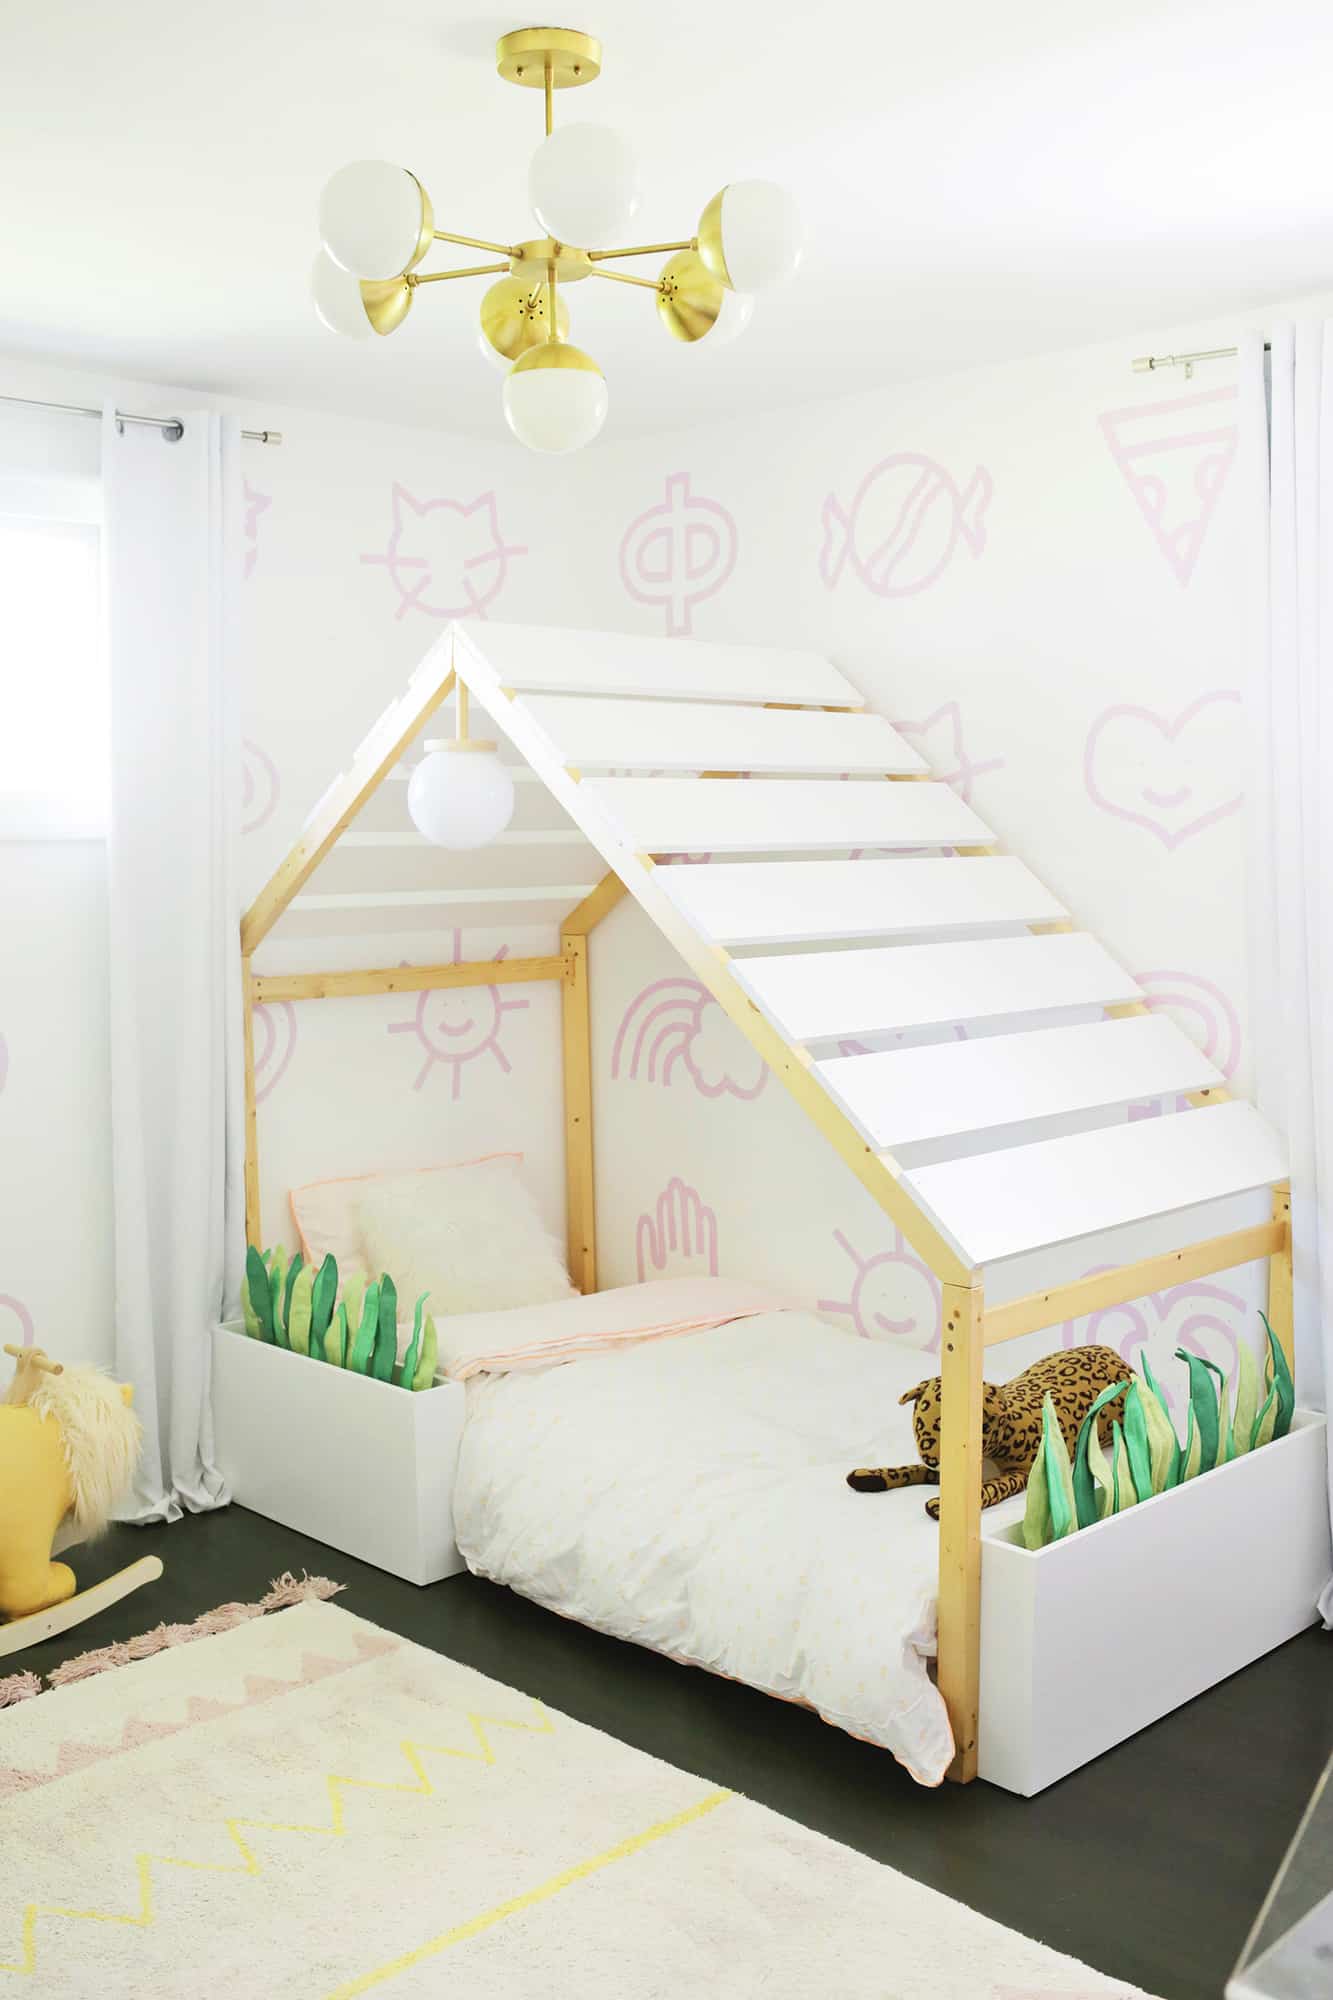
 Kids grow up so fast, you guys! Don’t get me started or I’ll just start crying … anyway, our little gal Lola was getting to the point where we were ready to move her out of her crib and into a big girl bed, so I had to sit down and think of what kind of bed we wanted to put her in. We ended up deciding on a twin-size mattress since it wouldn’t take up as much space in her smaller bedroom (but she can still fit in it for a long time to come) and then Todd and I were debating on whether or not to do a “regular” bed that sits up off the floor or a “floor” bed so she could get in and out easier. I love the look of those sweet house beds that I see on Pinterest, but I wanted something with a little more personality. So I decided to buy just a house bed frame and add some fun details to it to make it a little more interactive and fit in with our home style. Here’s what I added to make a simple frame come to life!
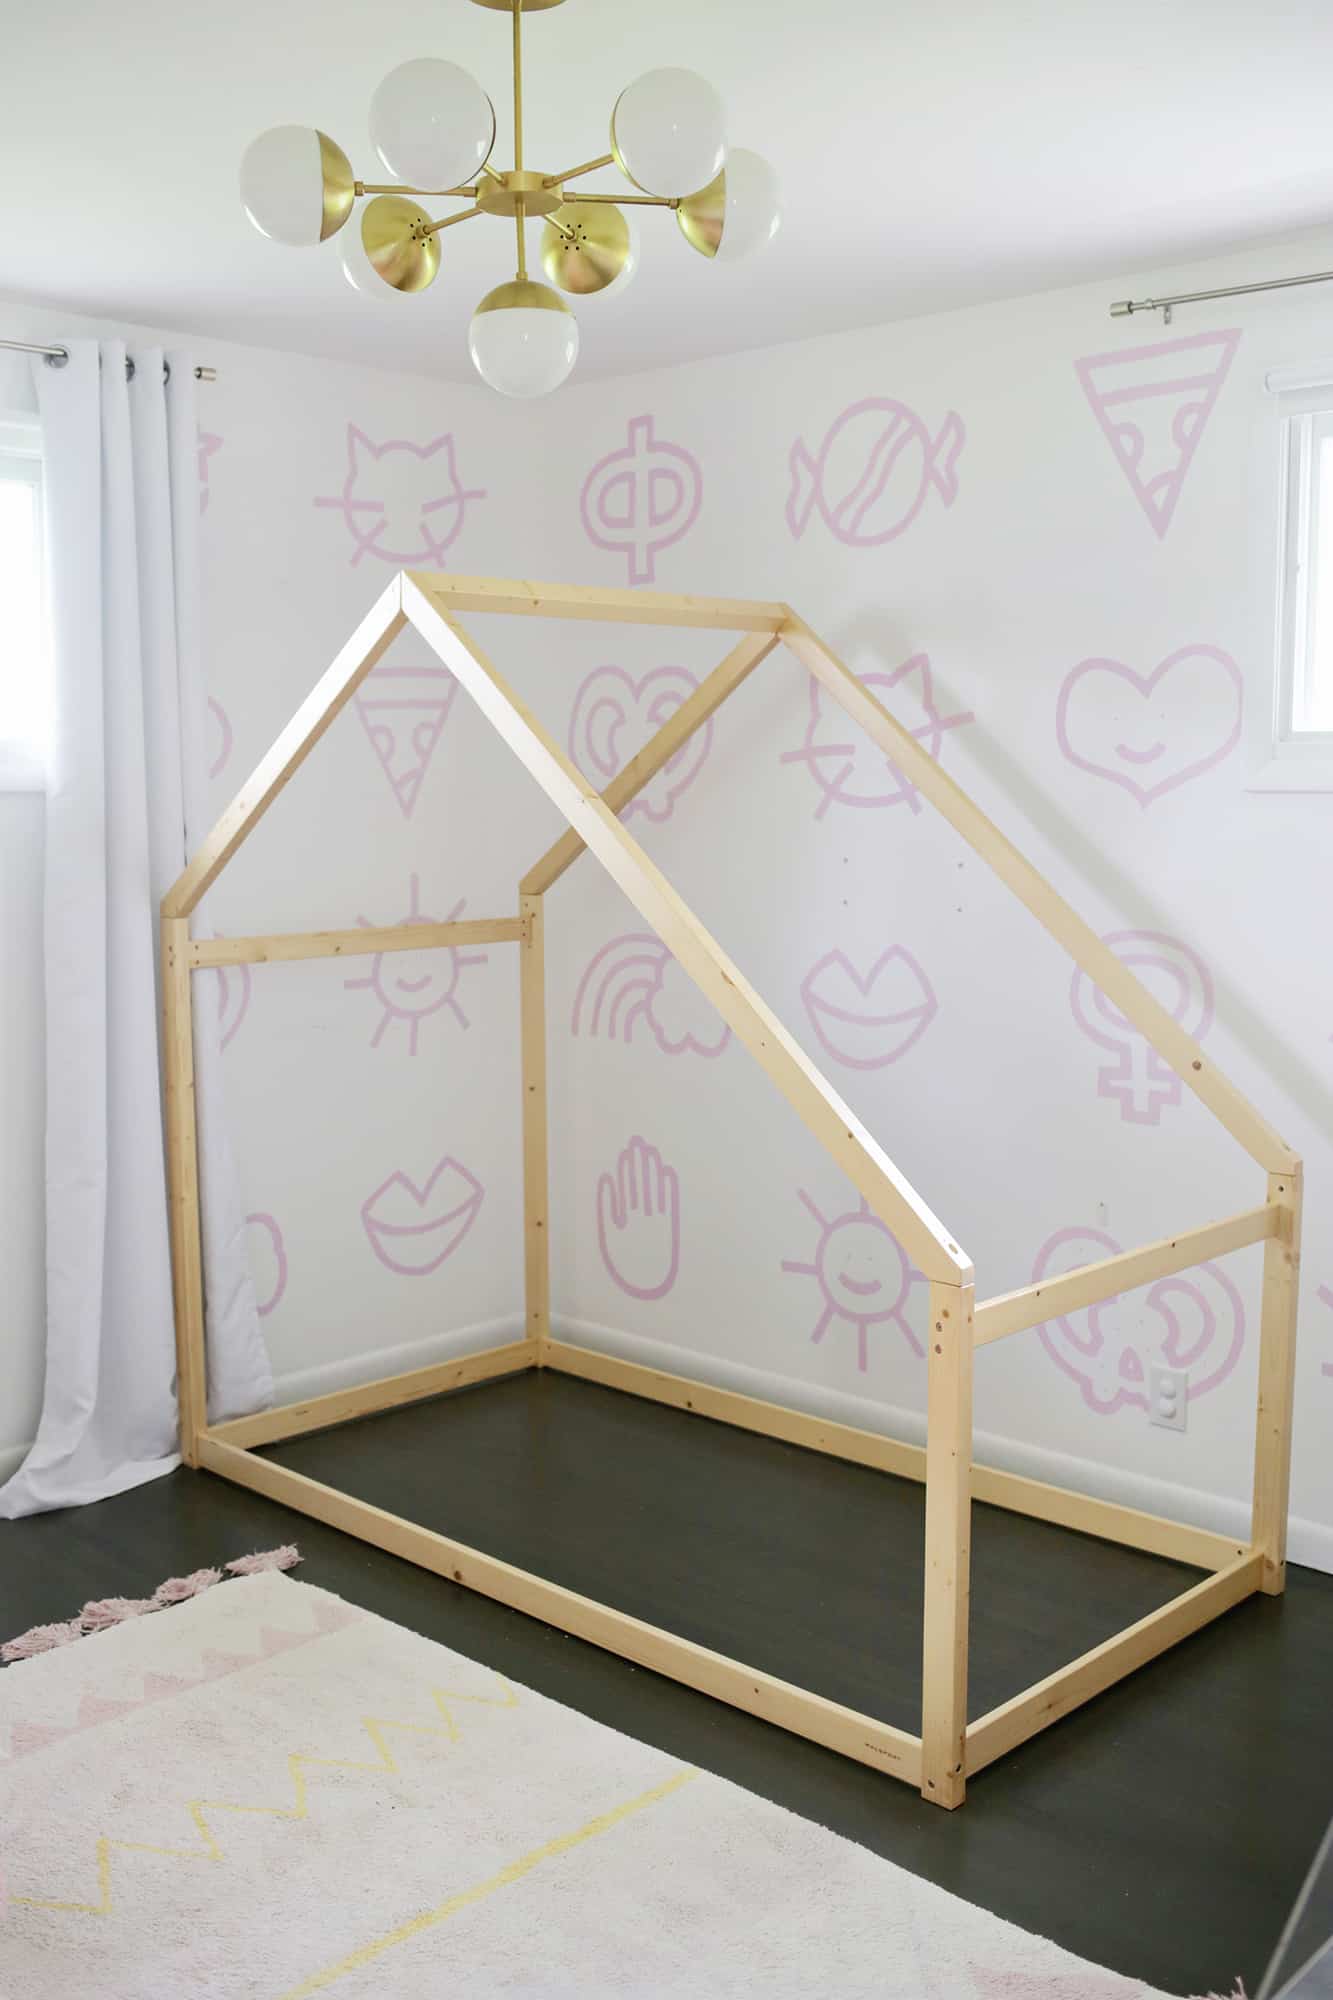
Here’s the house bed just by itself … cute but could use a little “something,” am I right??
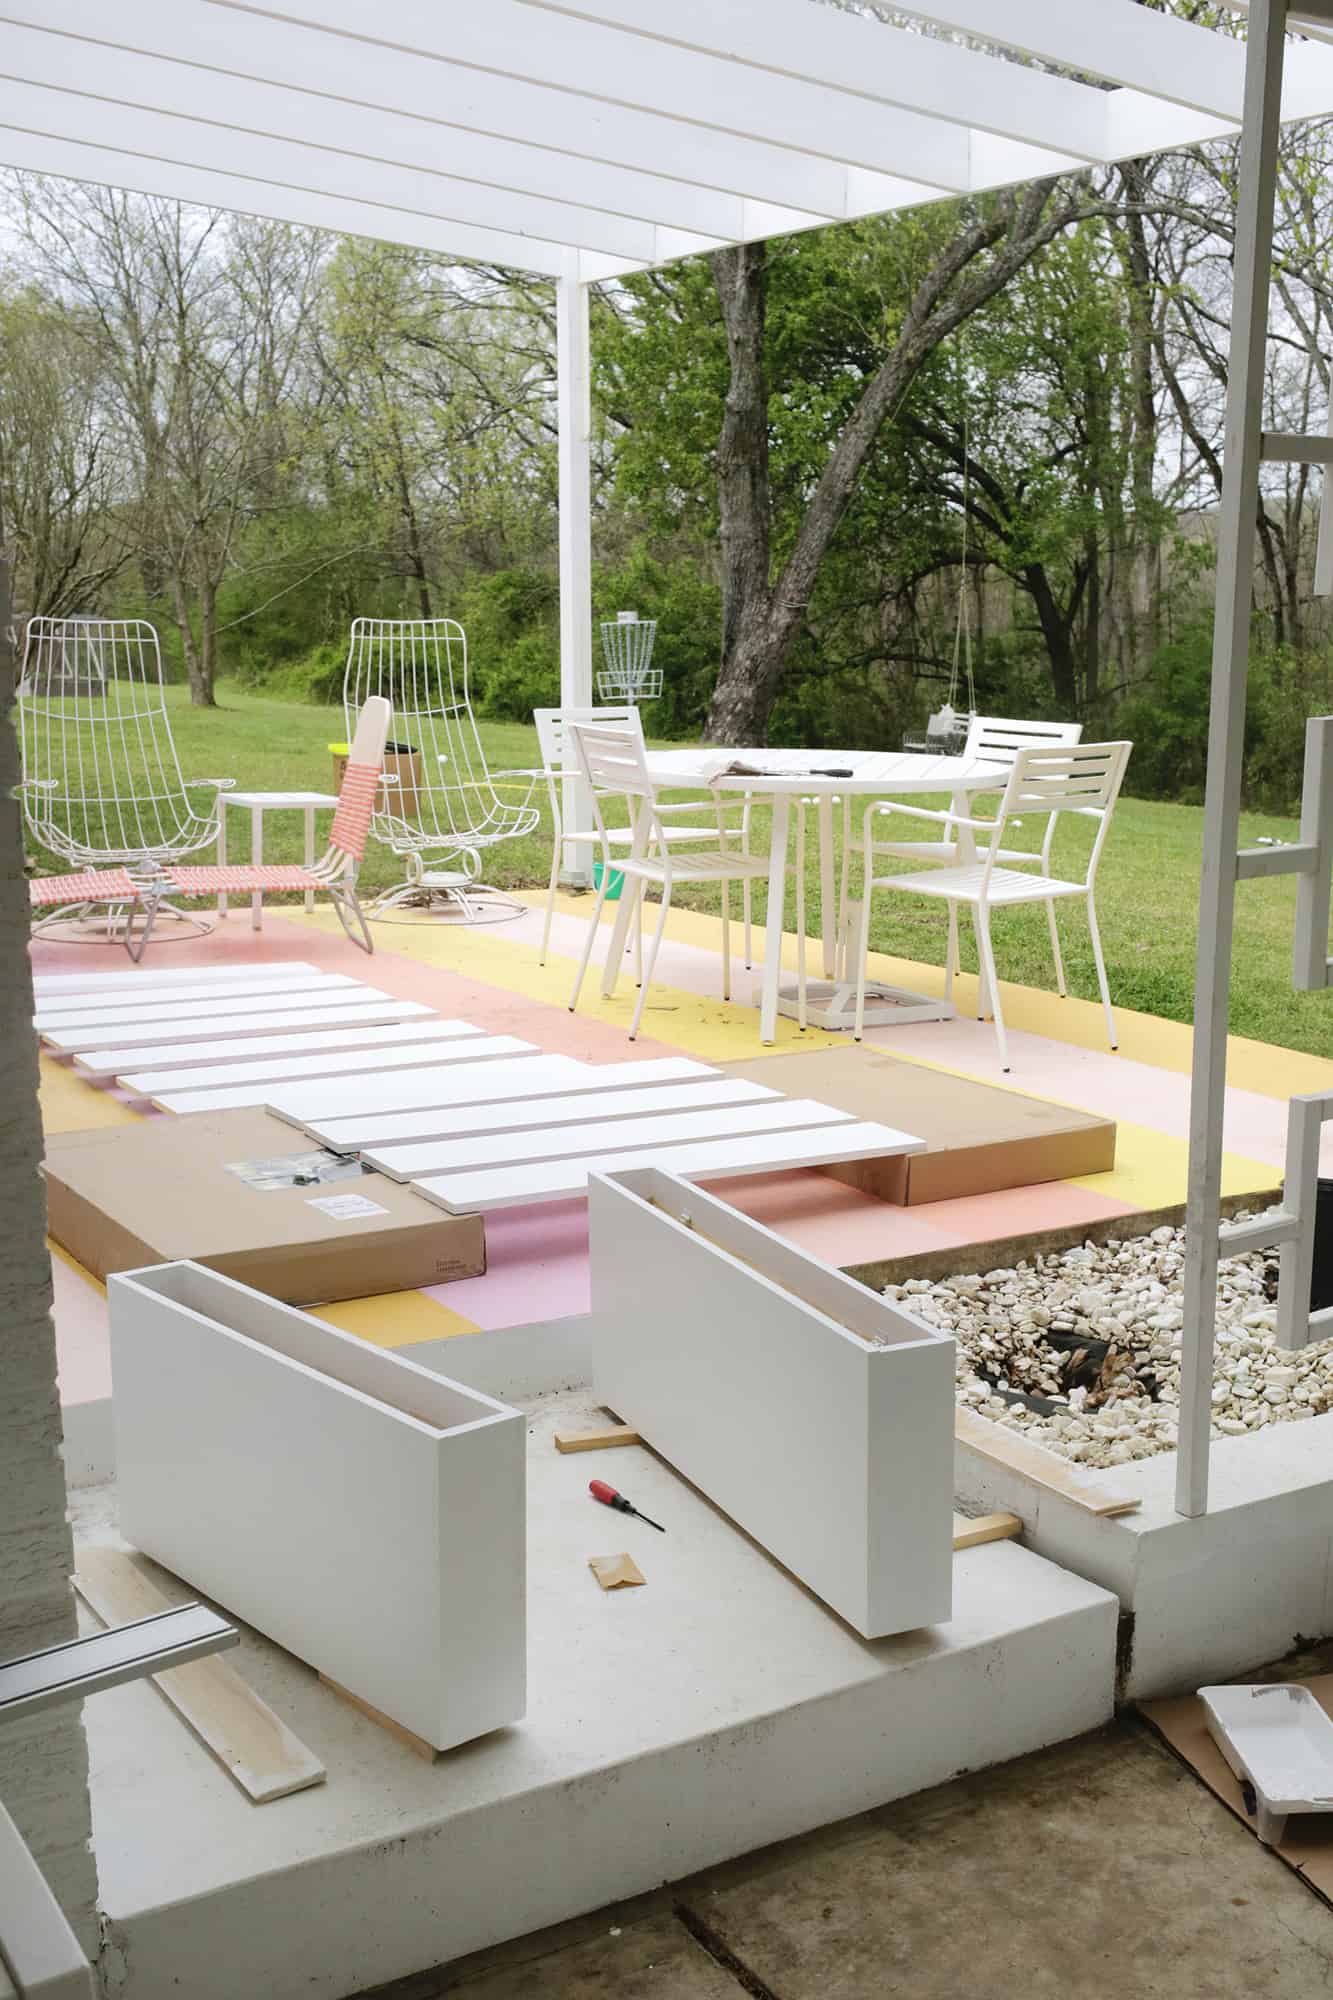
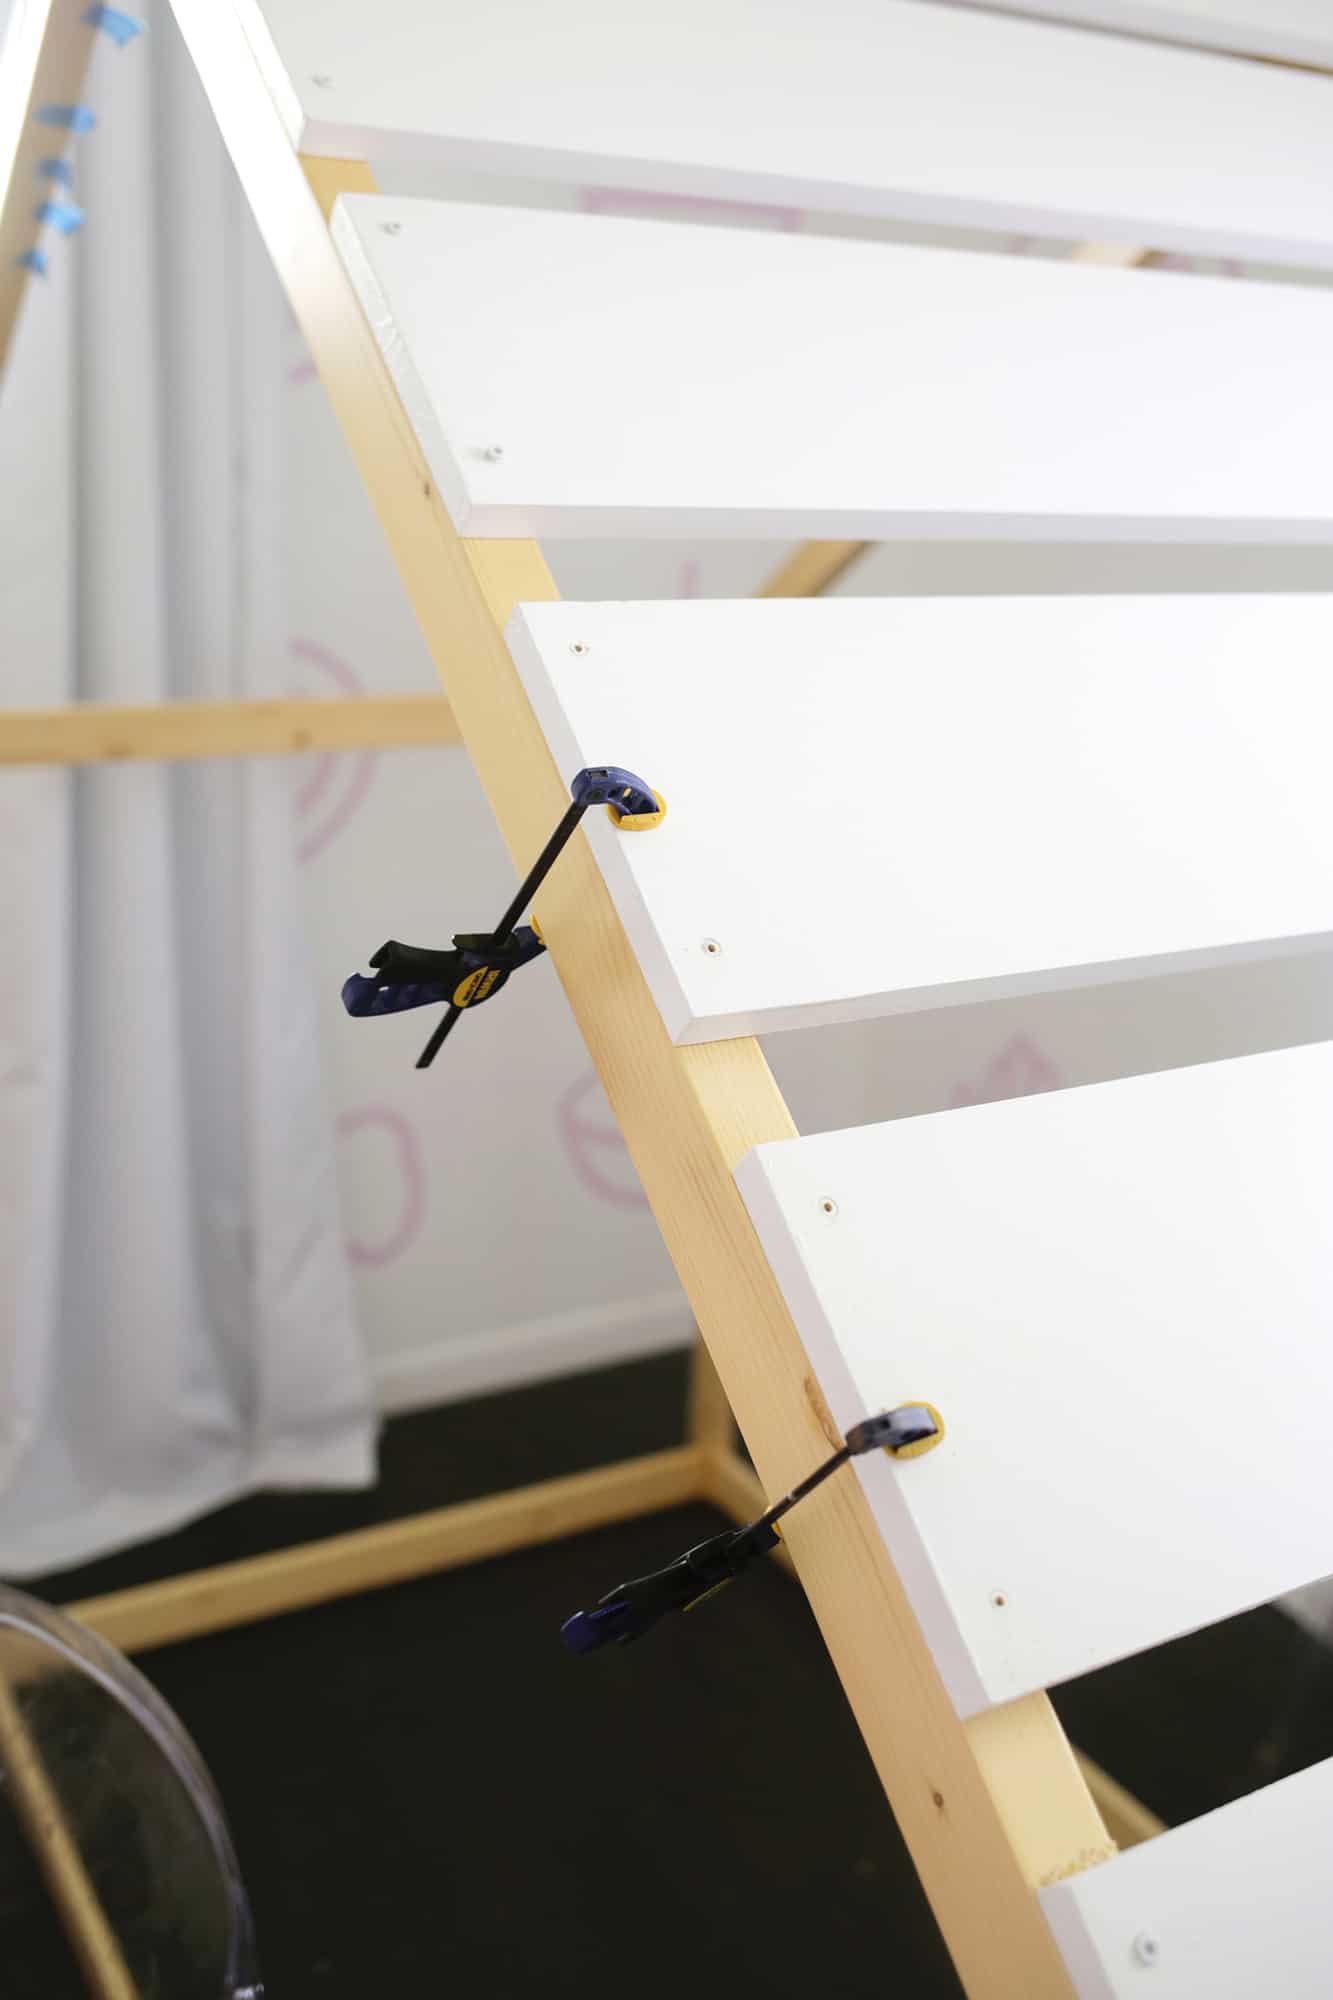
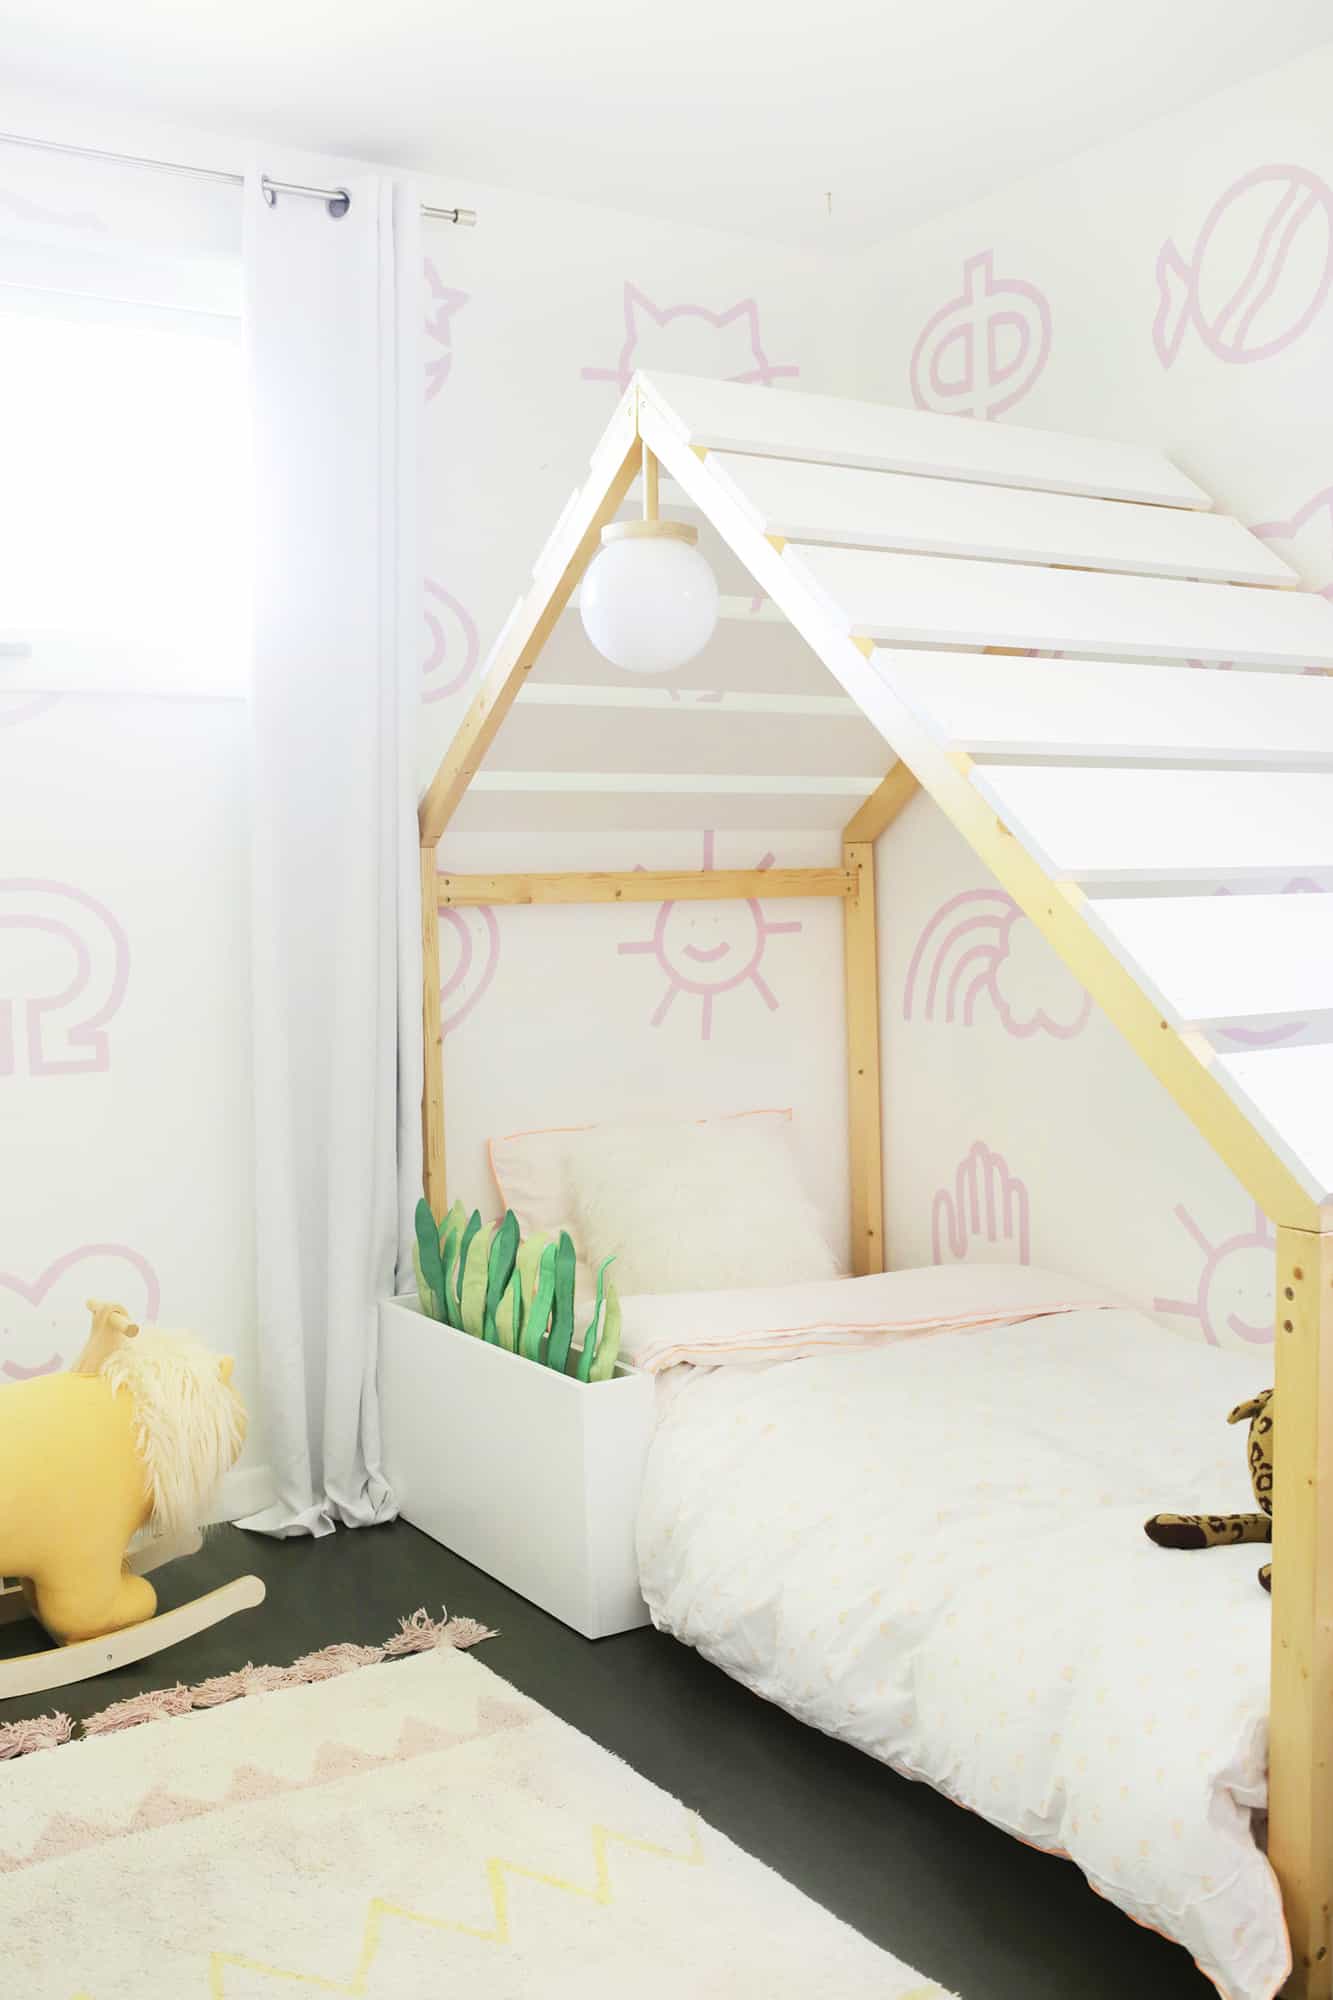
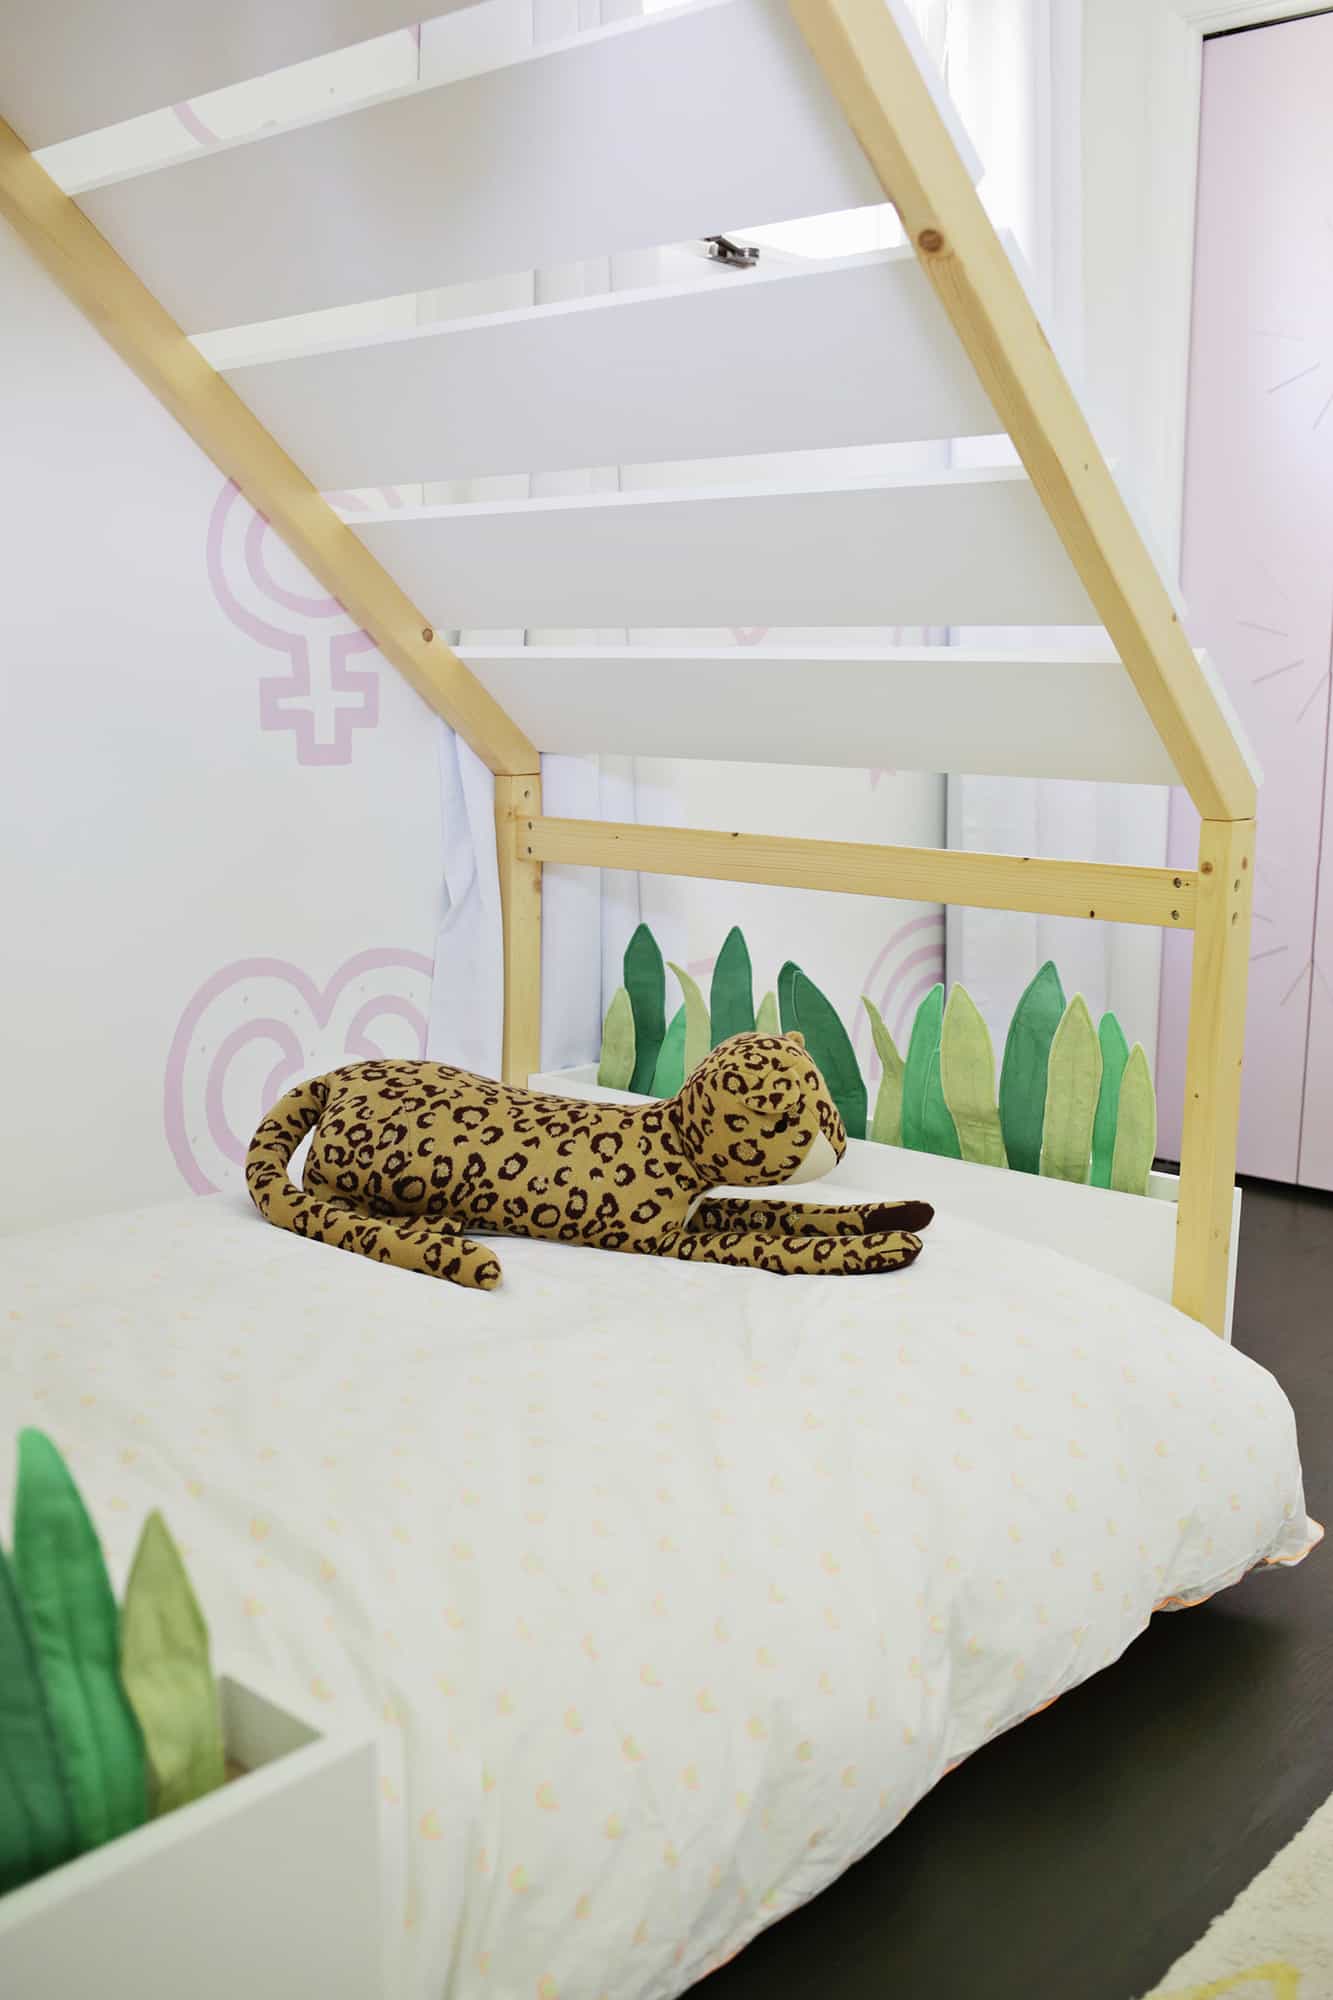
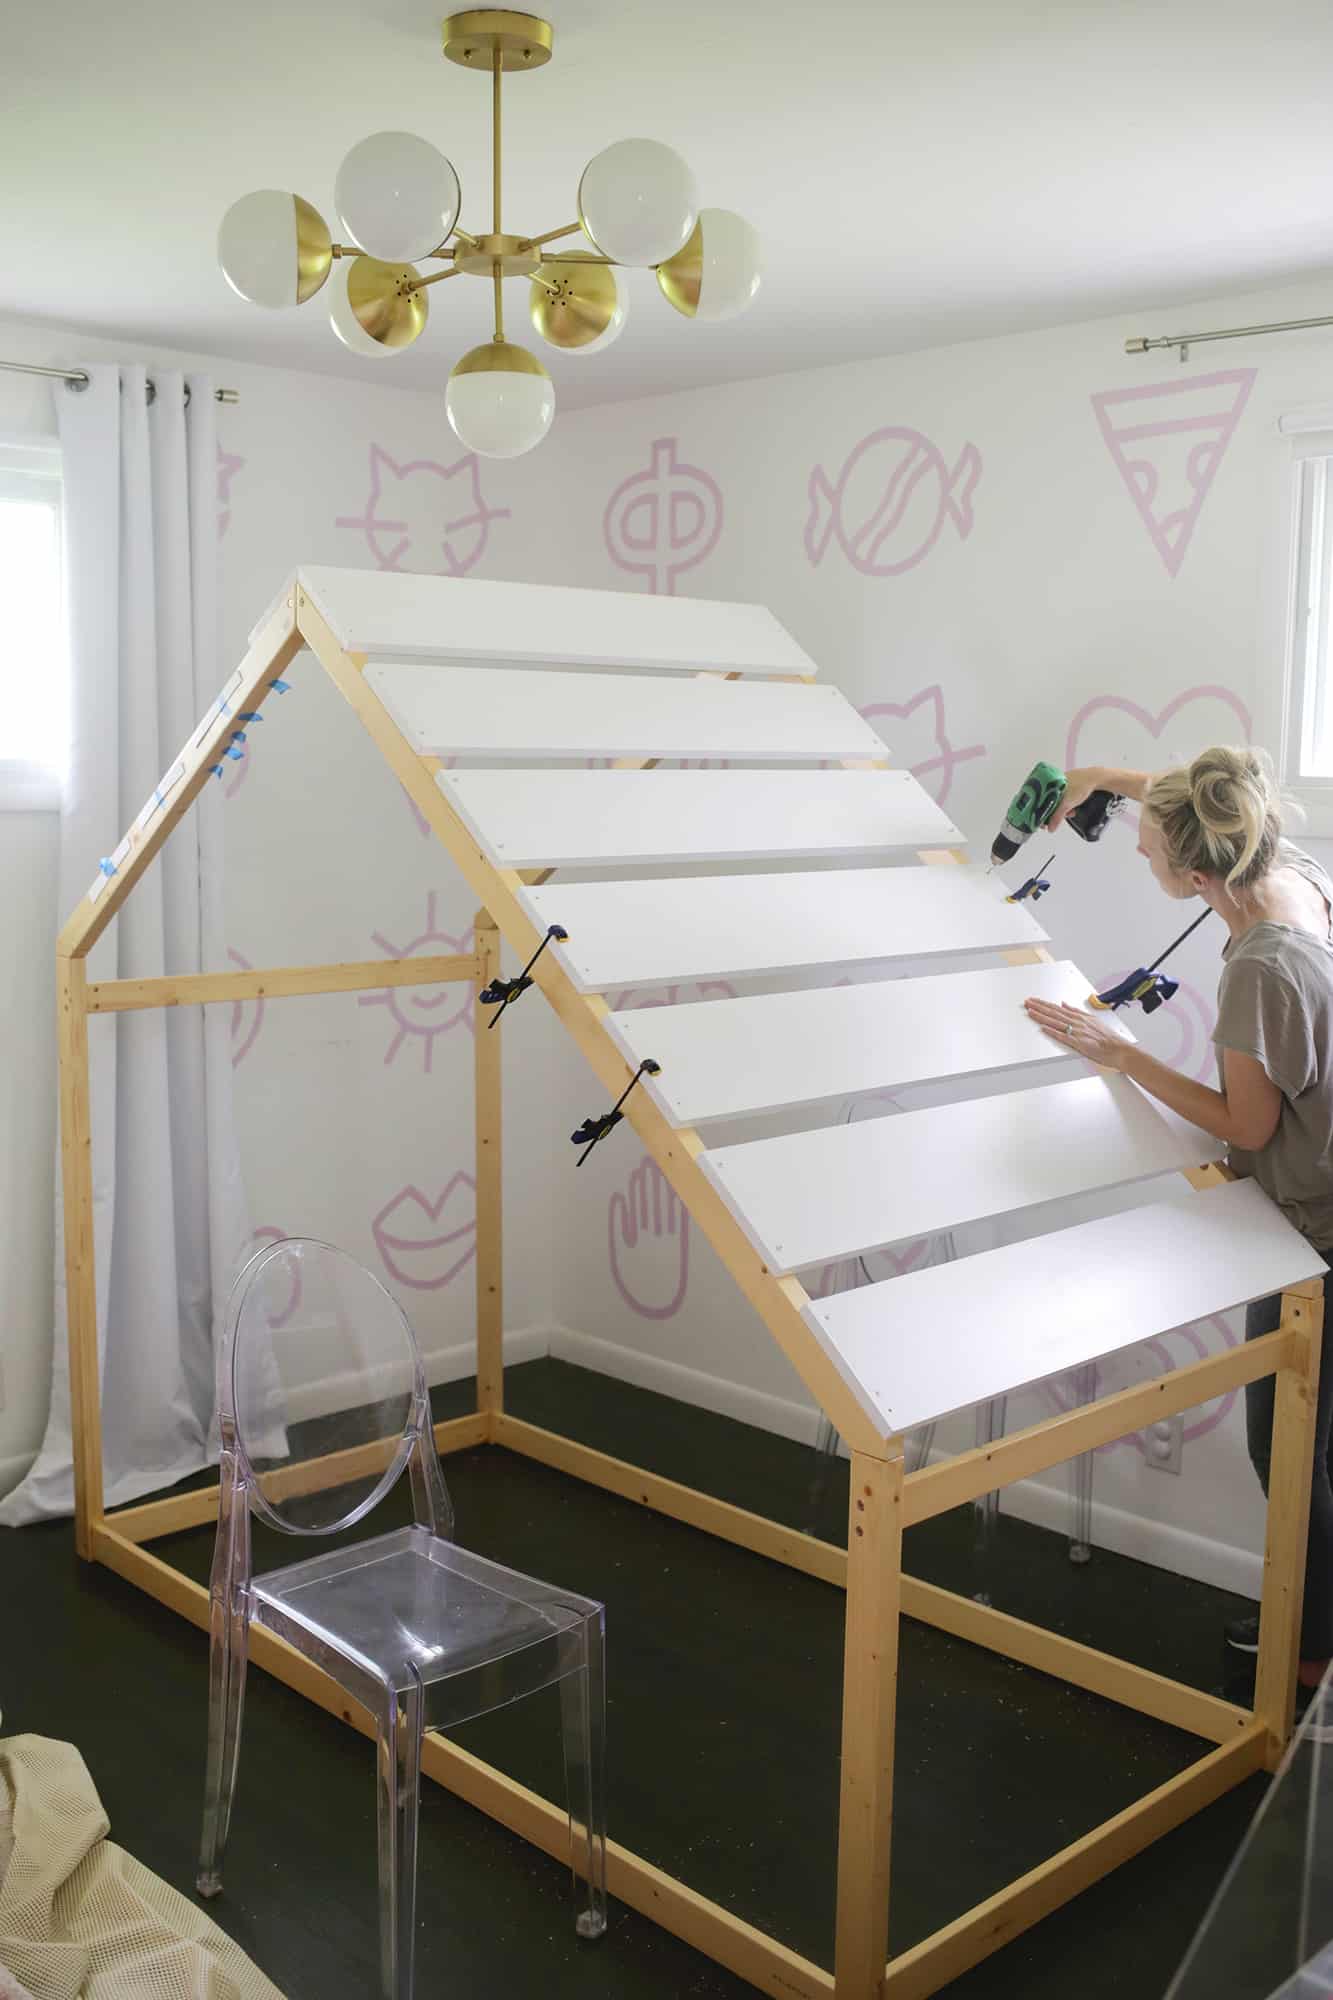 A roof: For this part, we bought 8″ wide boards, cut them the width of the house, painted them, and then spaced them about 2″ apart to create a roof! It was easiest to paint them before attaching them to the house (I like to use this paint for kid projects as it’s extra safe) and then we clamped them in place on the roof, predrilled our two holes about 1″ away from the top and bottom of the board edges and then used white screws to attach the boards on each side. The boards that meet in the middle had to be cut lengthwise at an angle with a circular saw to meet nice and pretty (the roofline is almost an 80° angle, so we cut each board at almost a 40° to fit).
If you didn’t want to take the time to do that, you can also not have them meet in the middle (and plan one of your roof gaps over that spot) or just have them touch as-is instead of cutting the angle. Since the bed we bought has an asymmetrical frame, it wasn’t the same length on both sides, so I cut a board a little thinner at the end near the wall so it wouldn’t be as noticeable.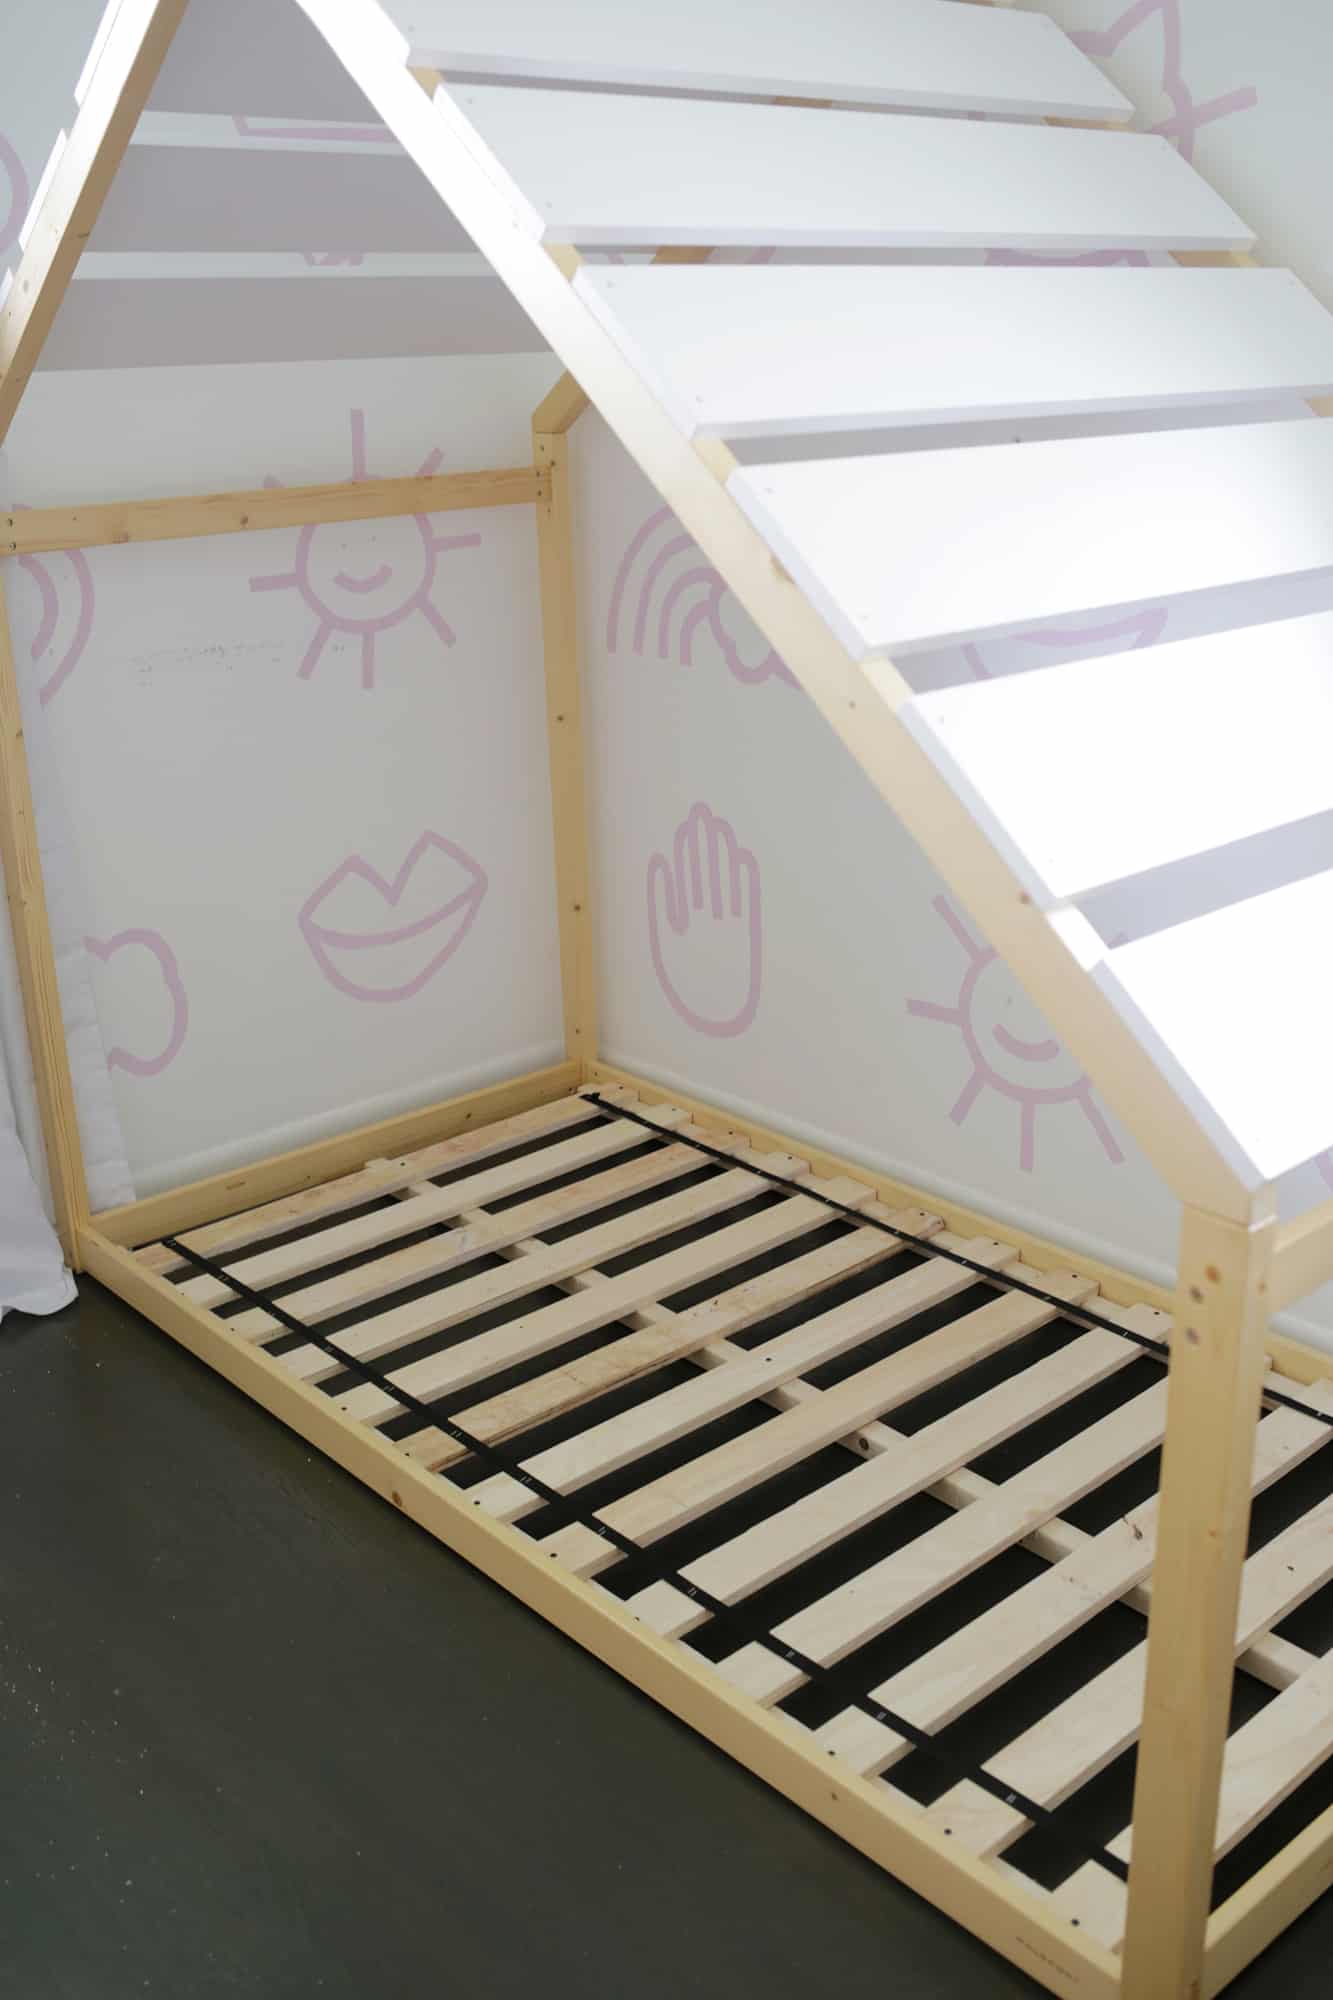
Also, as a side note, you can put your mattress right on the floor like a lot of these are designed for, but since we have a more humid climate in Tennessee I wanted to lift the bed off the floor a tiny bit so that air could circulate under the mattress and we wouldn’t have to worry about any moisture getting trapped between the mattress and the floor. I just bought a twin-size roll slat and set it on top of 3 2″x2″ boards that I cut to fit inside the length of the bed. I placed one board all the way on the right side, one all the way on the left side, and one down the middle and screwed the roll slat onto the boards with wood screws. If you ever need to take it out of the bed, it just all lifts out as one piece so it’s easy to remove.
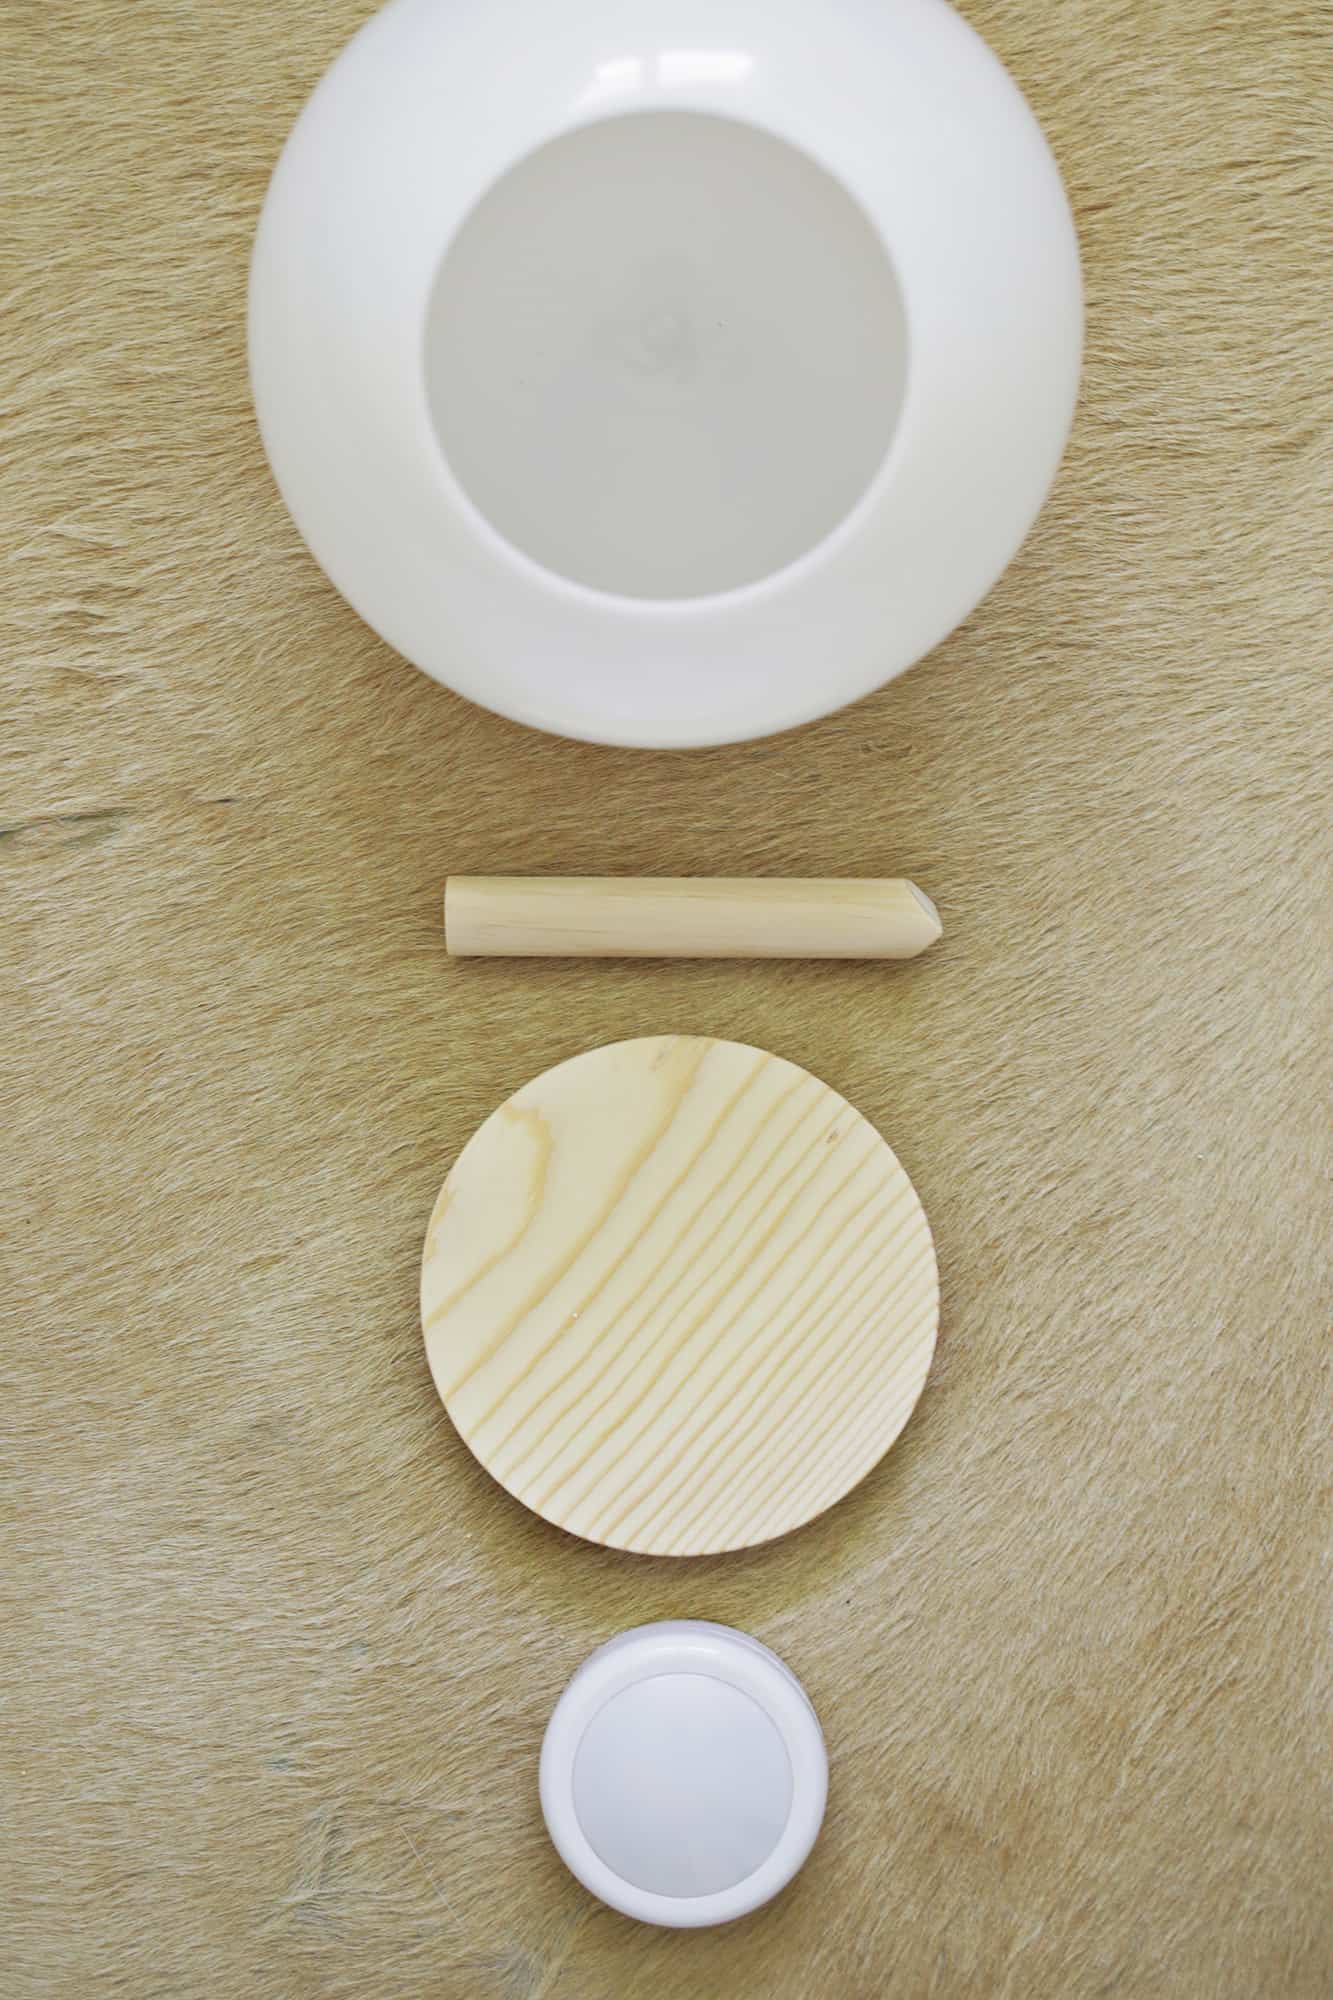
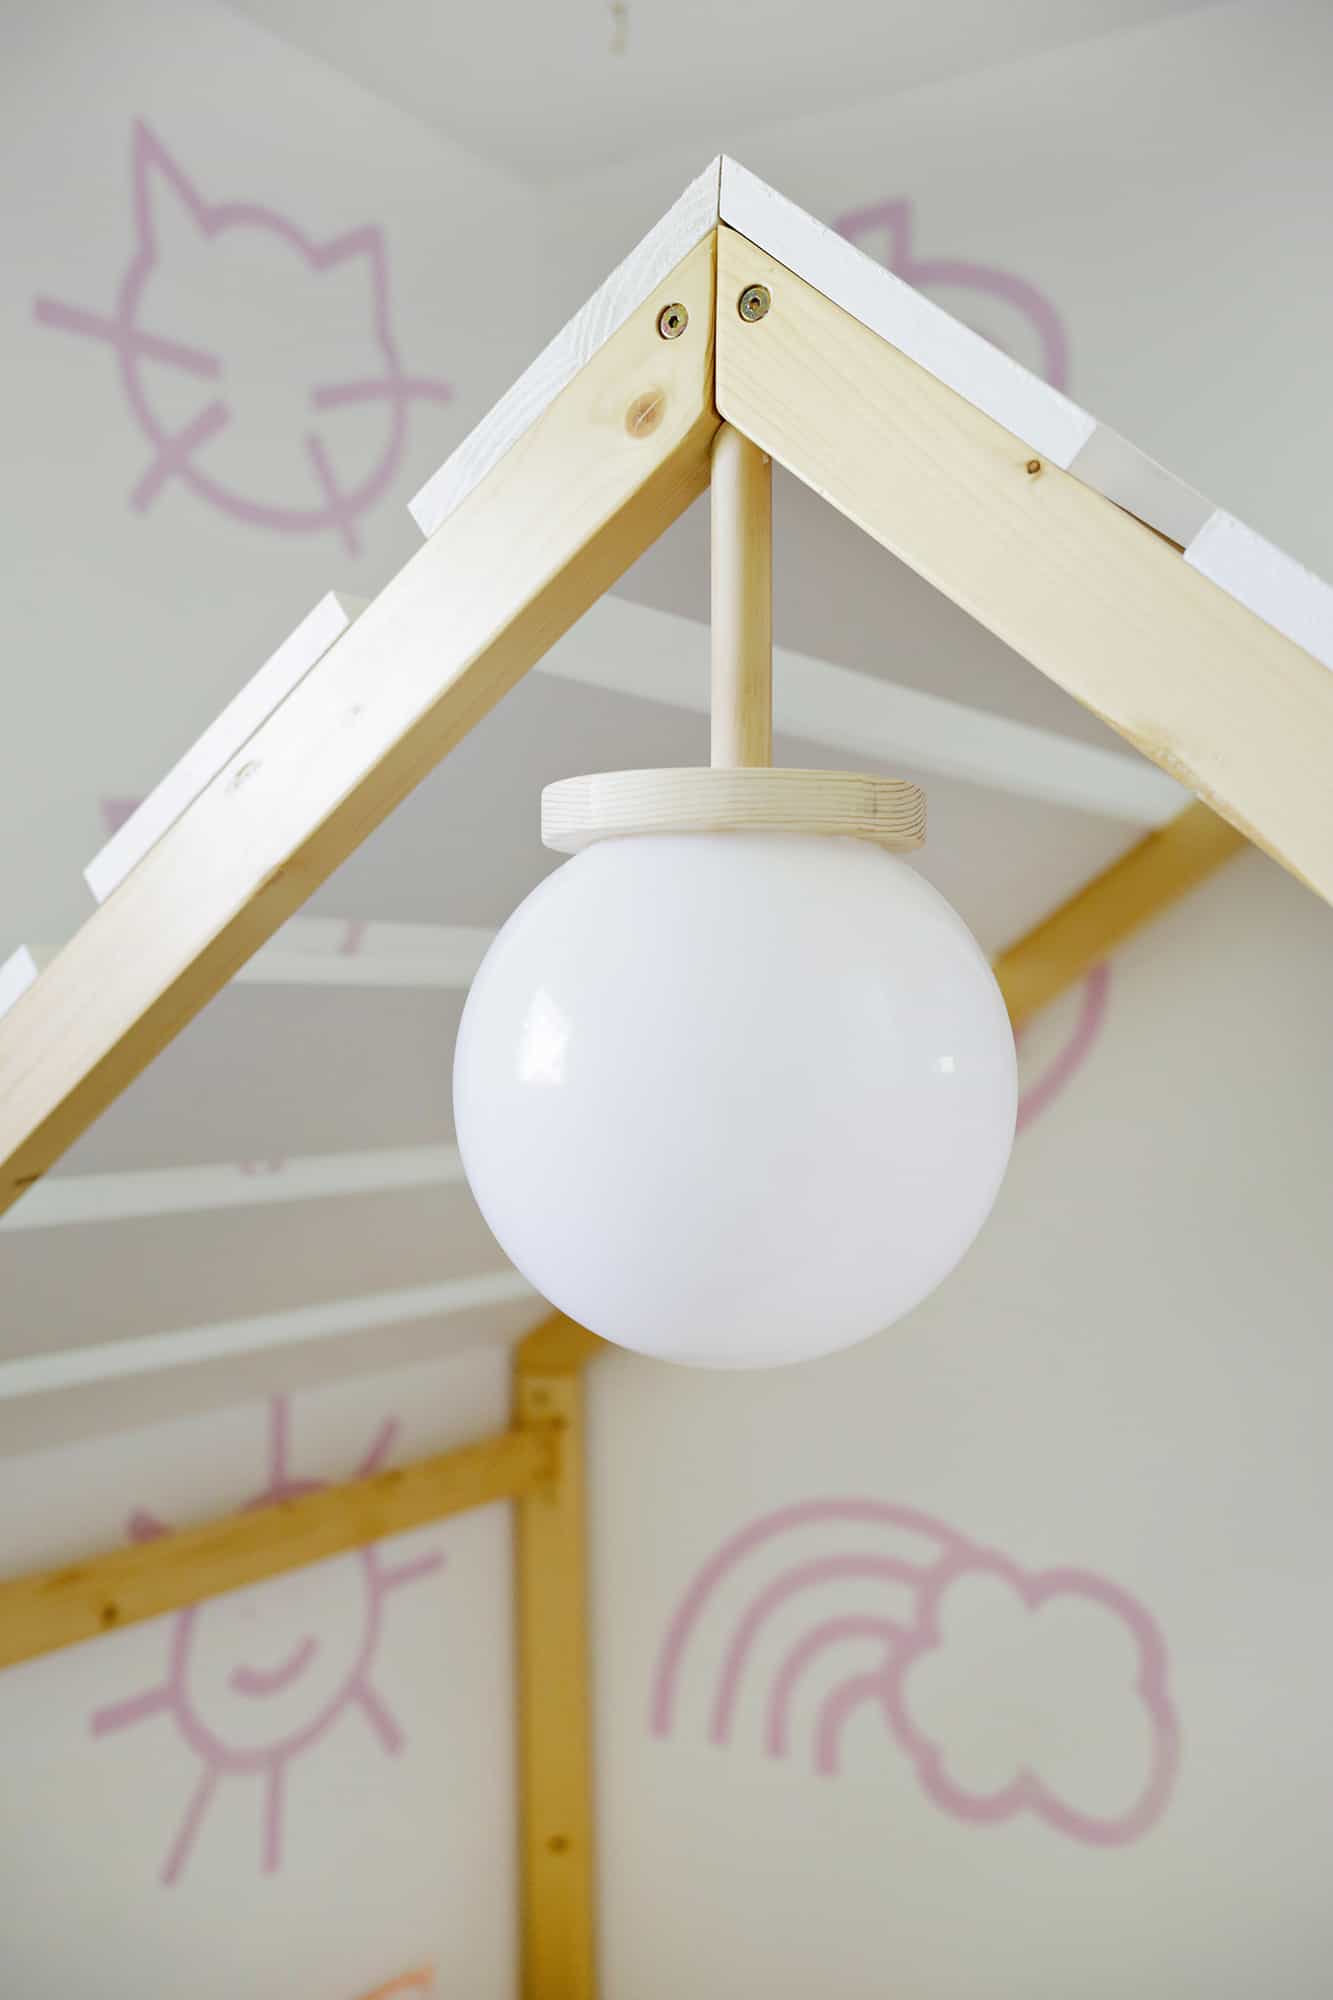
 A working light fixture: This part is so fun! I couldn’t imagine a mid-century house bed without a globe light, so I was determined to figure out a way to make a working one for the bed. I got a 1″ thick dowel rod and cut it to 5 1/4″ long and cut two 40° angles into one end so it would fit into the “V” of the roof arch. I then pre-drilled a hole into the flat end of the dowel and also through this 5.5″ round wood disc so I could use a wood screw to attach them together. I used some epoxy glue to glue the two pieces into the “V” of the roof (and had some large clamps keep it there while the glue dried).
Once the glue was dry, I could stick on my mini puck light onto the center underside of the wooden disc and then I used more epoxy to add an 8″ plastic globe onto the disc (I taped the globe to the disc with painter’s tape to keep it in place while the glue dried). I got these lights because they come with a little remote so you can turn the light off and on and even change the color and light pattern too—Lola thinks it’s the best thing ever to use the remote to change the colors herself, it’s so fun!!
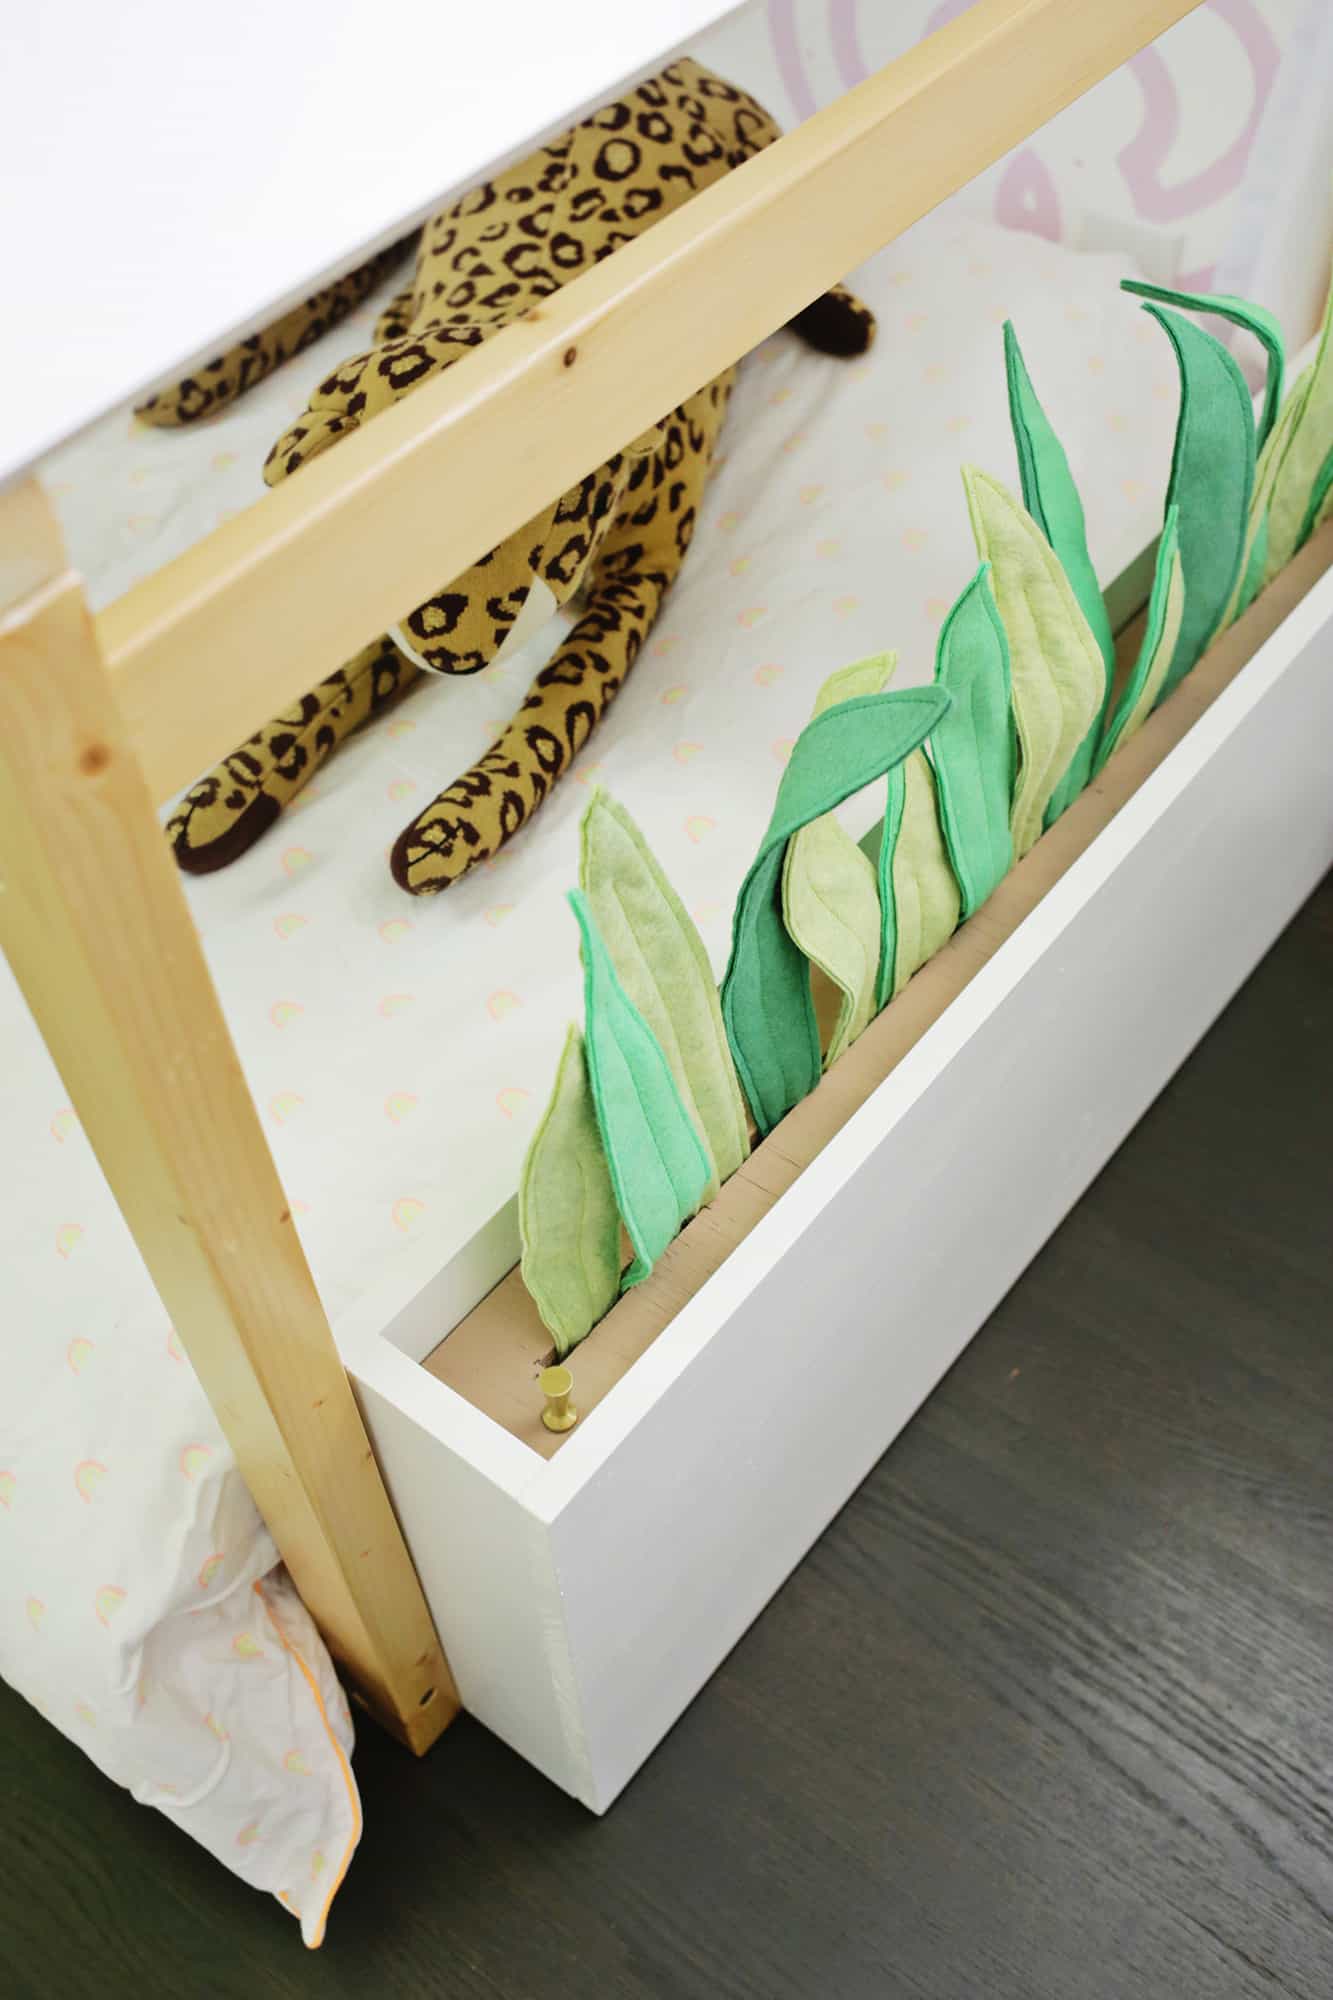
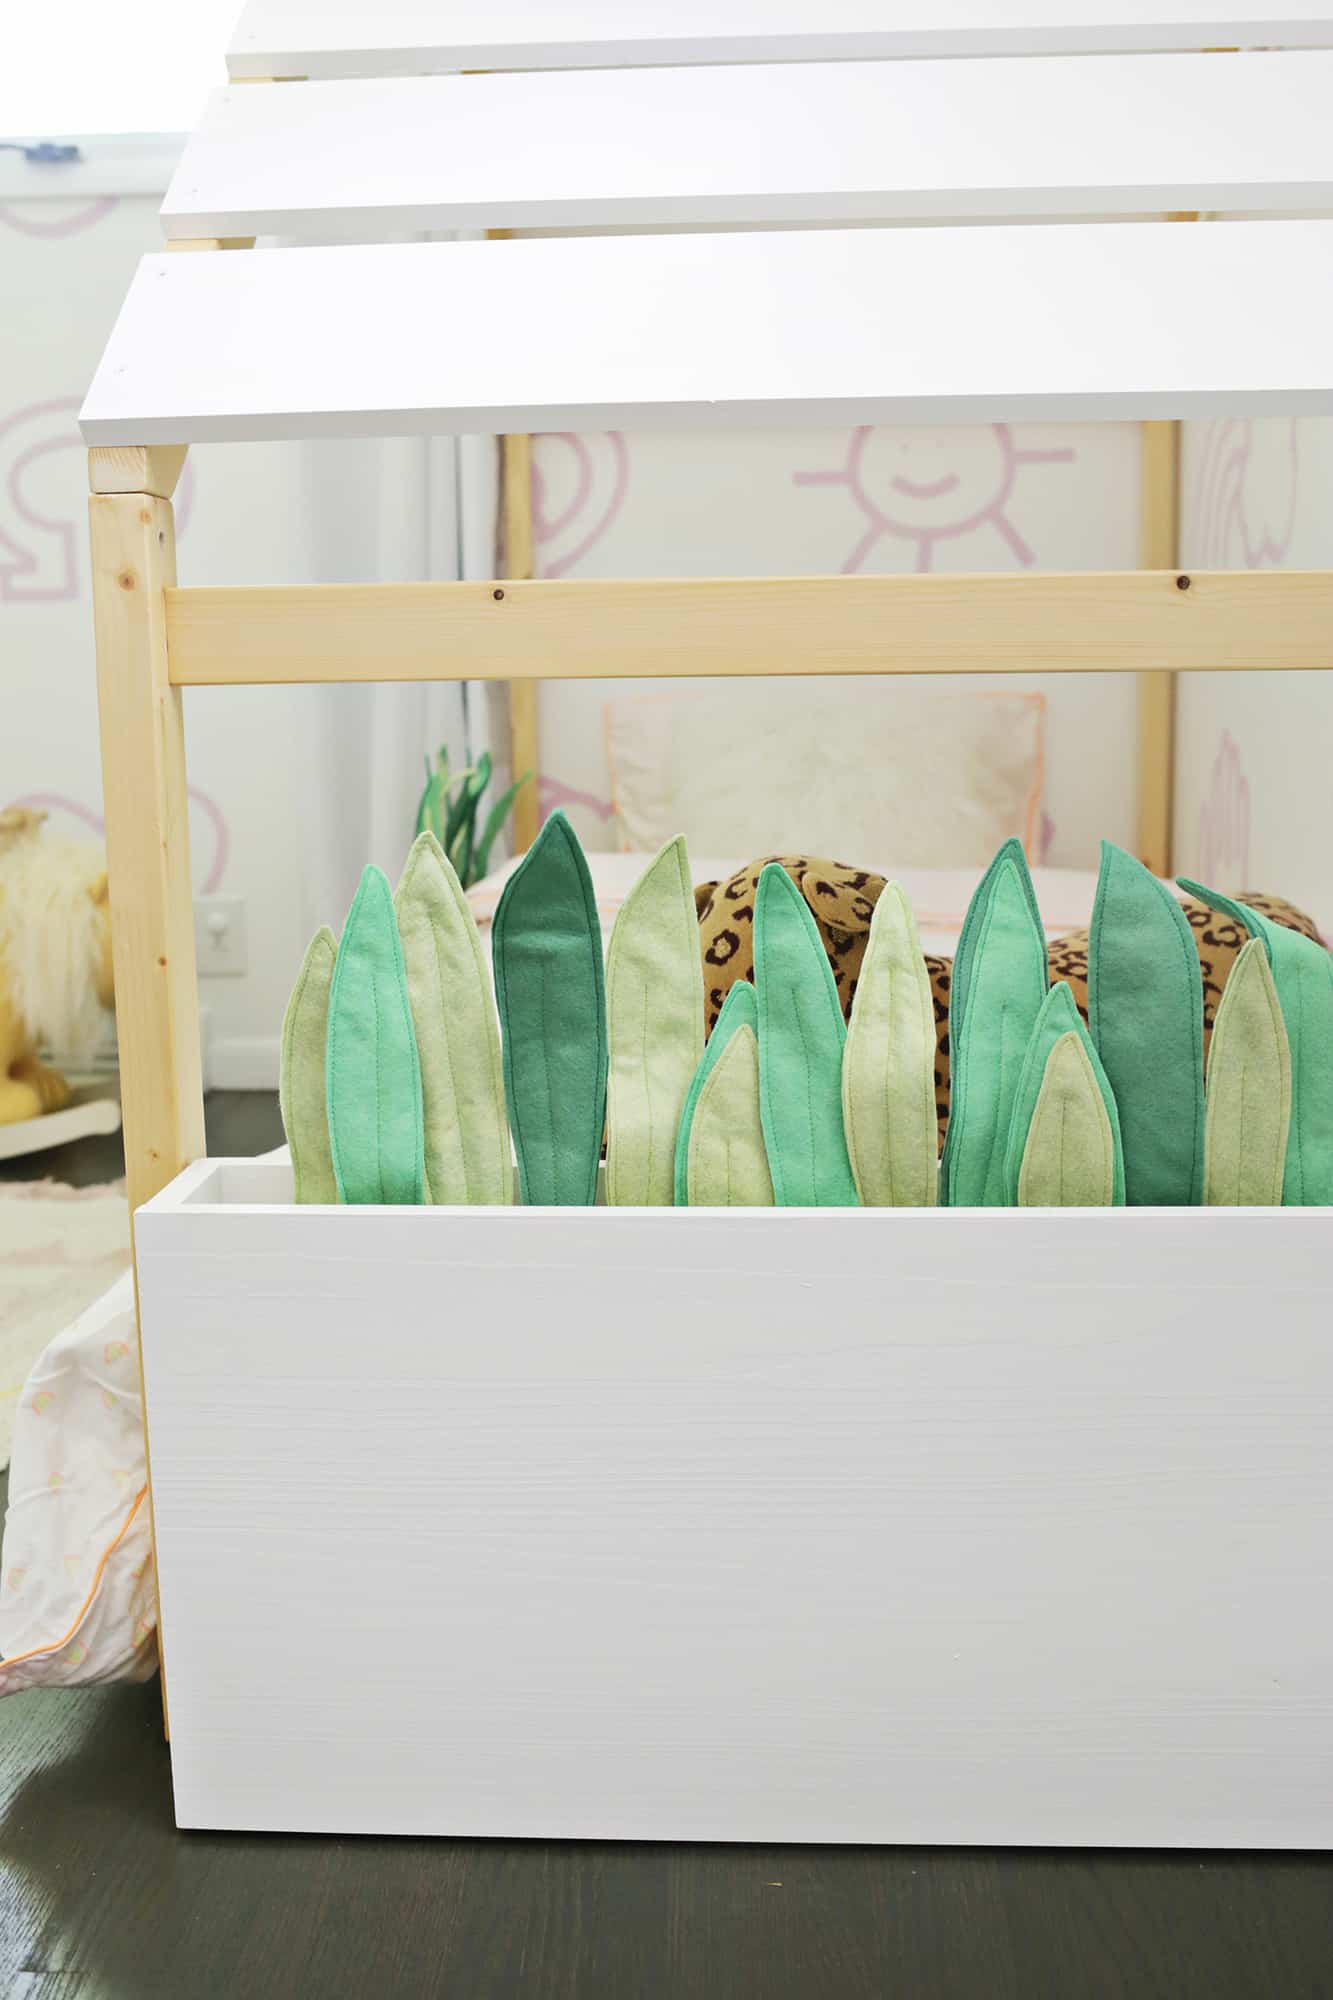
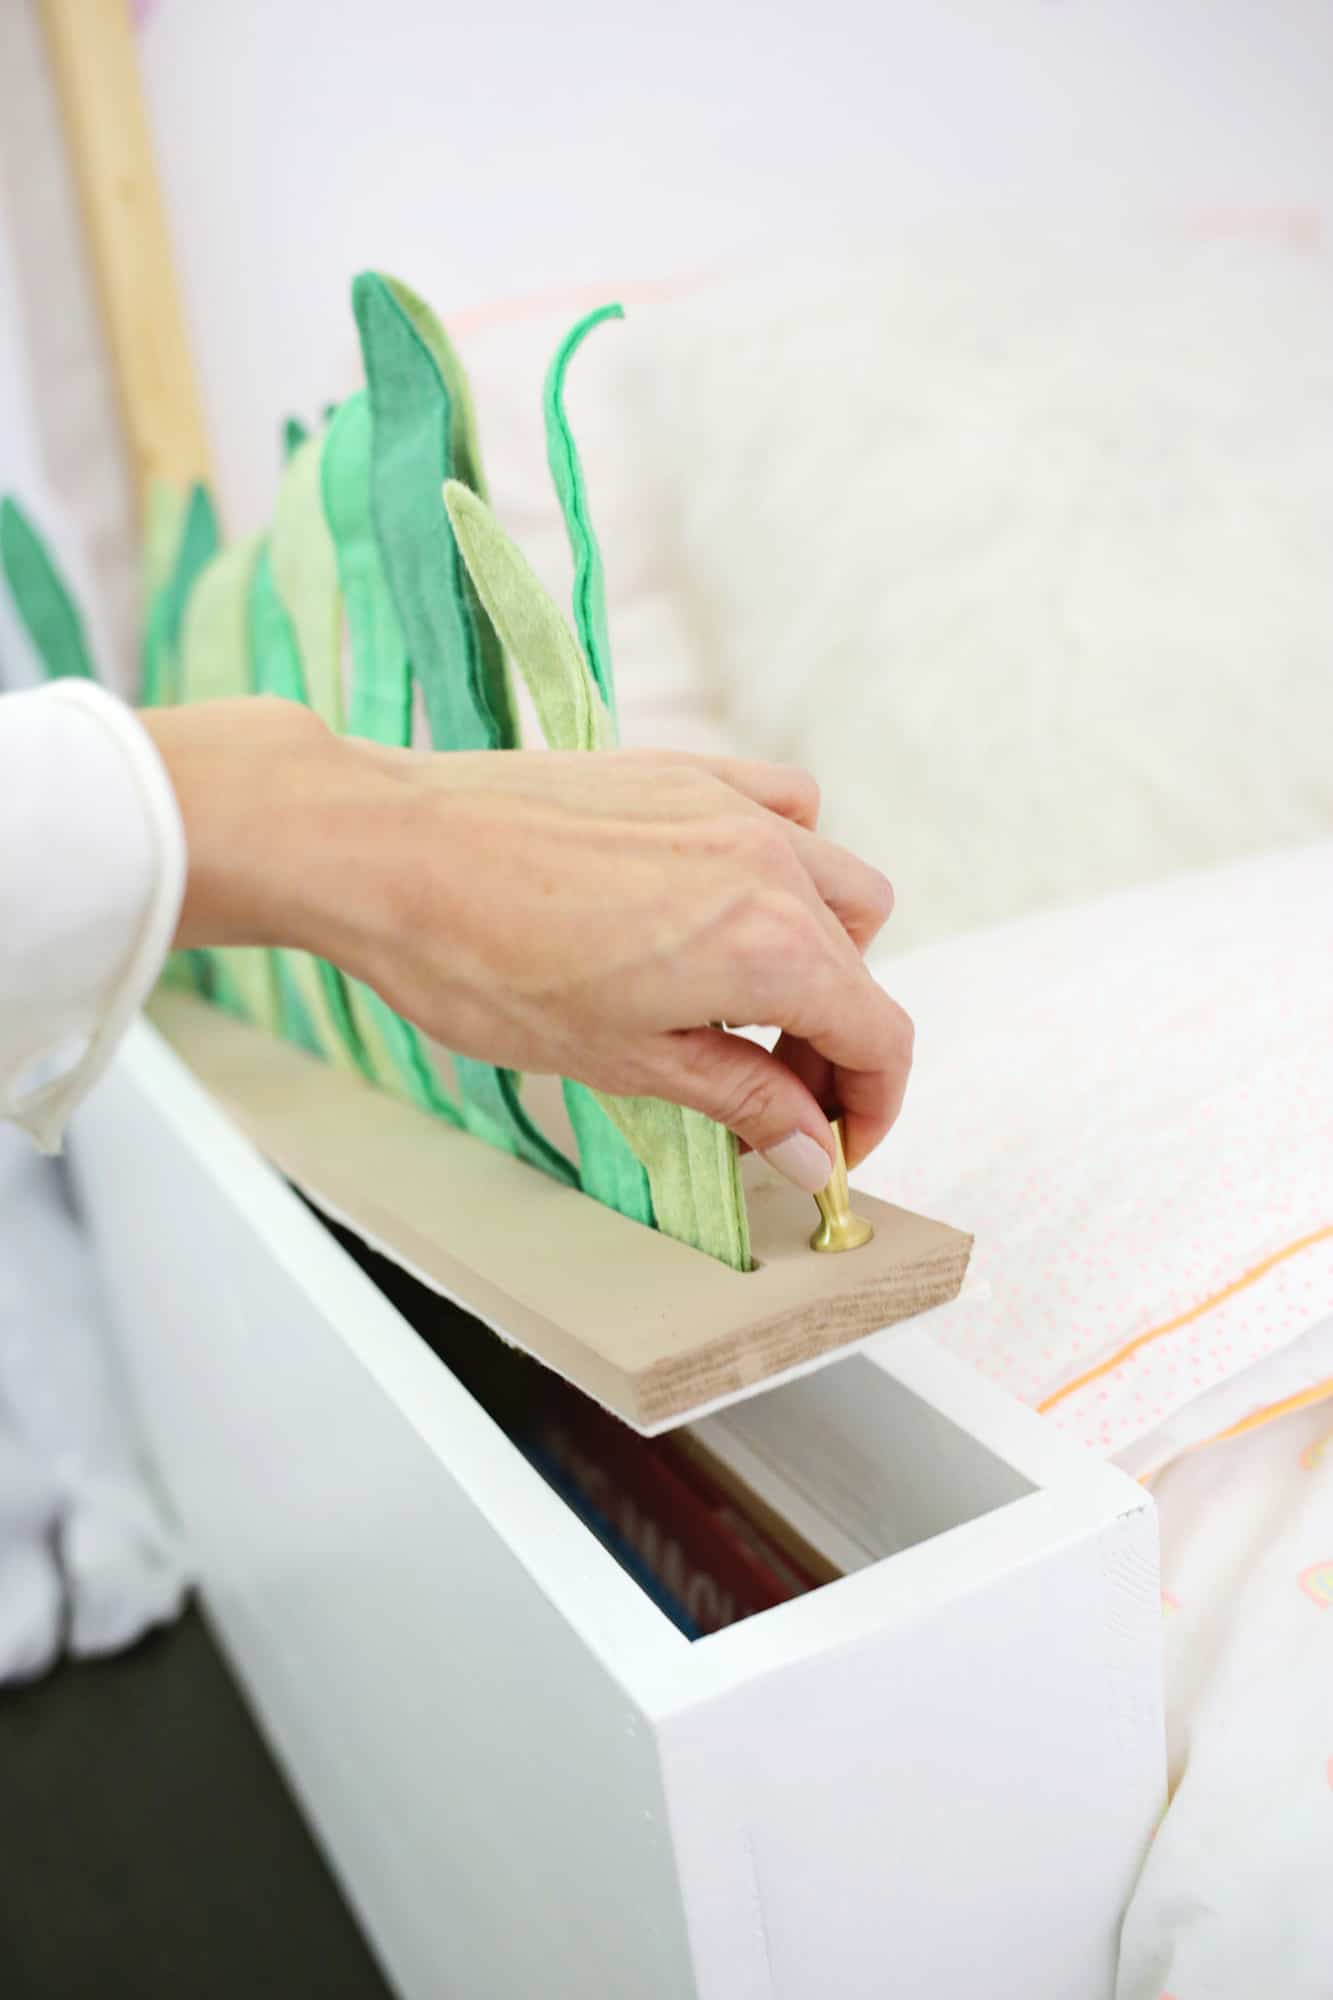 Felt planter beds (they are hidden storage too!): One of my favorite parts about designing this bed was thinking of how I could have some planter beds as a fun decoration that would also serve as a small guardrail for Lola. She doesn’t really need a guardrail with her bed being so close to the ground, but she was waking us up several times a night before I added it, complaining that her “babies” kept falling off the big girl bed and it was making her upset. Once we added the planter boxes and felt sansevieria plants, there were no more babies on the floor and the problem was solved! You can see how I made the planters and the plants in this post, but I also love that they double as toy/book storage as well since the tops come off. I’m all about hidden storage, so it’s an idea that I was pretty proud of when it popped into my head.


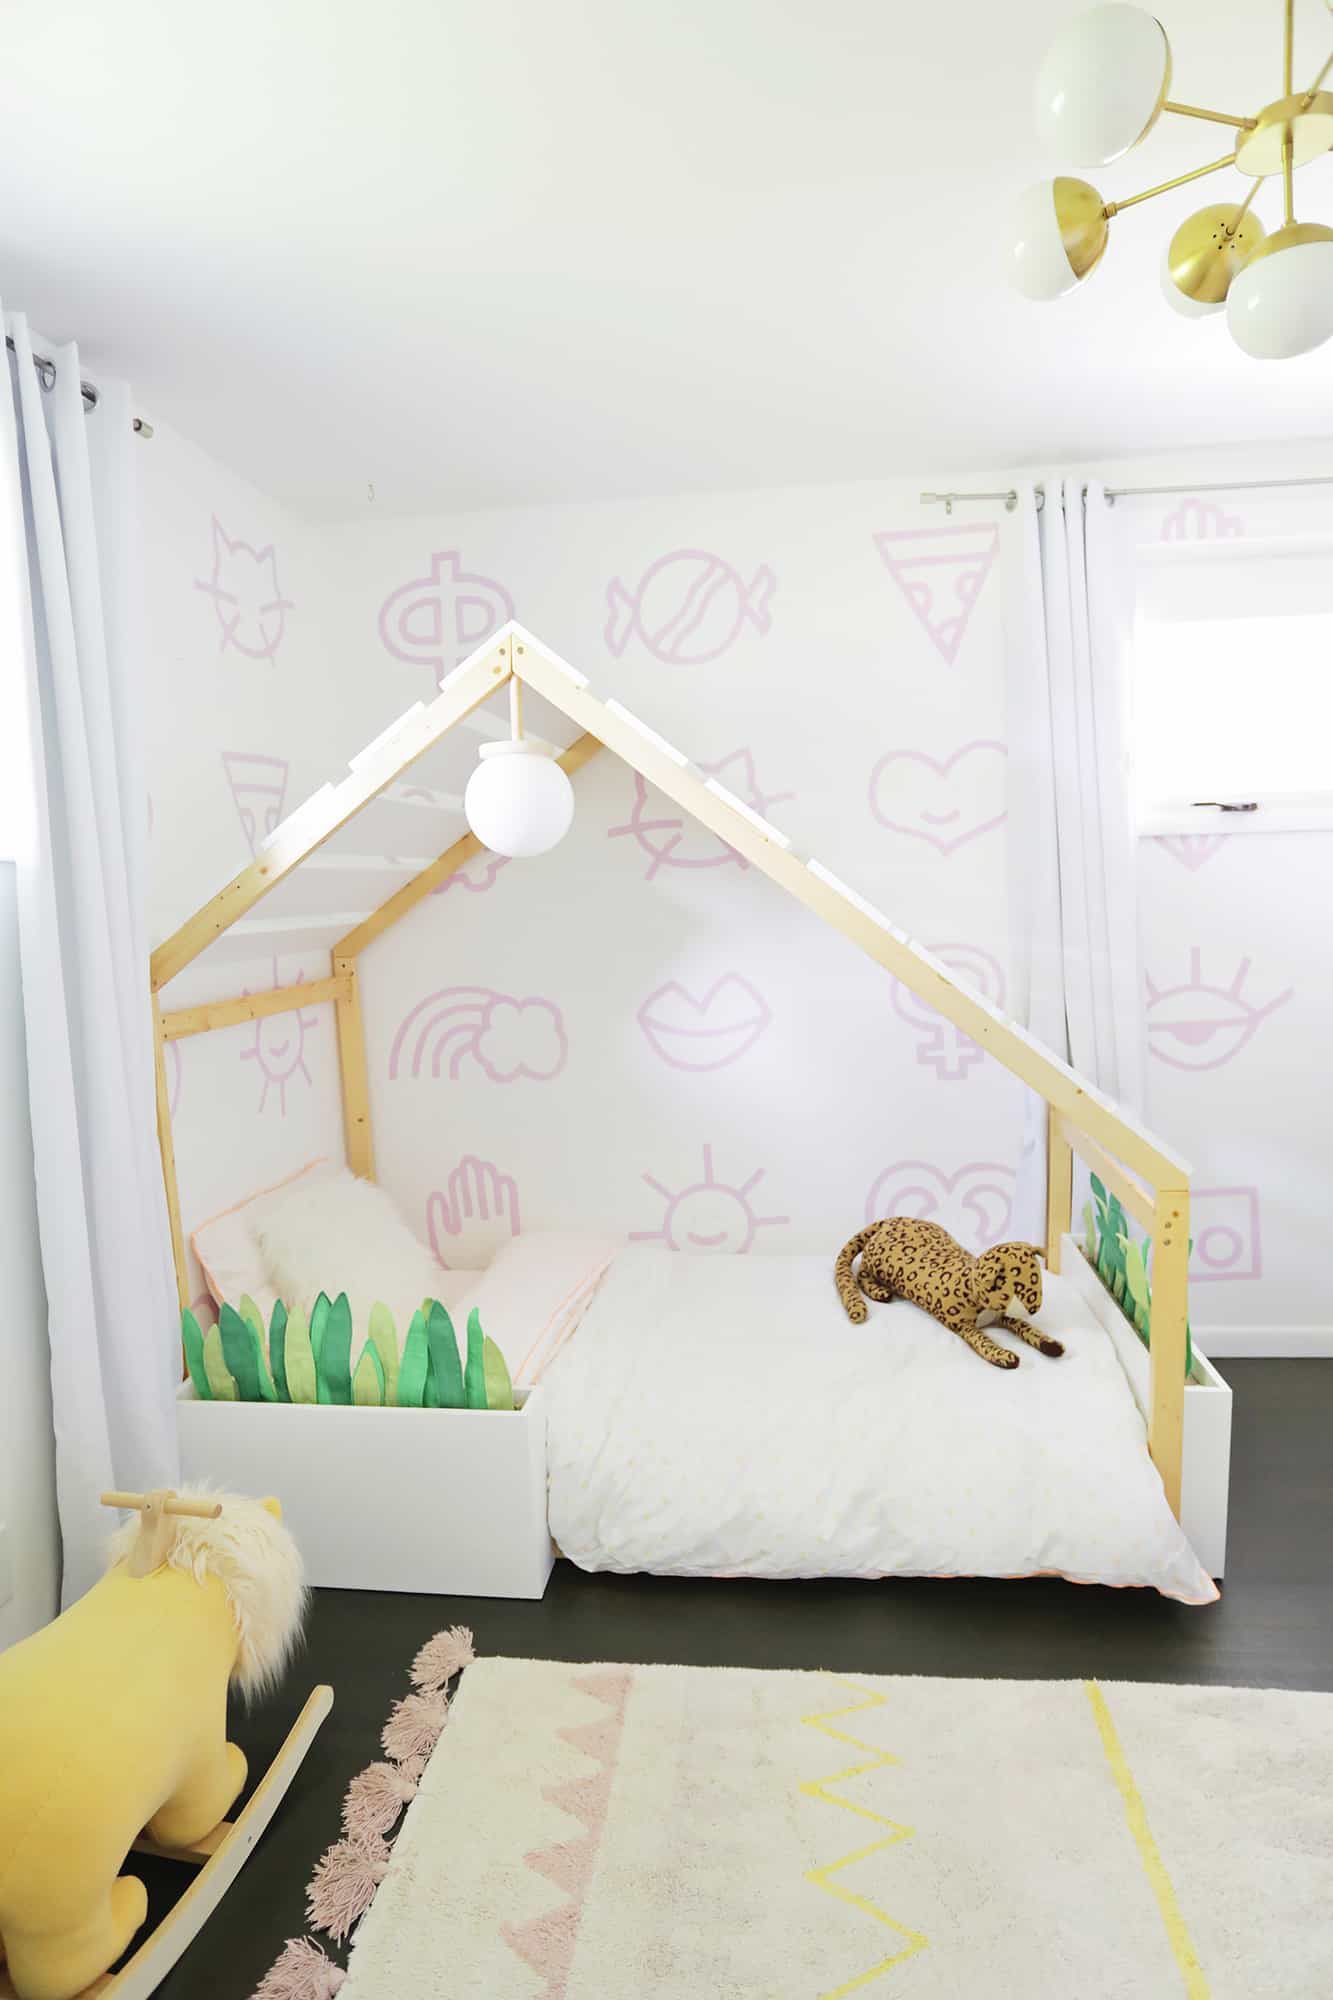
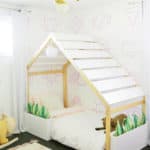
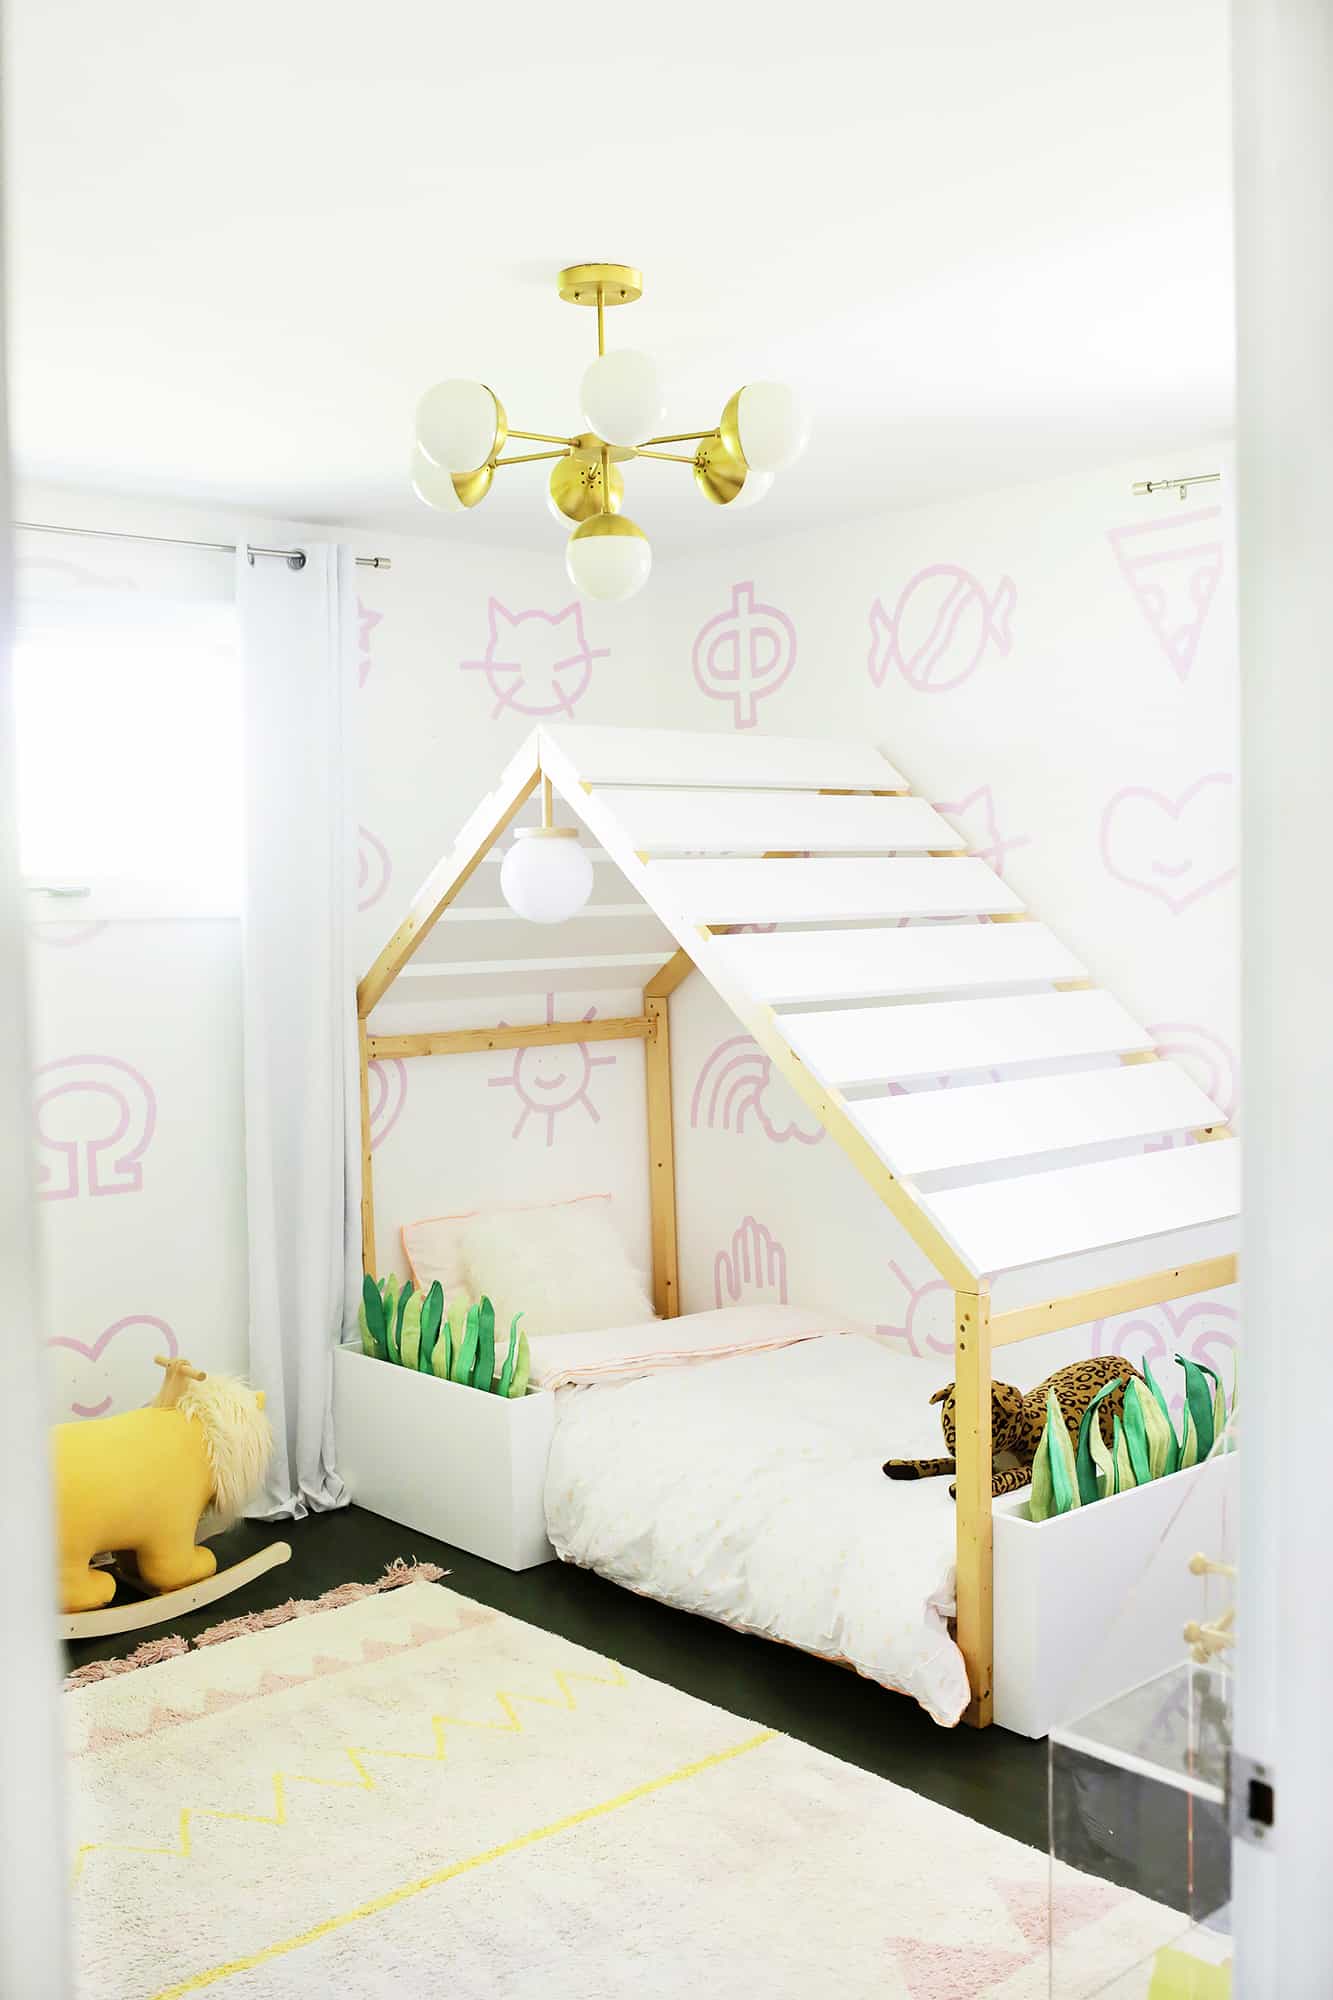 AGH! I love it so much (and that little leopard guarding the bed is so cute too!). In case you are wondering, corner guards are optional but recommended for the planter beds if you have a small toddler (something like this would be great and you can remove later as they grow). For me, it’s not that different from having a nightstand or dresser near a kid’s bed, but if corners make you nervous I say tweak it however you want! Overall, I get a huge kick out of seeing Lola sleep and play in her bed and it’s always so fun when something you dream up in your head comes to life. Hope it was fun for you to share in as well! xo. Laura
Palm Springs House Makeover
Ingredients
- house bed frame
- 12 8″ wide wooden boards
- white paint
- white wood screws
- twin size roll slat
- 3 2" x 2" boards
- 1″ thick dowel rod
- 5.5″ round wood disc
- mini puck light
- 8″ plastic globe
- epoxy glue
- 2 planter beds (see separate DIY post)
Instructions
-
For the roof, we bought 8″ wide boards, cut them the width of the house, painted them, and then spaced them about 2″ apart to create a roof! It was easiest to paint them before attaching them to the house (I like to use this paint for kid projects as it’s extra safe) and then we clamped them in place on the roof, pre-drilled our two holes about 1″ away from the top and bottom of the board edges and then used white screws to attach the boards on each side. The boards that meet in the middle had to be cut lengthwise at an angle with a circular saw to meet nice and pretty (the roofline is almost an 80° angle, so we cut each board at almost a 40° to fit). If you didn’t want to take the time to do that, you can also not have them meet in the middle (and plan one of your roof gaps over that spot) or just have them touch as-is instead of cutting the angle. Since the bed we bought has an asymmetrical frame, it wasn’t the same length on both sides, so I cut a board a little thinner at the end near the wall so it wouldn’t be as noticeable.
-
I just got a twin-size roll slat and set it on top of 3 2″x2″ boards that I cut to fit inside the length of the bed. I placed one board all the way on the right side, one all the way on the left side, and one down the middle and screwed the roll slat onto the boards with wood screws.
-
For the light, I got a 1″ thick dowel rod and cut it to 5 1/4″ long and cut two 40° angles into one end so it would fit into the “V” of the roof arch. I then pre-drilled a hole into the flat end of the dowel and also through this 5.5″ round wood disc so I could use a wood screw to attach them together. I used some epoxy glue to glue the two pieces into the “V” of the roof (and had some large clamps keep it there while the glue dried). Once the glue was dry, I could stick on my mini puck light onto the center underside of the wooden disc and then I used more epoxy to add an 8″ plastic globe onto the disc (I taped the globe to the disc with painter’s tape to keep it in place while the glue dried).
-
See the linked post to see planter bed instructions
Credits // Author and Photography: Laura Gummerman. Project Assistants: Collin DuPree and Todd Gummerman. Photos edited with A Color Story Desktop.
from A Beautiful Mess https://ift.tt/2LIZVip
via IFTTT