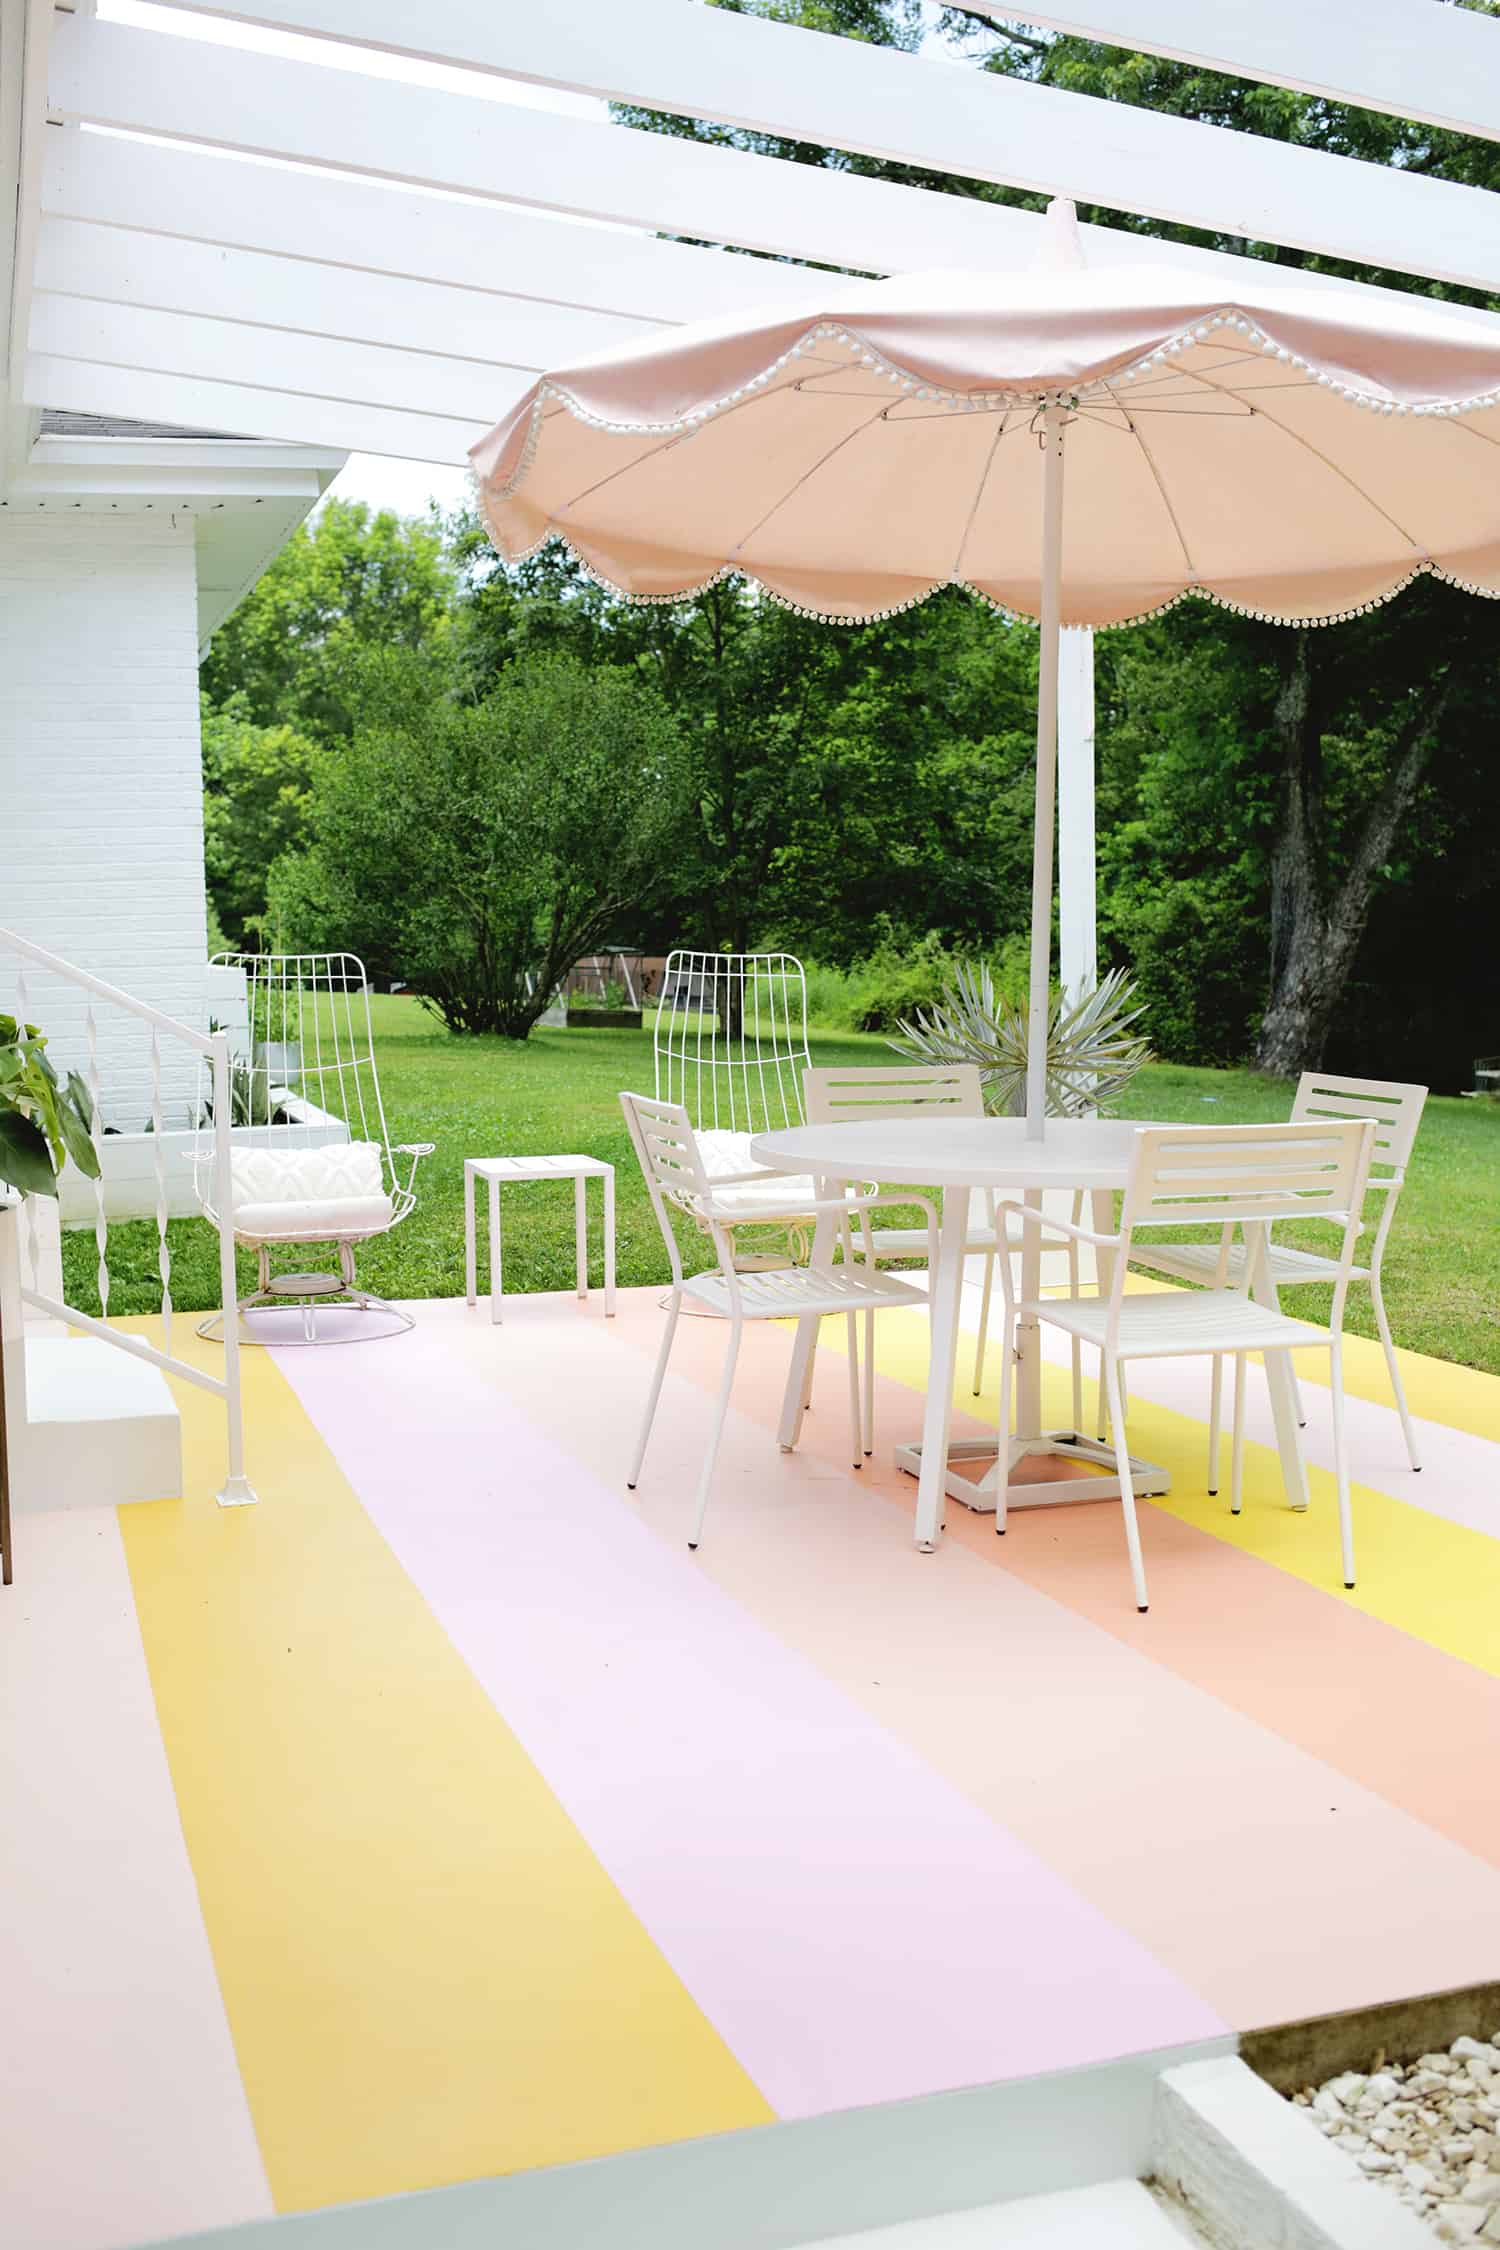
 I don’t know about you, but I like to add a little bit of “fun” to my outdoor spaces … sometimes that may be done by simply adding pink chairs and a dartboard cabinet as I did in our carport-turned-patio-situation, or you can also do it by painting a pattern on an outdoor concrete floor! Now, I’ve painted a few porch floors in my time (this painted rug and this faux-tile pattern) and depending on what you want to paint, it can be a pretty time consuming project out in the hot sun. I wanted to do something a bit more colorful on our back patio that was a little faster to execute, so I decided that a rainbow of sherbet-colored stripes would add the perfect amount of fun to our outdoor space! Here’s what we did!
 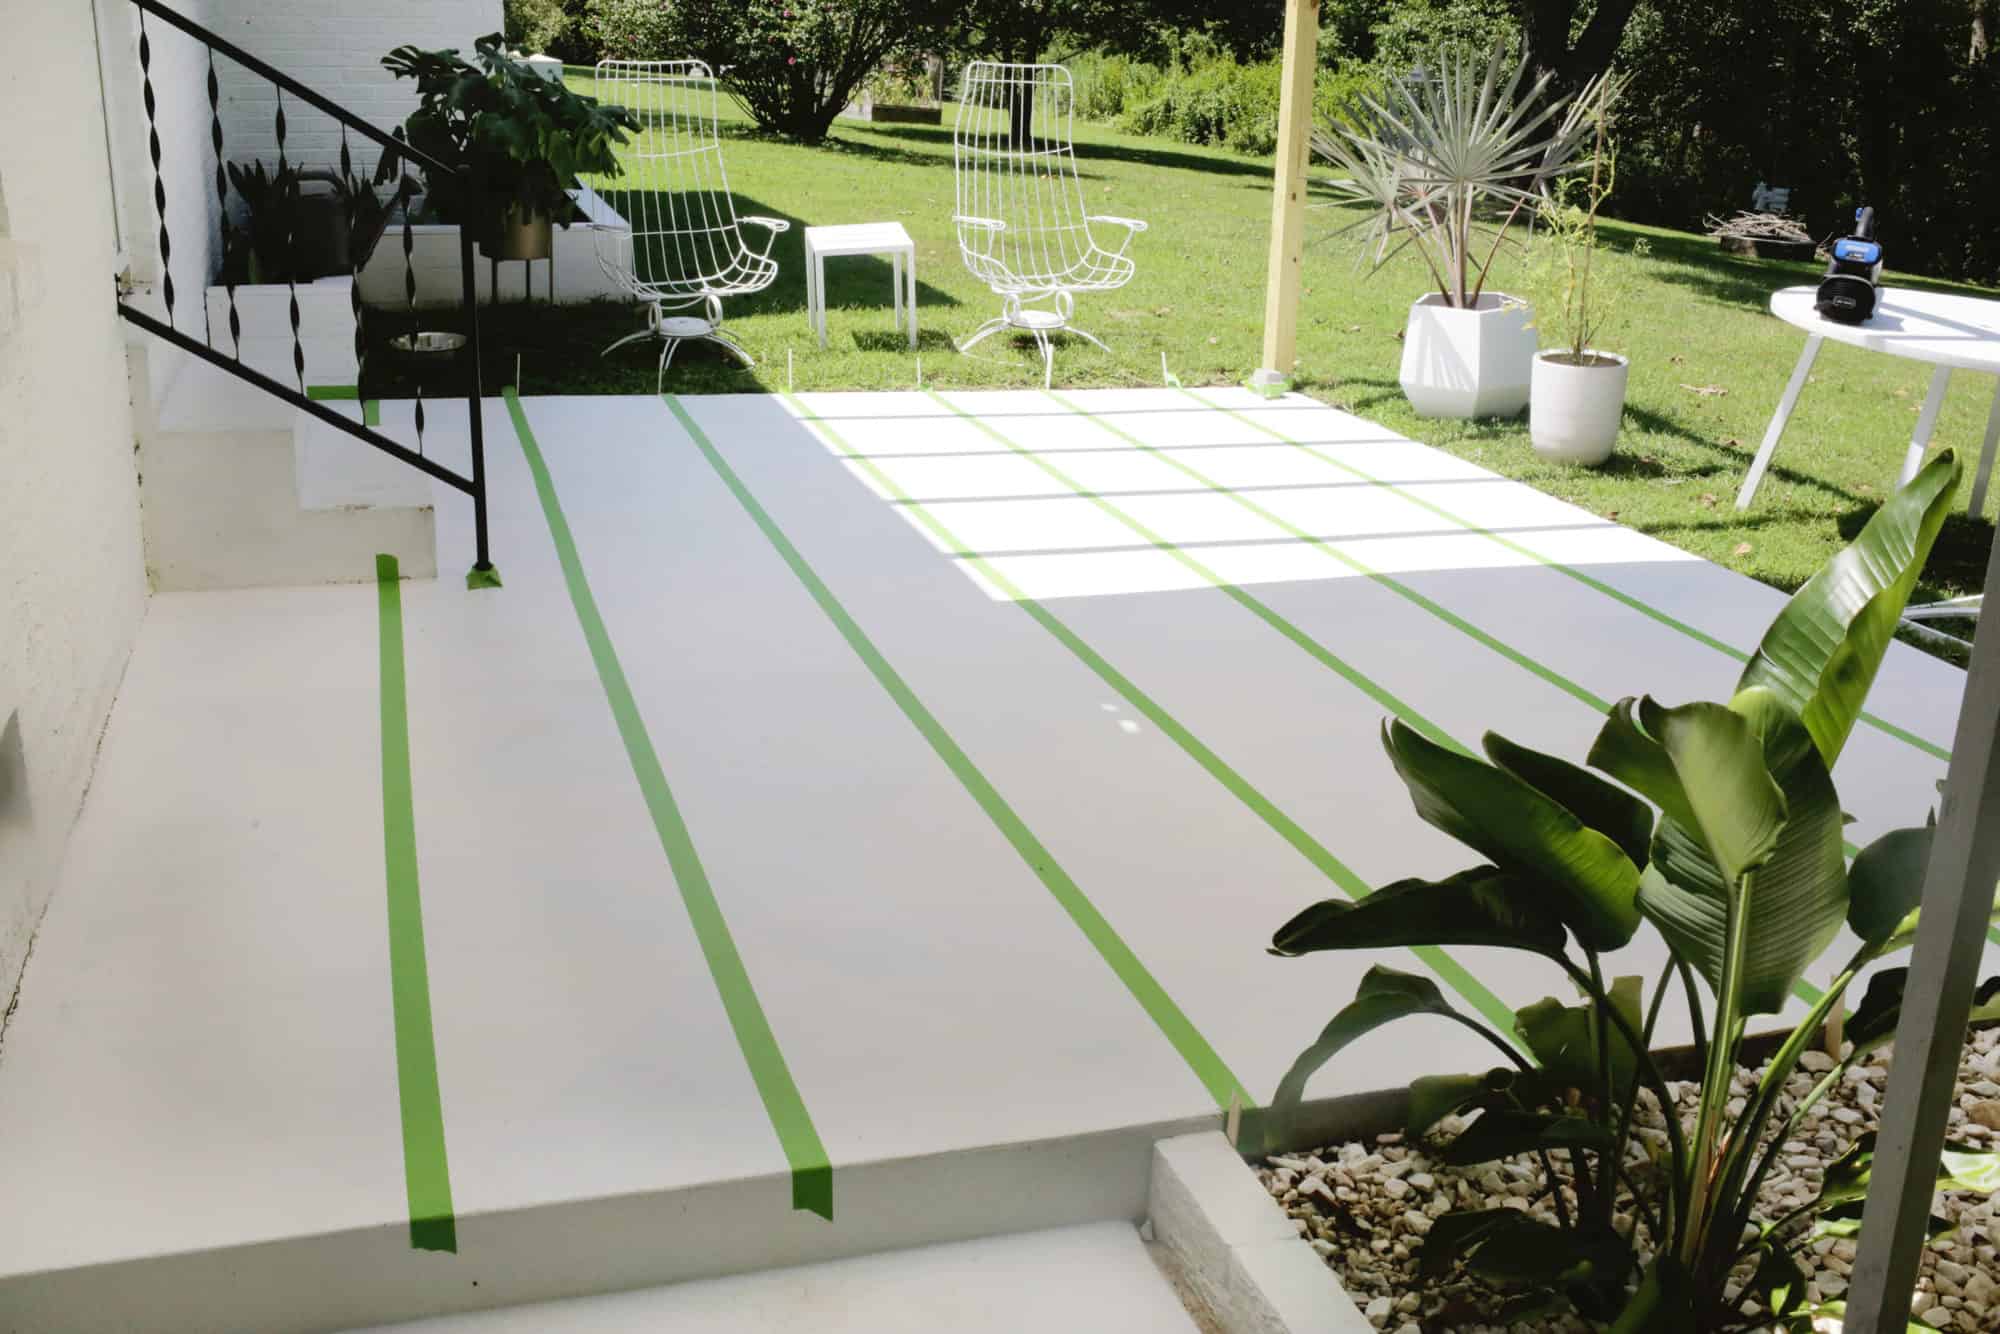 Supplies:
–concrete cleaner and brush or power washer
-painter’s tape
-paint rollers
–concrete primer
-outdoor porch paint (I used, in order, Snow Pa by Valspar, Pirates Treasure by Valspar, Magic Wand by Valspar, Rachel Pink by Sherwin Williams, Coral Reef by Valspar, Sweet Lemon by Valspar, Coral Perfection by Sherwin Williams, and another stripe of Pirates Treasure by Valspar)
–leaf blower (optional but helpful to clear small debris that may keep blowing onto the porch while you work)
First, you’ll want to clean your concrete floor with a cleaner and a brush to remove debris and any oils that will keep the paint from adhering. Once your porch is totally dry, you can use a roller and brush to paint a good layer of concrete primer onto your concrete. Once that is totally set (check the can for directions on how long to let it dry), you can use your painter’s tape to mark off your stripes!
Since I had a black and white pattern already painted on my porch, I decided to do a layer of white paint first just to make sure that the pattern wouldn’t come through. But you can skip that if you don’t have the same issue. We divided the porch into eight equal sections and stuck popsicle sticks in the ground at each end so you could see where the sections would be. You’ll want to use the painter’s tape to mark off every other stripe and once those colors are filled in you can move onto the stripes you missed the first round.
Use your paint and paint roller to fill in the color for the sections you’ve taped off. Do as many coats as you need to get full coverage and make sure to let them fully dry between each coat (check the weather before painting—you don’t want a rainstorm in the middle of your project!).

Once your every-other-stripe colors are done, we can move on to the ones in between with a little pro tip secret for getting clean tape lines when painting! Pull up your tape marks and retape so you are focusing on the stripes you missed in the first round. You’ll want to overlap the colors you just did a tiny bit with the second round of paint colors, so make sure you can see a sliver of those first round colors on the inside of the tape so you don’t have a white area between the stripes where you can see the primer underneath.
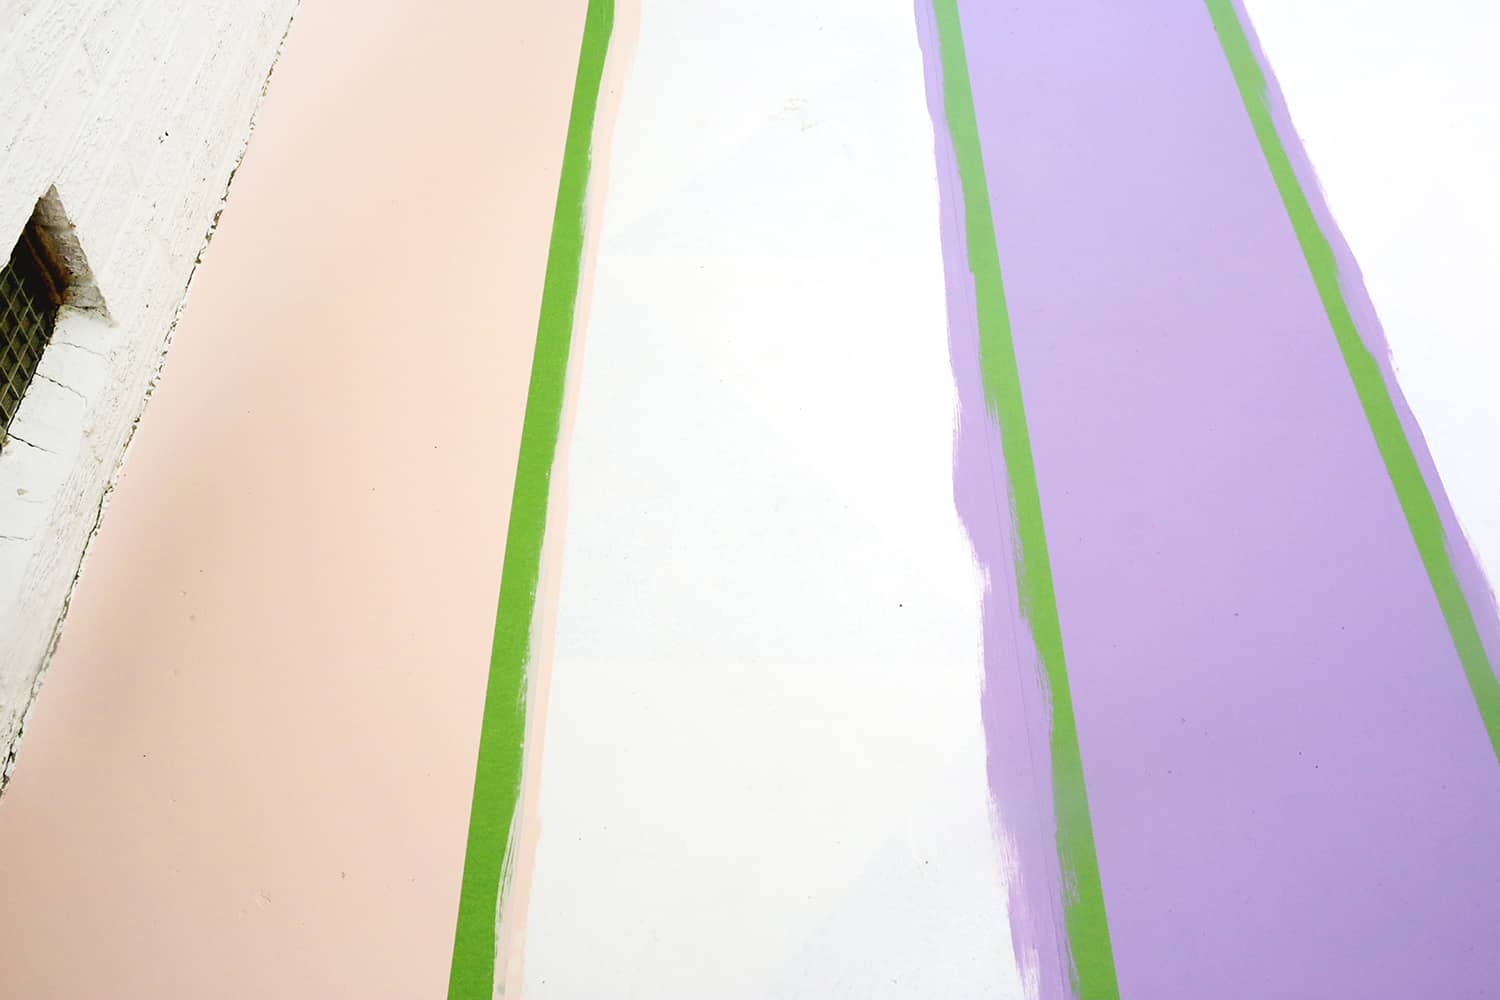
Once your second round of stripes are taped off, here’s the big pro tip: Paint all along the inside tape lines with the color that is next to your new stripe as you see above. Since it’s difficult not to get a little bit of paint bleed with painter’s tape, you are basically expecting to get some bleed. But because the paint that’s bleeding is already the color of that stripe, the bleed will be invisible and you’ll have a super crisp line when you paint your new color over the top of it and pull off the tape. It feels very wrong when you are doing it but it’s like magic …
 Once your second round of stripes are dry, pull off the tape and see your new porch! Most porch paints will suggest leaving furniture and heavy foot traffic off of the porch for up to a week, so I would also suggest doing that if you can to allow the paint to fully set.
We actually noticed at this point that we were given incorrect paint for the purple and yellow stripes, so we had to go back and paint those over again (fun!). Maybe let a sample dry first to make sure yours is the correct shade, haha!

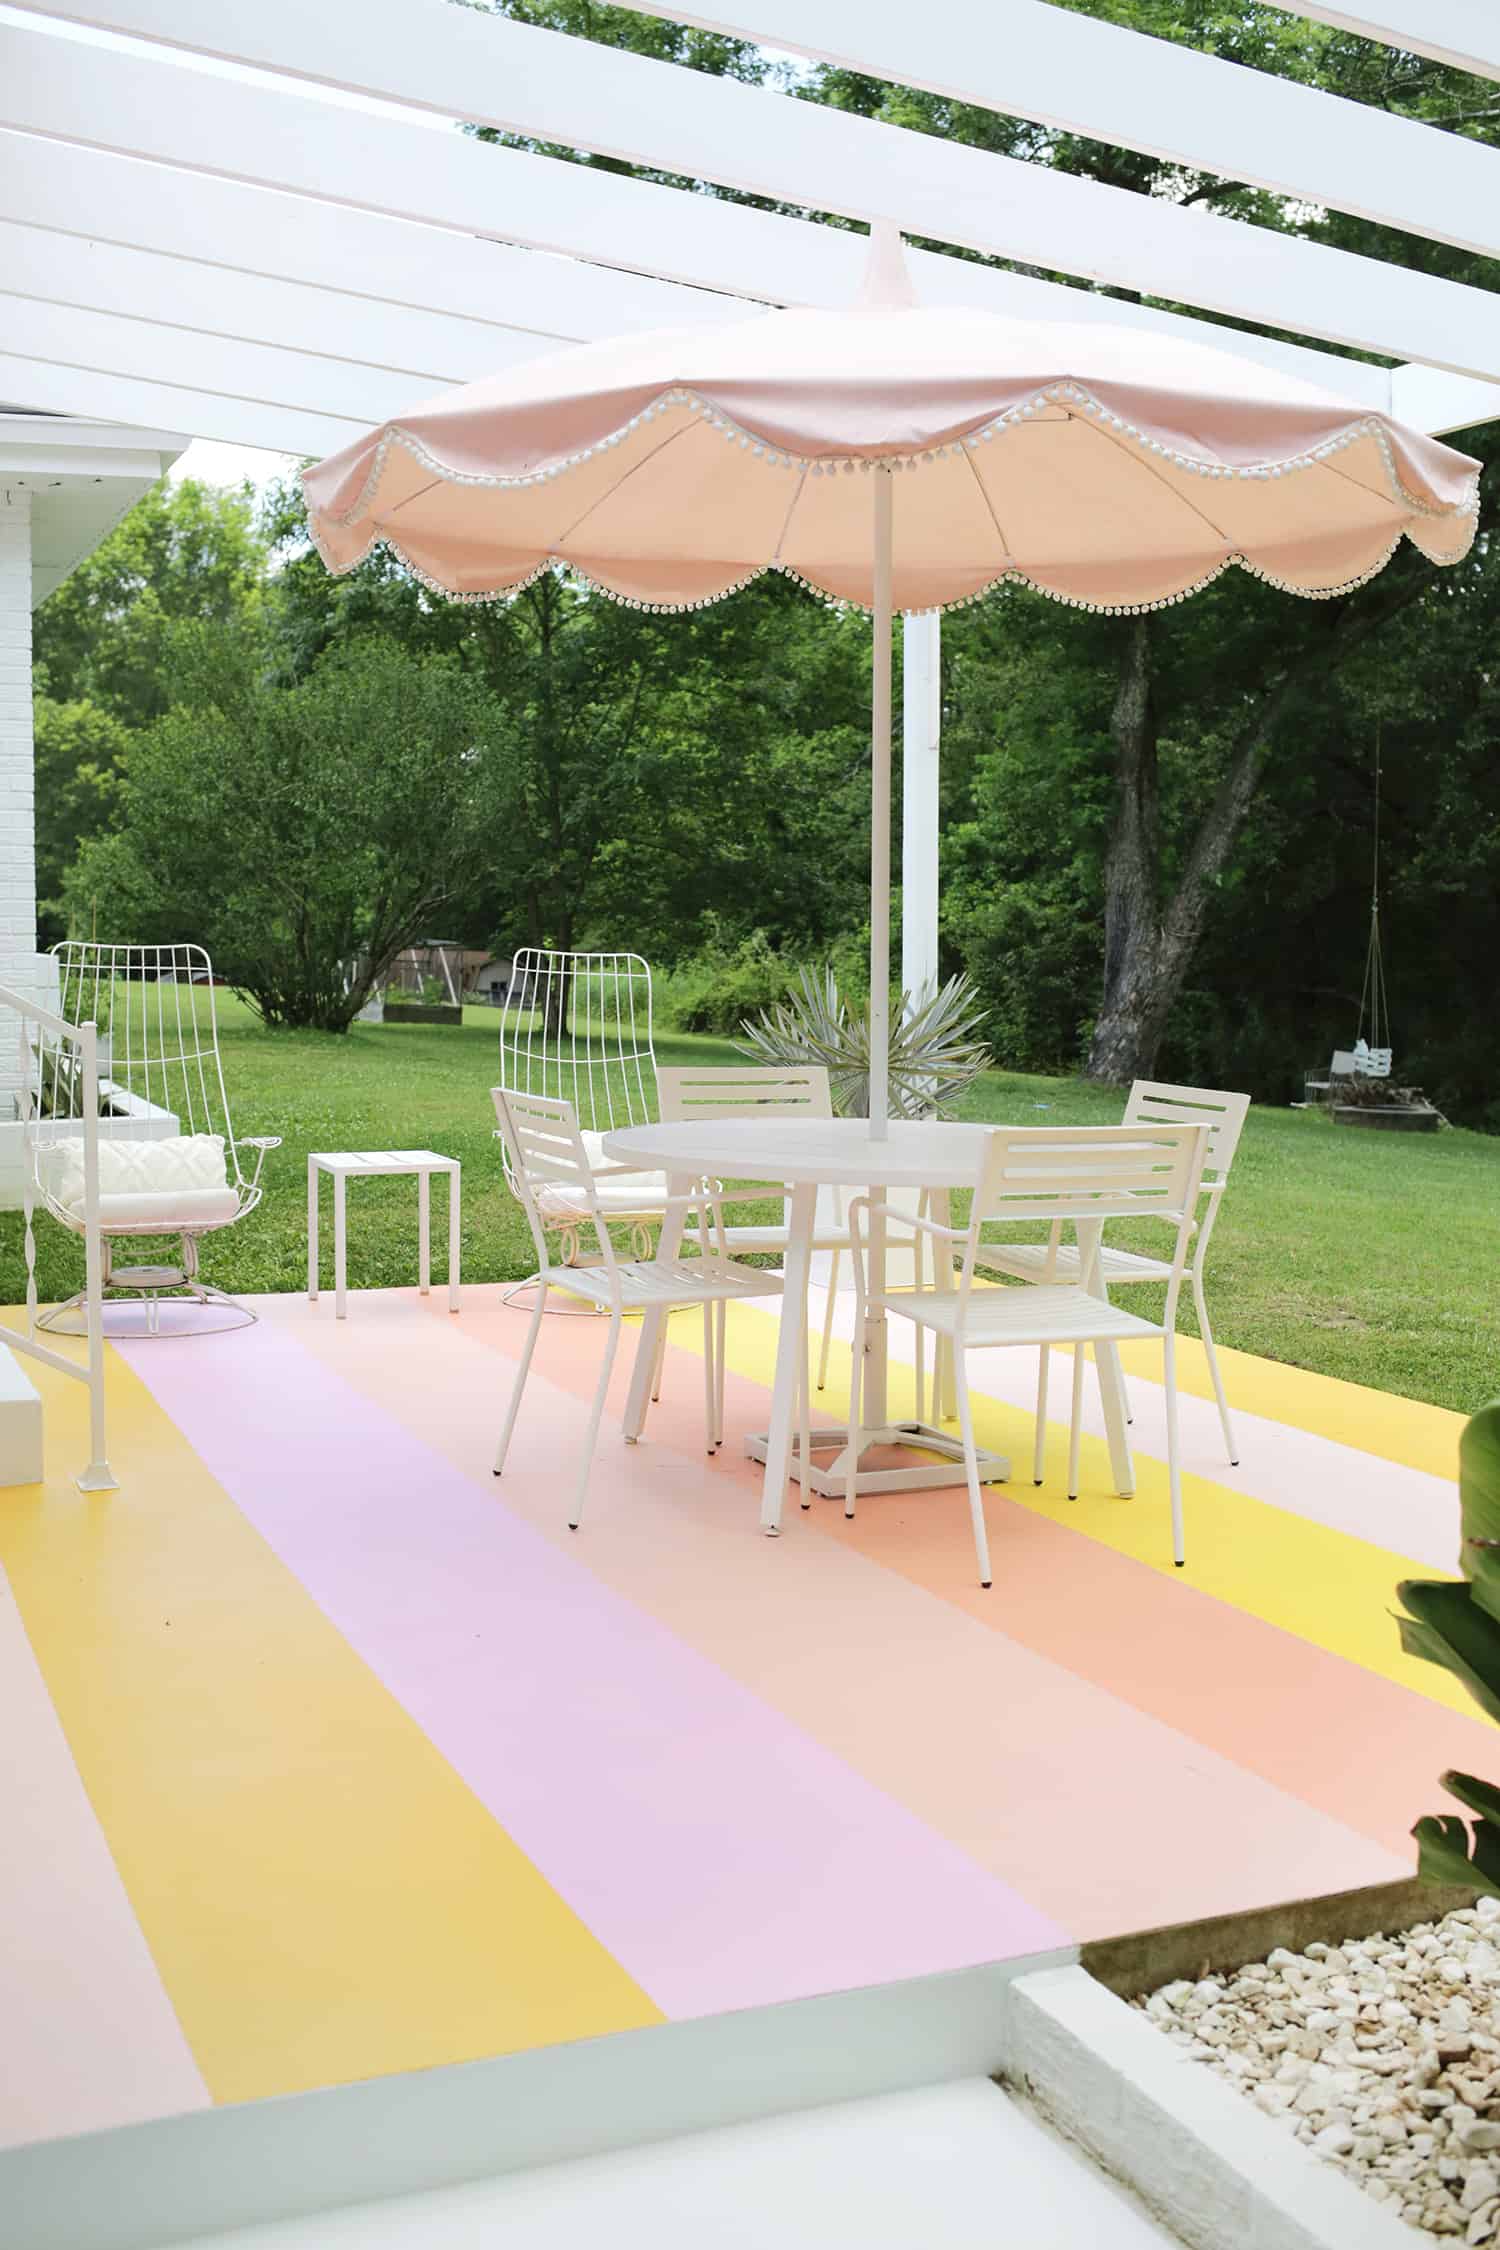
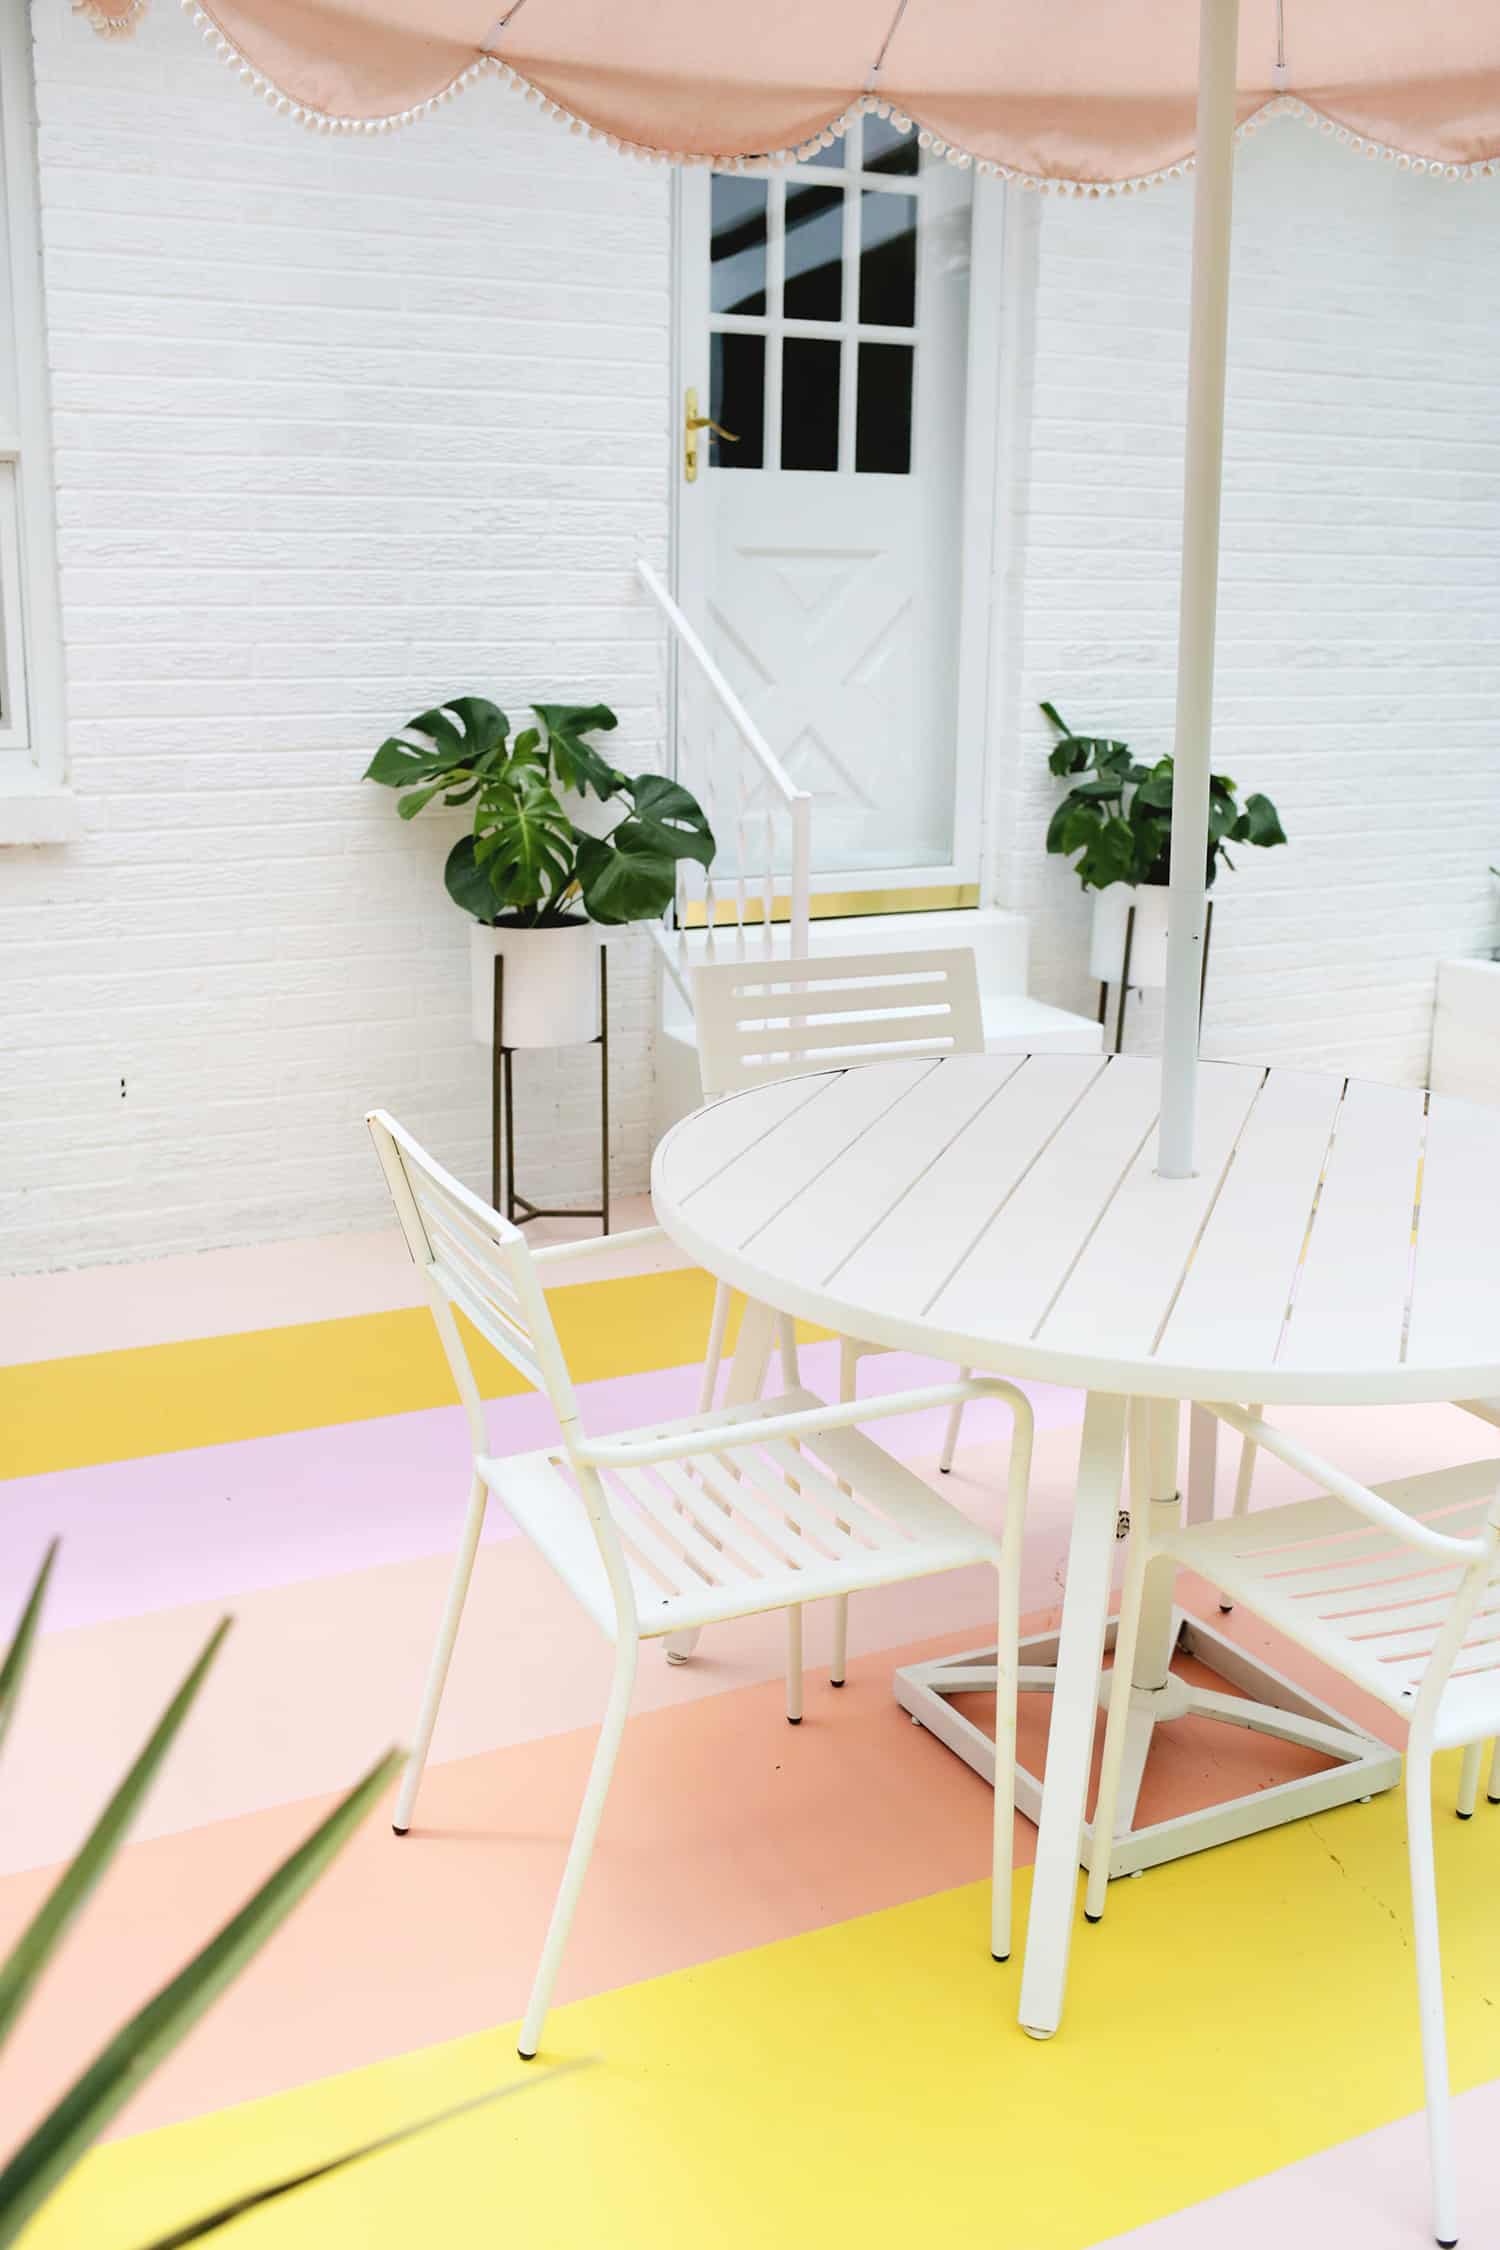
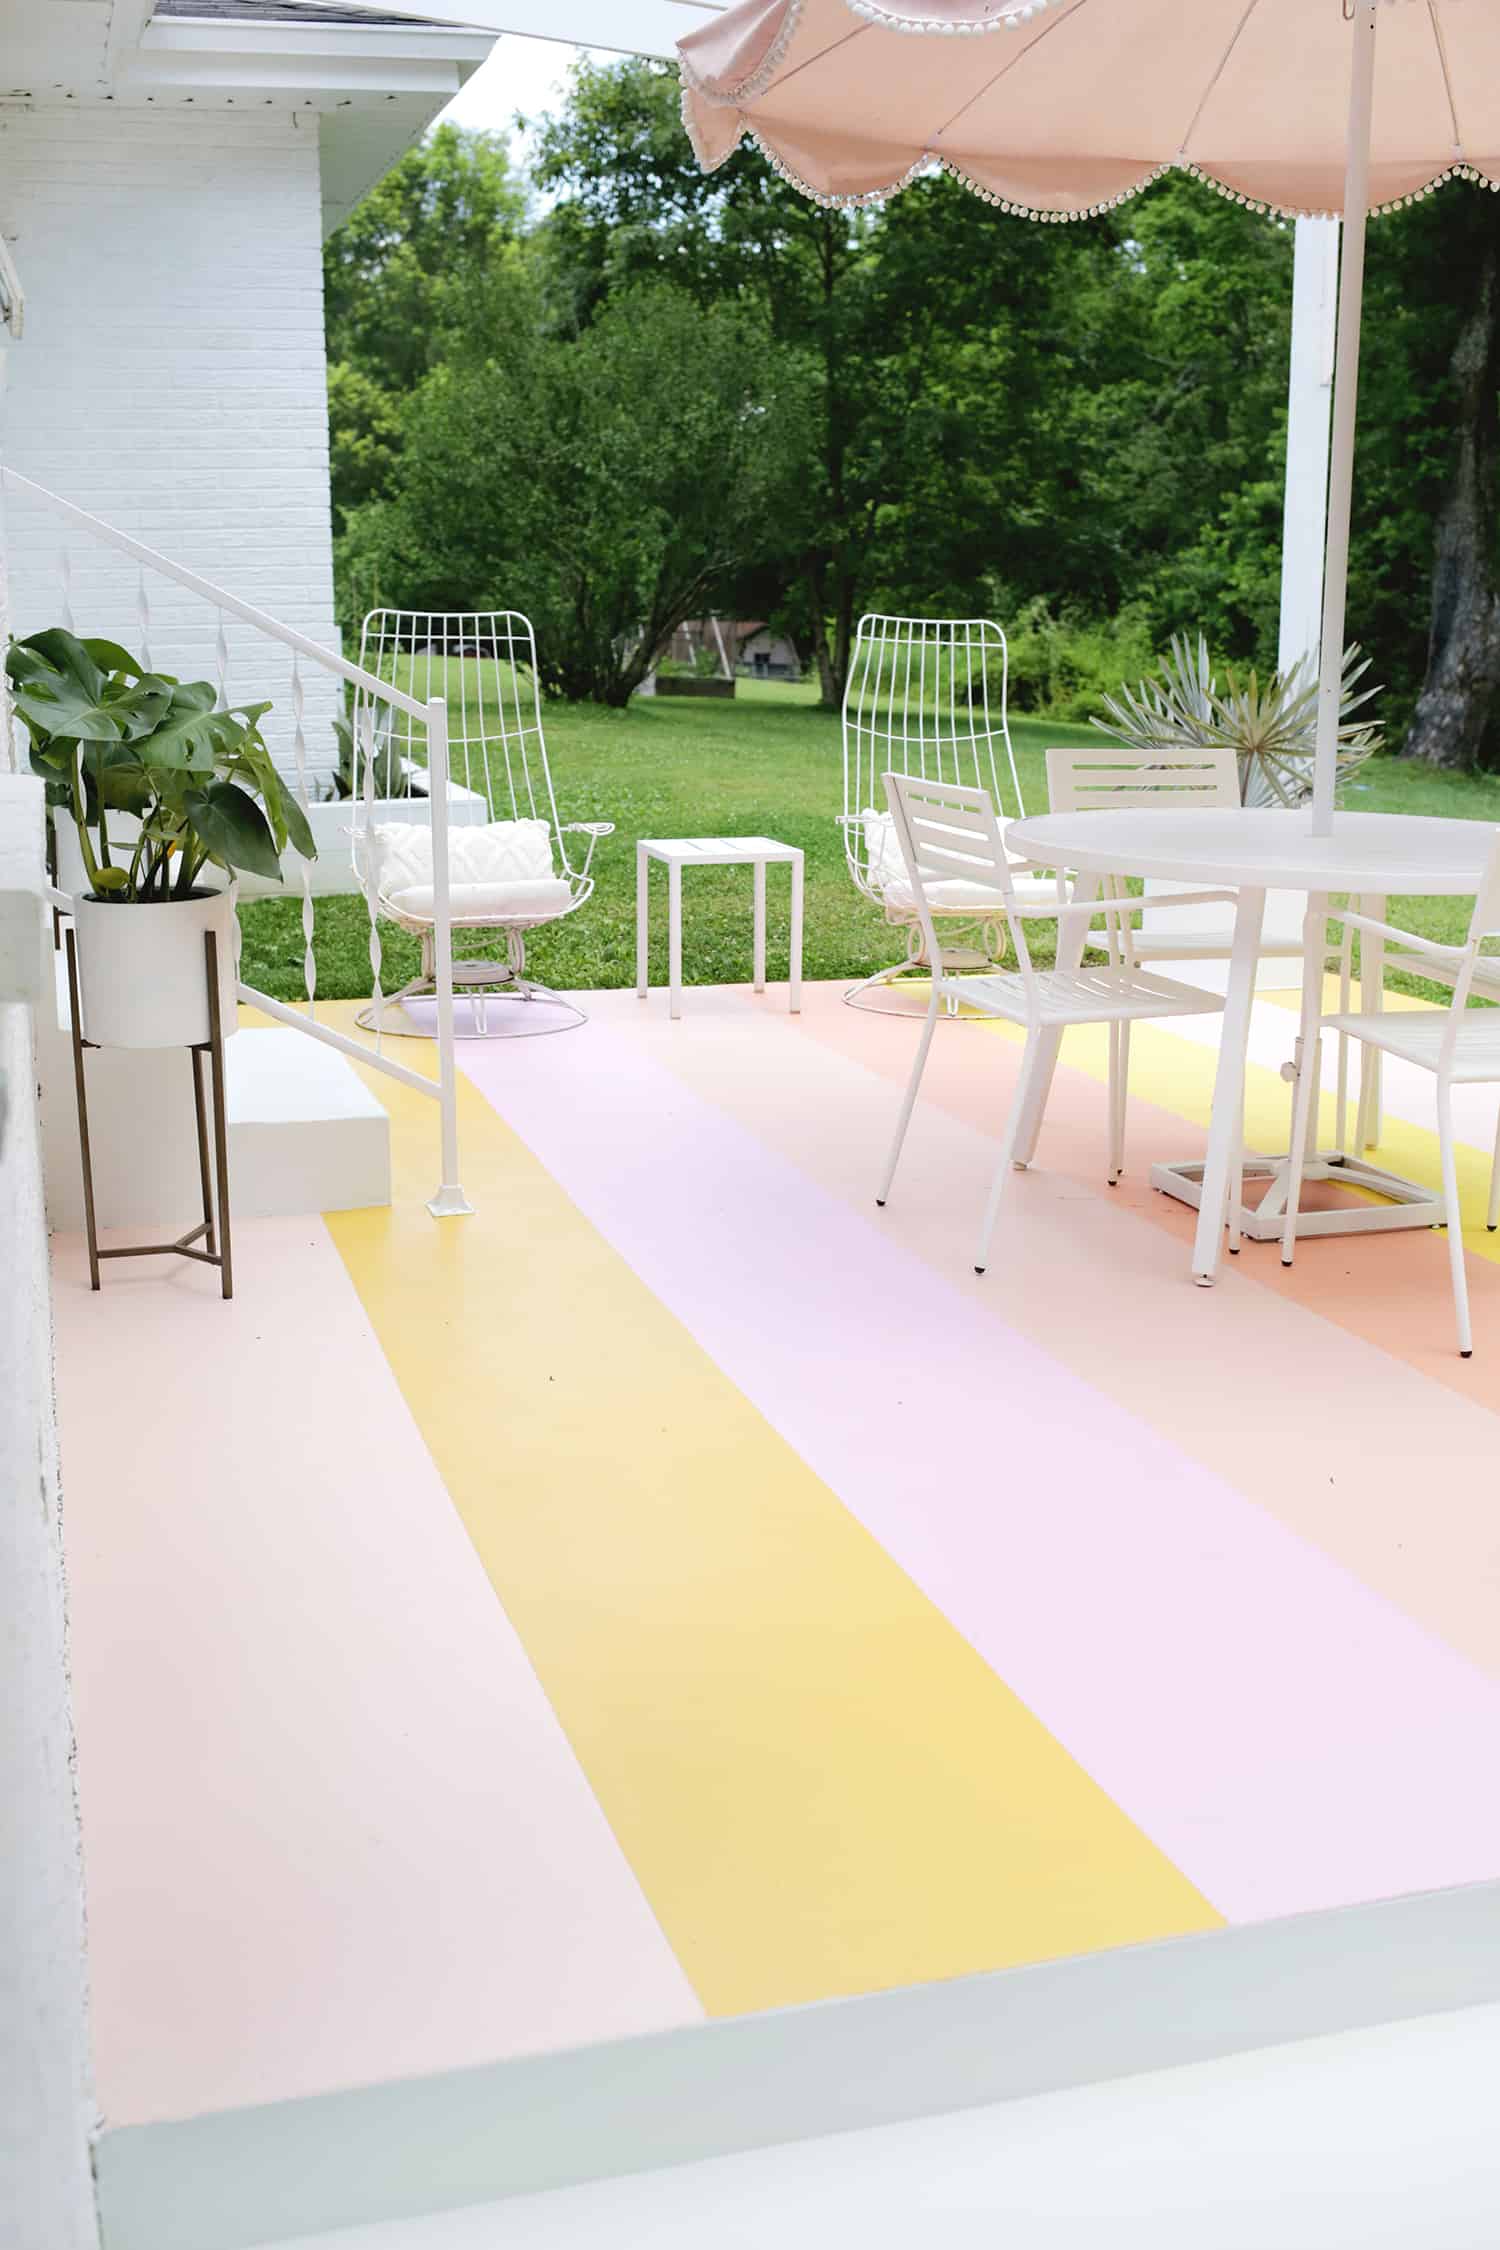
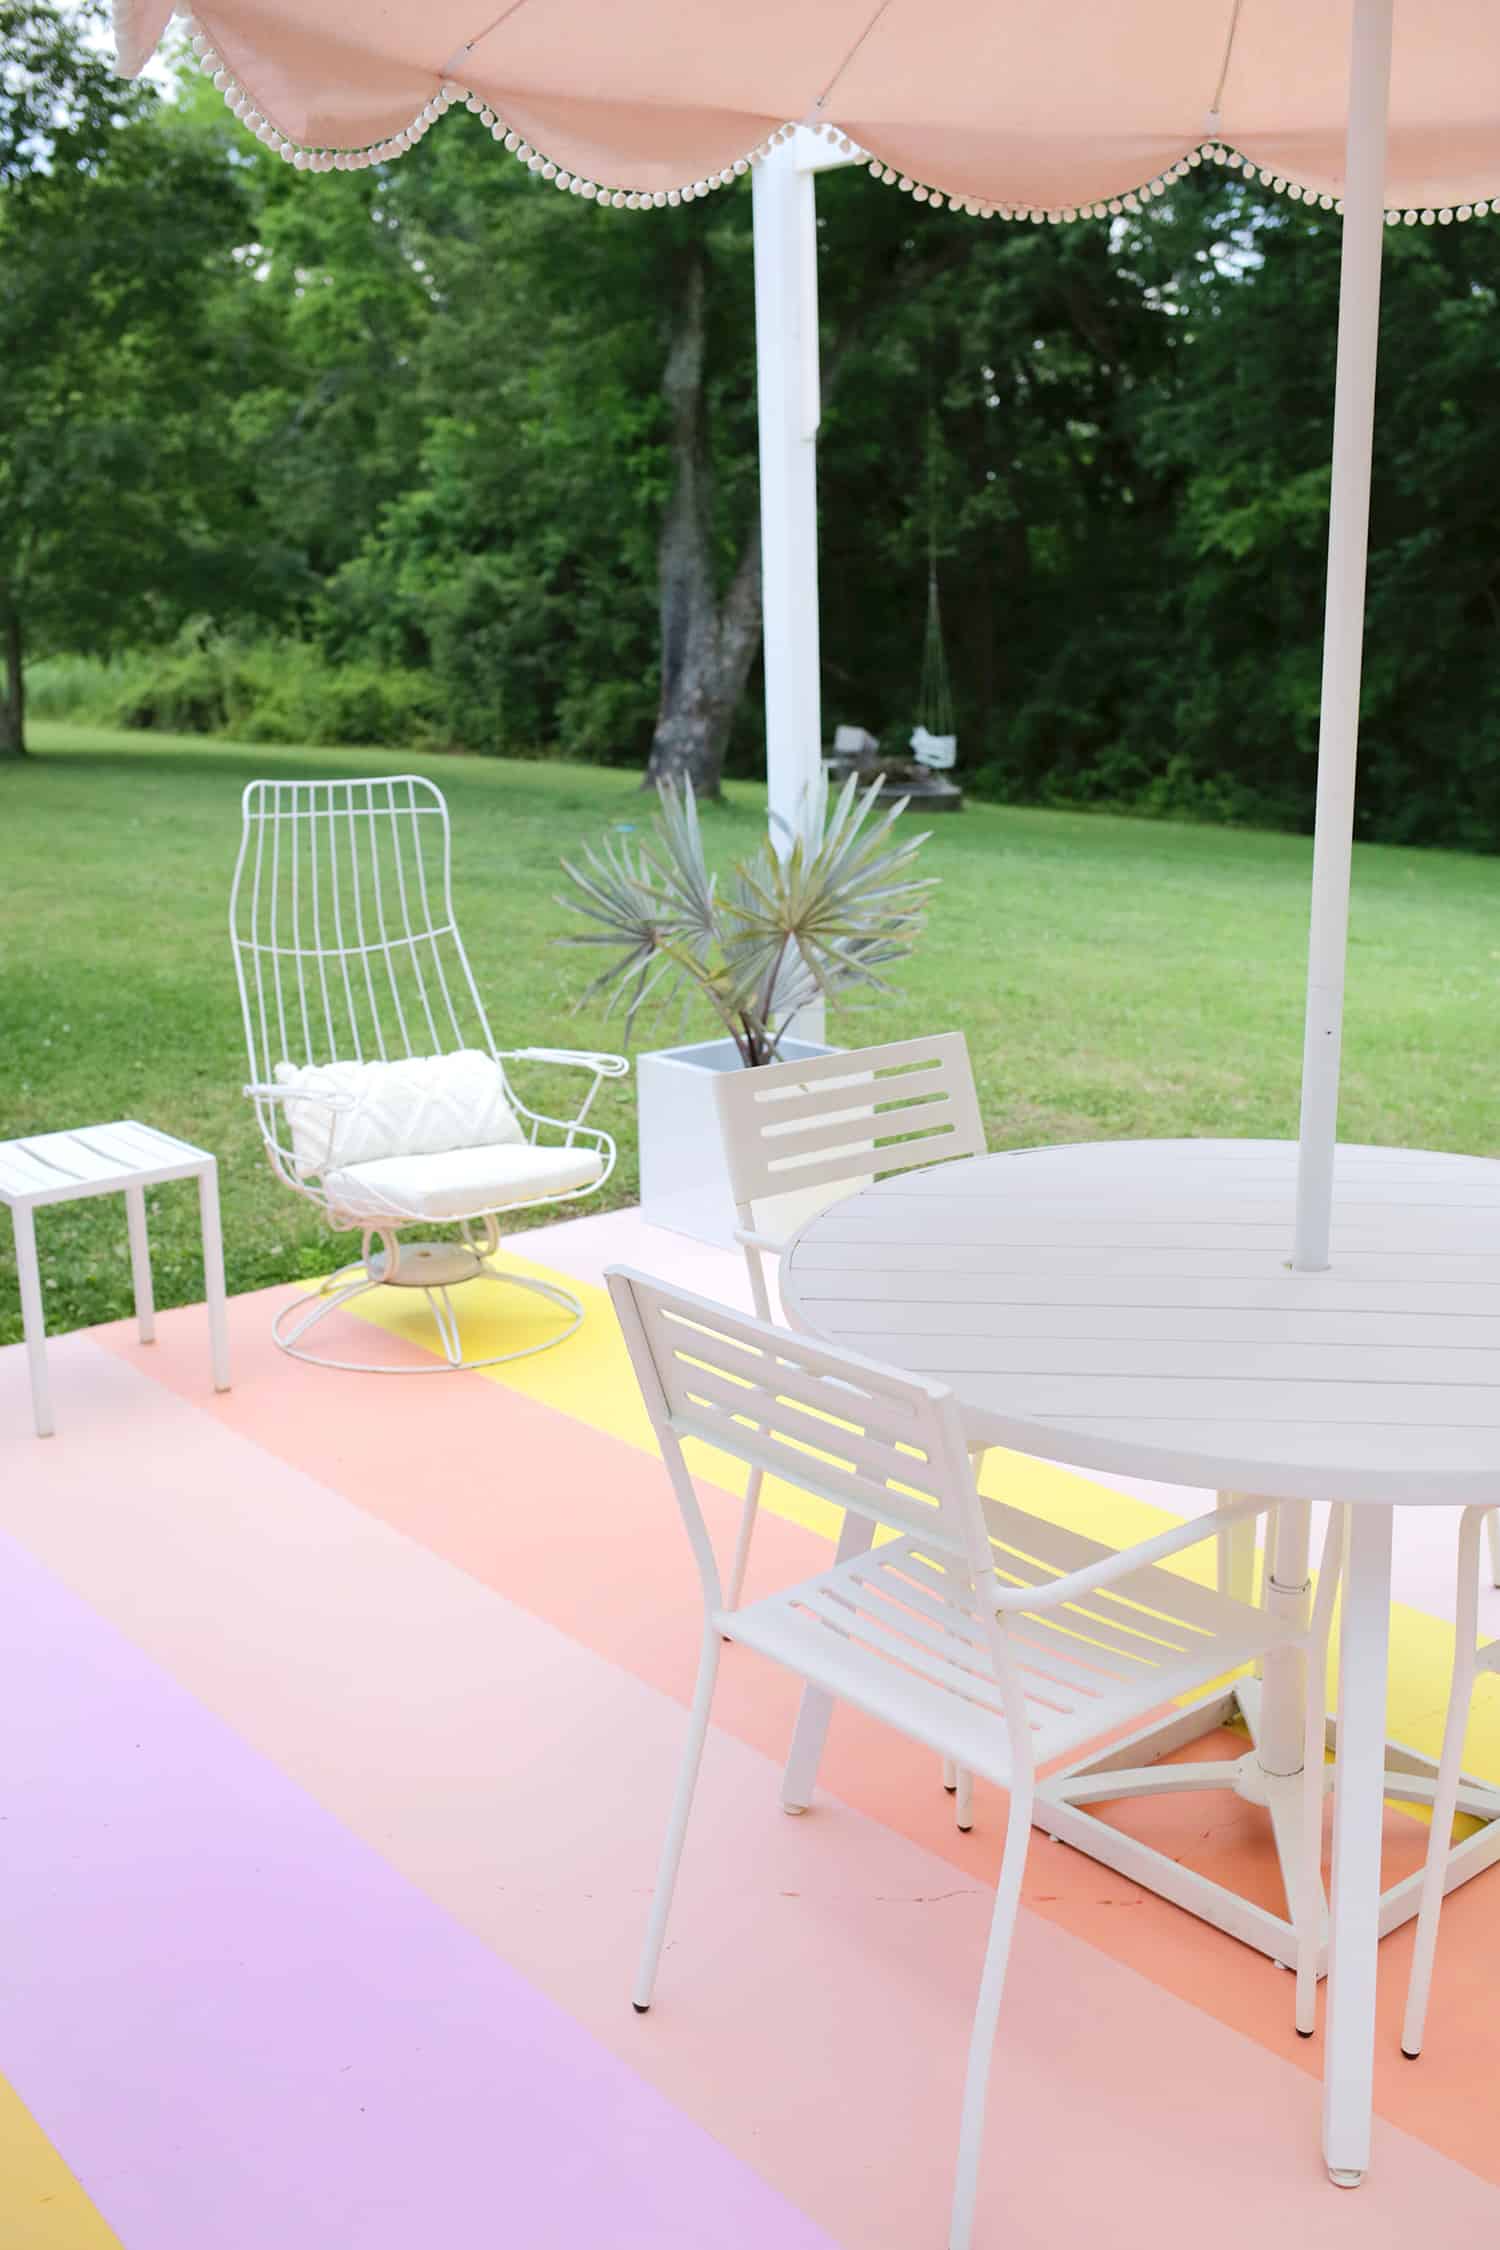
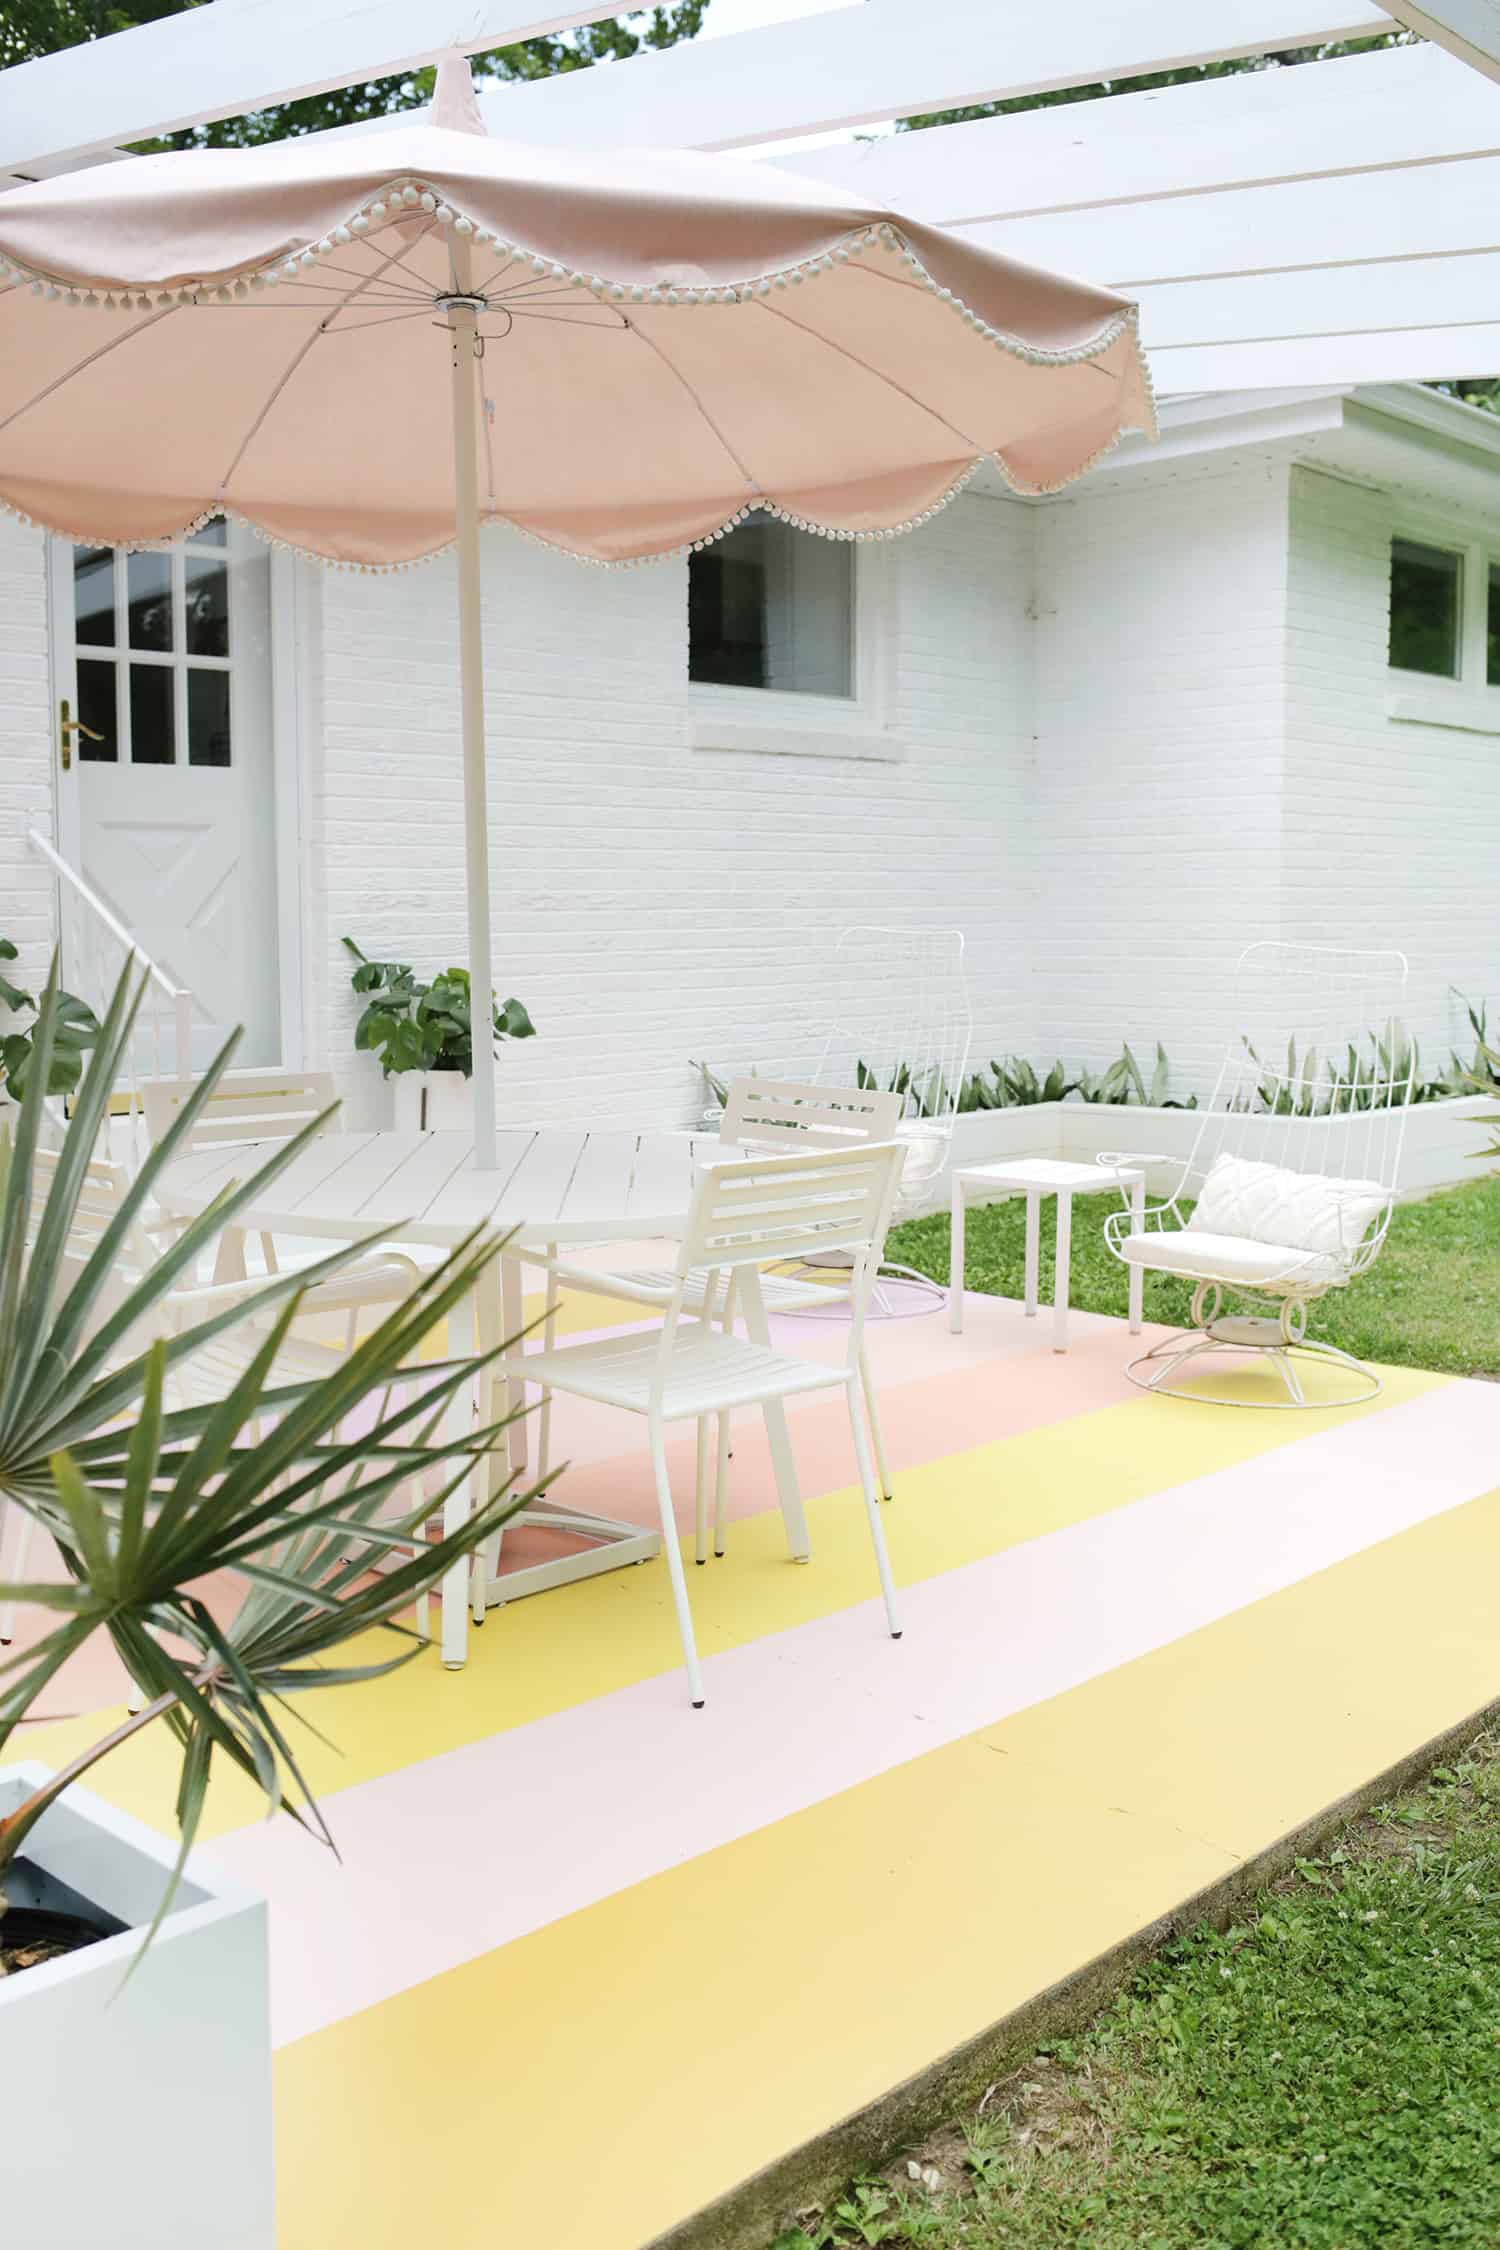
 Ahhh, it’s like a little slice of sherbet-colored outdoor heaven. I love how much color and fun it adds to the back porch and it just gives me the feeling of having drinks on the back porch of a cute Palm Springs restaurant or hotel. While it is true that a painted floor will fade some over time and get some stains from outdoor activities, you can also give it a good cleaning at the start of each season with a scrub brush or gentle power washer, and I like that I can always paint something new over it when I get tired of that pattern. Hope this happy pattern brightened your day a bit, too! xo. Laura

Striped Porch Floor DIY
Ingredients
- concrete cleaner and brush or power washer
- painter’s tape
- paint rollers
- concrete primer
- outdoor porch paint (I used in order Snow Pa by Valspar, Pirates Treasure by Valspar, Magic Wand by Valspar, Rachel Pink by Sherwin Williams, Coral Reef by Valspar, Sweet Lemon by Valspar, Coral Perfection by Sherwin Williams, and another stripe of Pirates Treasure by Valspar)
Instructions
-
First, you’ll want to clean your concrete floor with a cleaner and a brush to remove debris and any oils that will keep the paint from adhering. Once your porch is totally dry, you can use a roller and brush to paint a good layer of concrete primer onto your concrete. Once that is totally set (check the can for directions on how long to let it dry), you can use your painter’s tape to mark off your stripes! We divided the porch into eight equal sections and stuck popsicle sticks in the ground at each end so you could see where the sections would be. You’ll want to use the painter’s tape to mark off every other stripe and once those colors are filled in you can move onto the stripes you missed the first round.
-
Use your paint and paint roller to fill in the color for the sections you’ve taped off. Do as many coats as you need to get full coverage and make sure to let them fully dry between each coat (check the weather before painting—you don’t want a rainstorm in the middle of your project!).
-
Once your every-other-stripe colors are done, we can move on to the ones in between with a little pro tip secret for getting clean tape lines when painting! Pull up your tape marks and retape so you are focusing on the stripes you missed in the first round. You’ll want to overlap the colors you just did a tiny bit with the second round of paint colors. So make sure you can see a sliver of those first round colors on the inside of the tape so you don’t have a white area between the stripes where you can see the primer underneath.
-
Once your second round of stripes are taped off, here’s the big pro tip: Paint all along the inside tape lines with the color that is next to your new stripe as you see above. Since it’s difficult not to get a little bit of paint bleed with painter’s tape, you are basically expecting to get some bleed. But because the paint that’s bleeding is already the color of that stripe, the bleed will be invisible and you’ll have a super crisp line when you paint your new color over the top of it and pull off the tape. It feels very wrong when you are doing it but it’s like magic …
-
Once your second round of stripes are dry, pull off the tape and see your new porch! Most porch paints will suggest leaving furniture and heavy foot traffic off of the porch for up to a week, so I would also suggest doing that if you can to allow the paint to fully set.
Credits // Author and Photography: Laura Gummerman. Project Assistant and Photography: Collin DuPree. Photos edited with A Color Story Desktop.
from A Beautiful Mess https://ift.tt/2ZNCivZ
via IFTTT