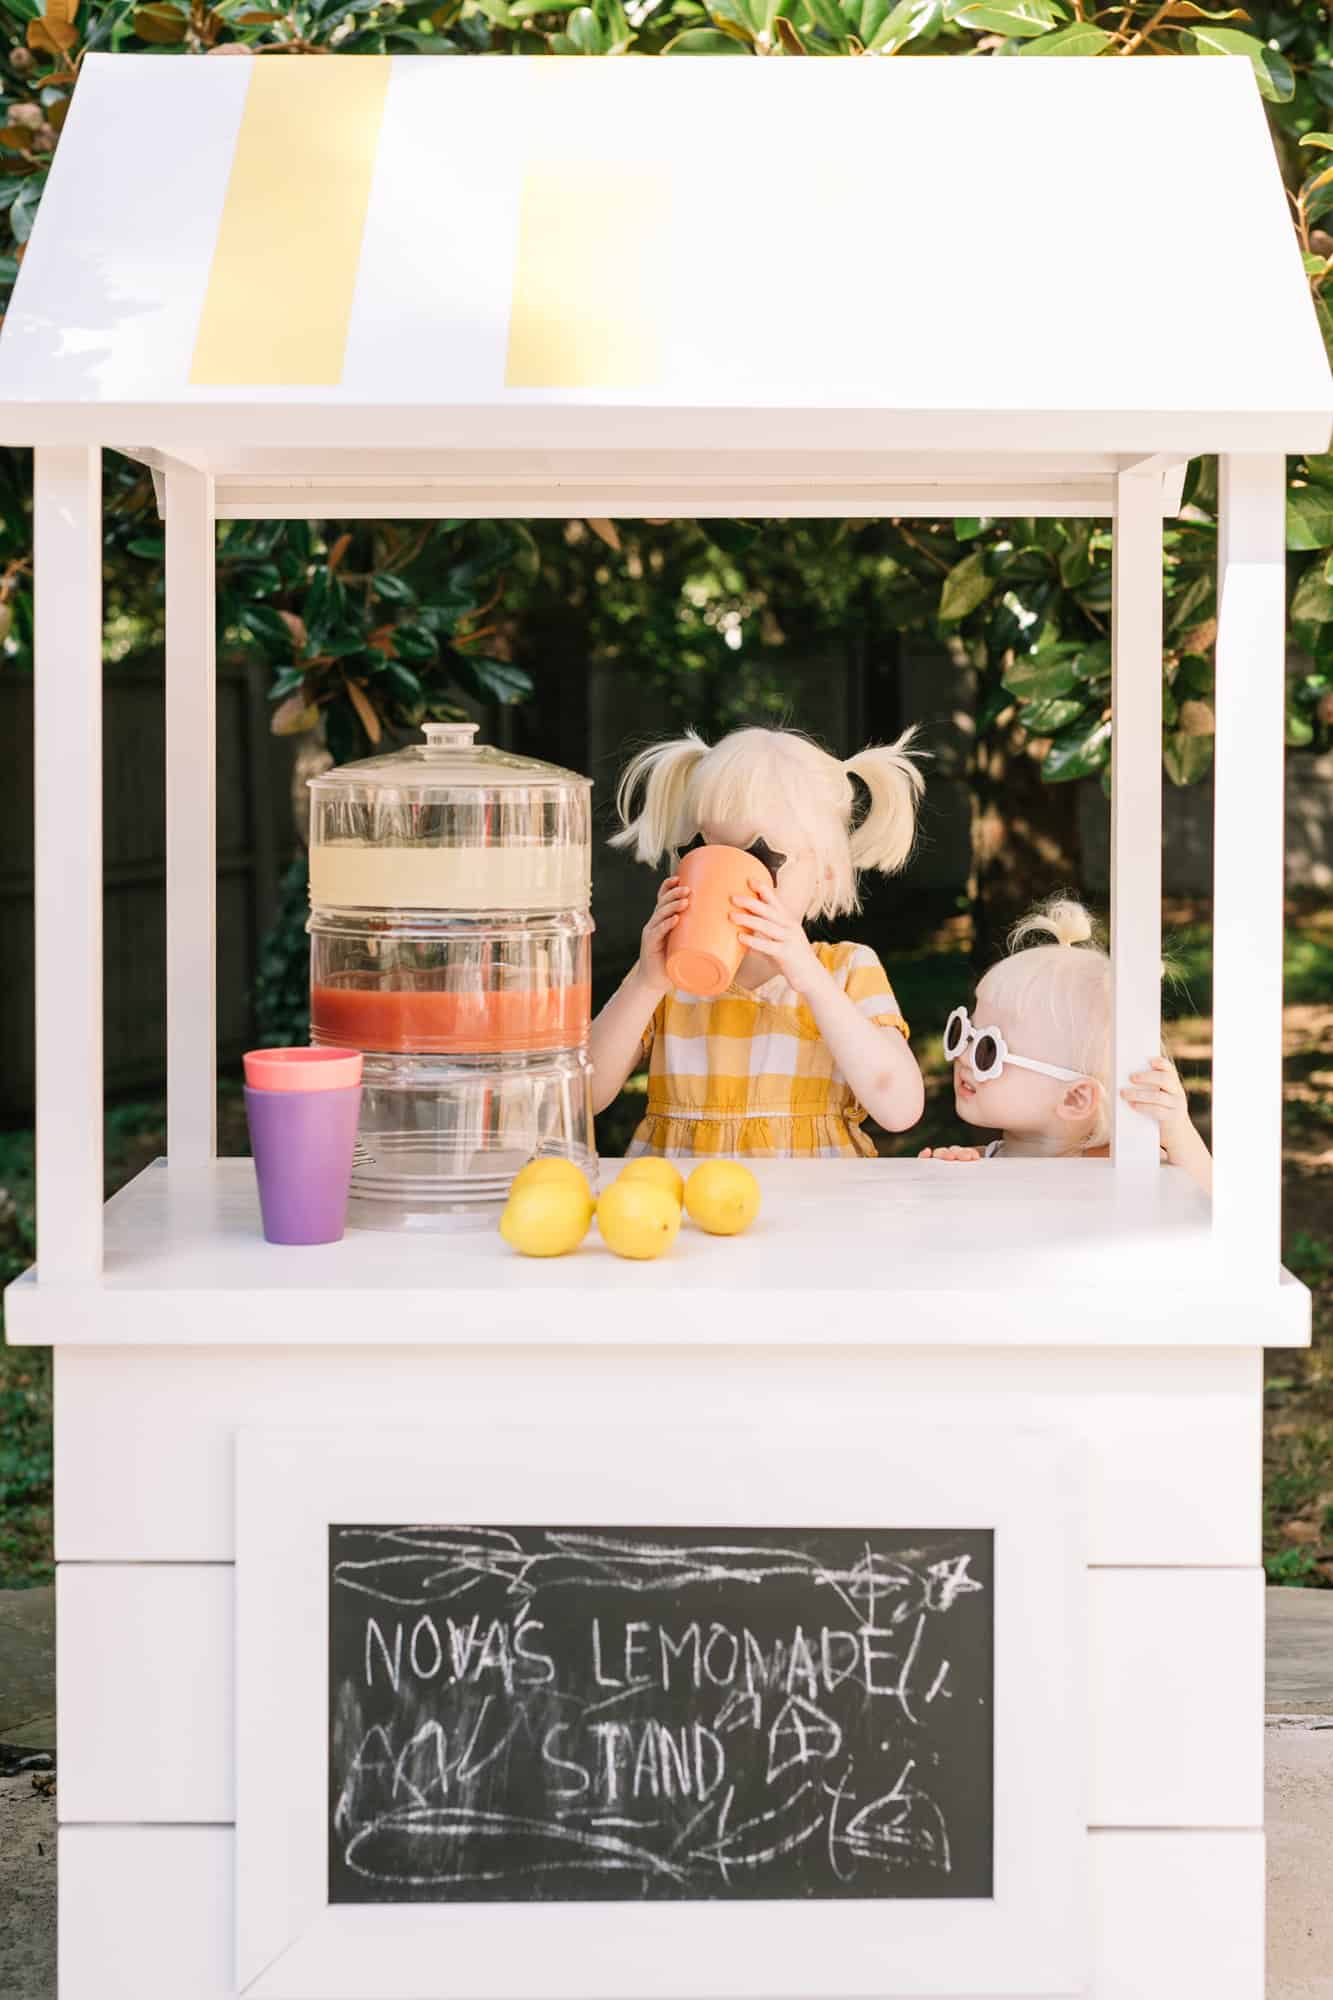
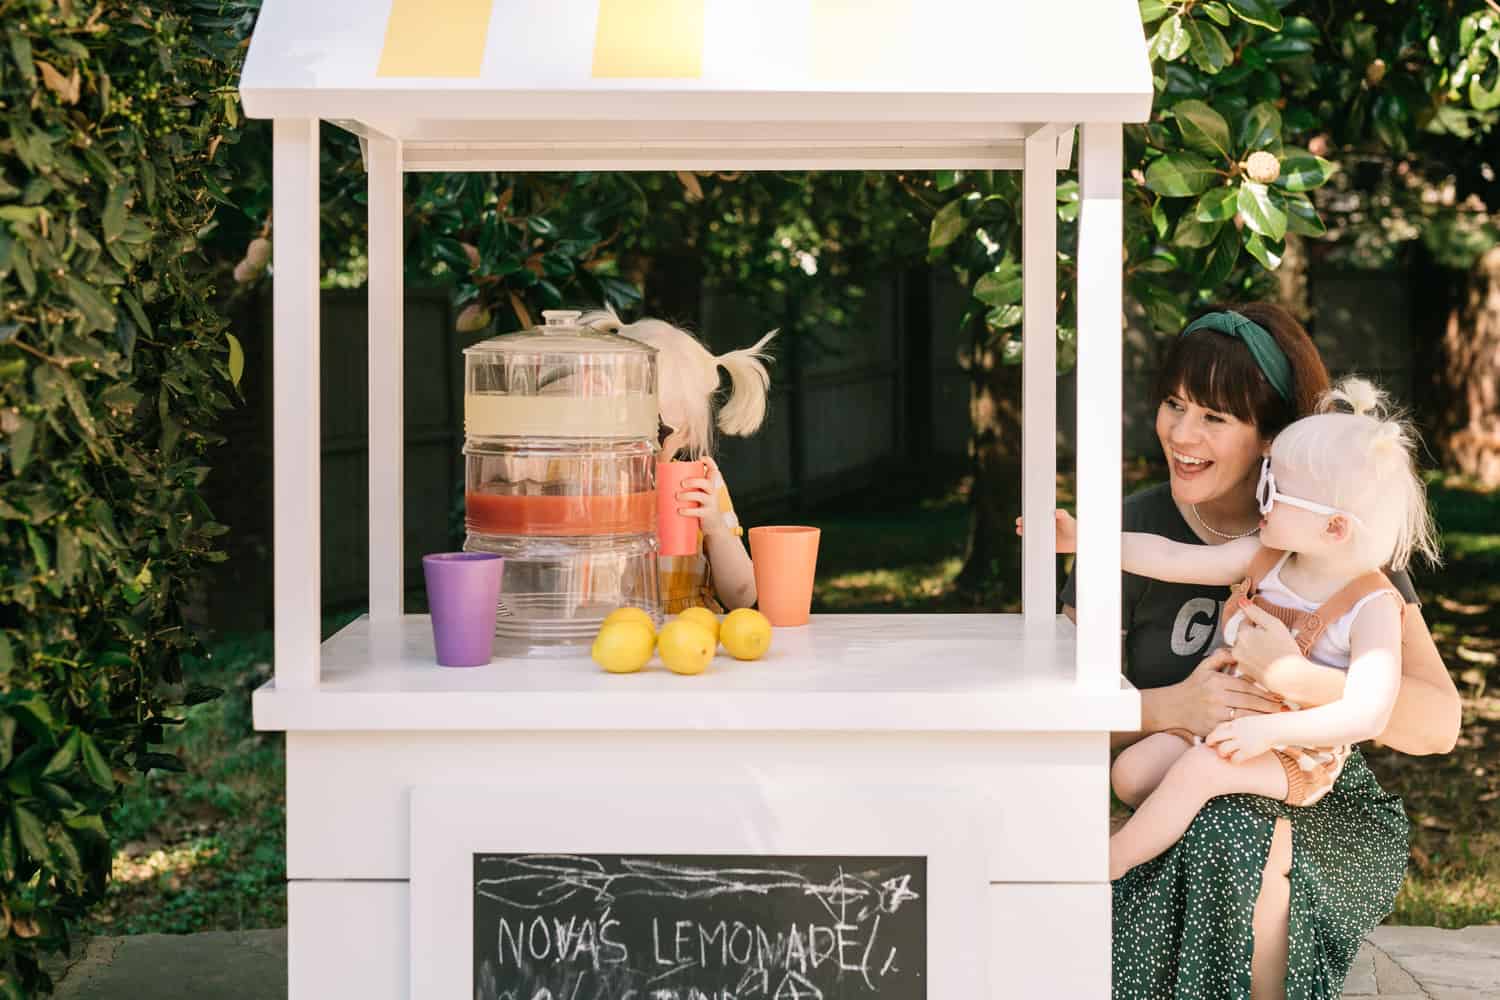
 I’m so, so excited to share today’s DIY with you! We’ve been wanting to make a lemonade stand for what feels like forever, but after we saw one on Daniel Tiger, we knew it was the perfect time to go for it. Nova has brought it up over and over and over to us. Then, one magical day, it appeared in our garage (thank you, Collin) and her 5-year-old-world was complete!
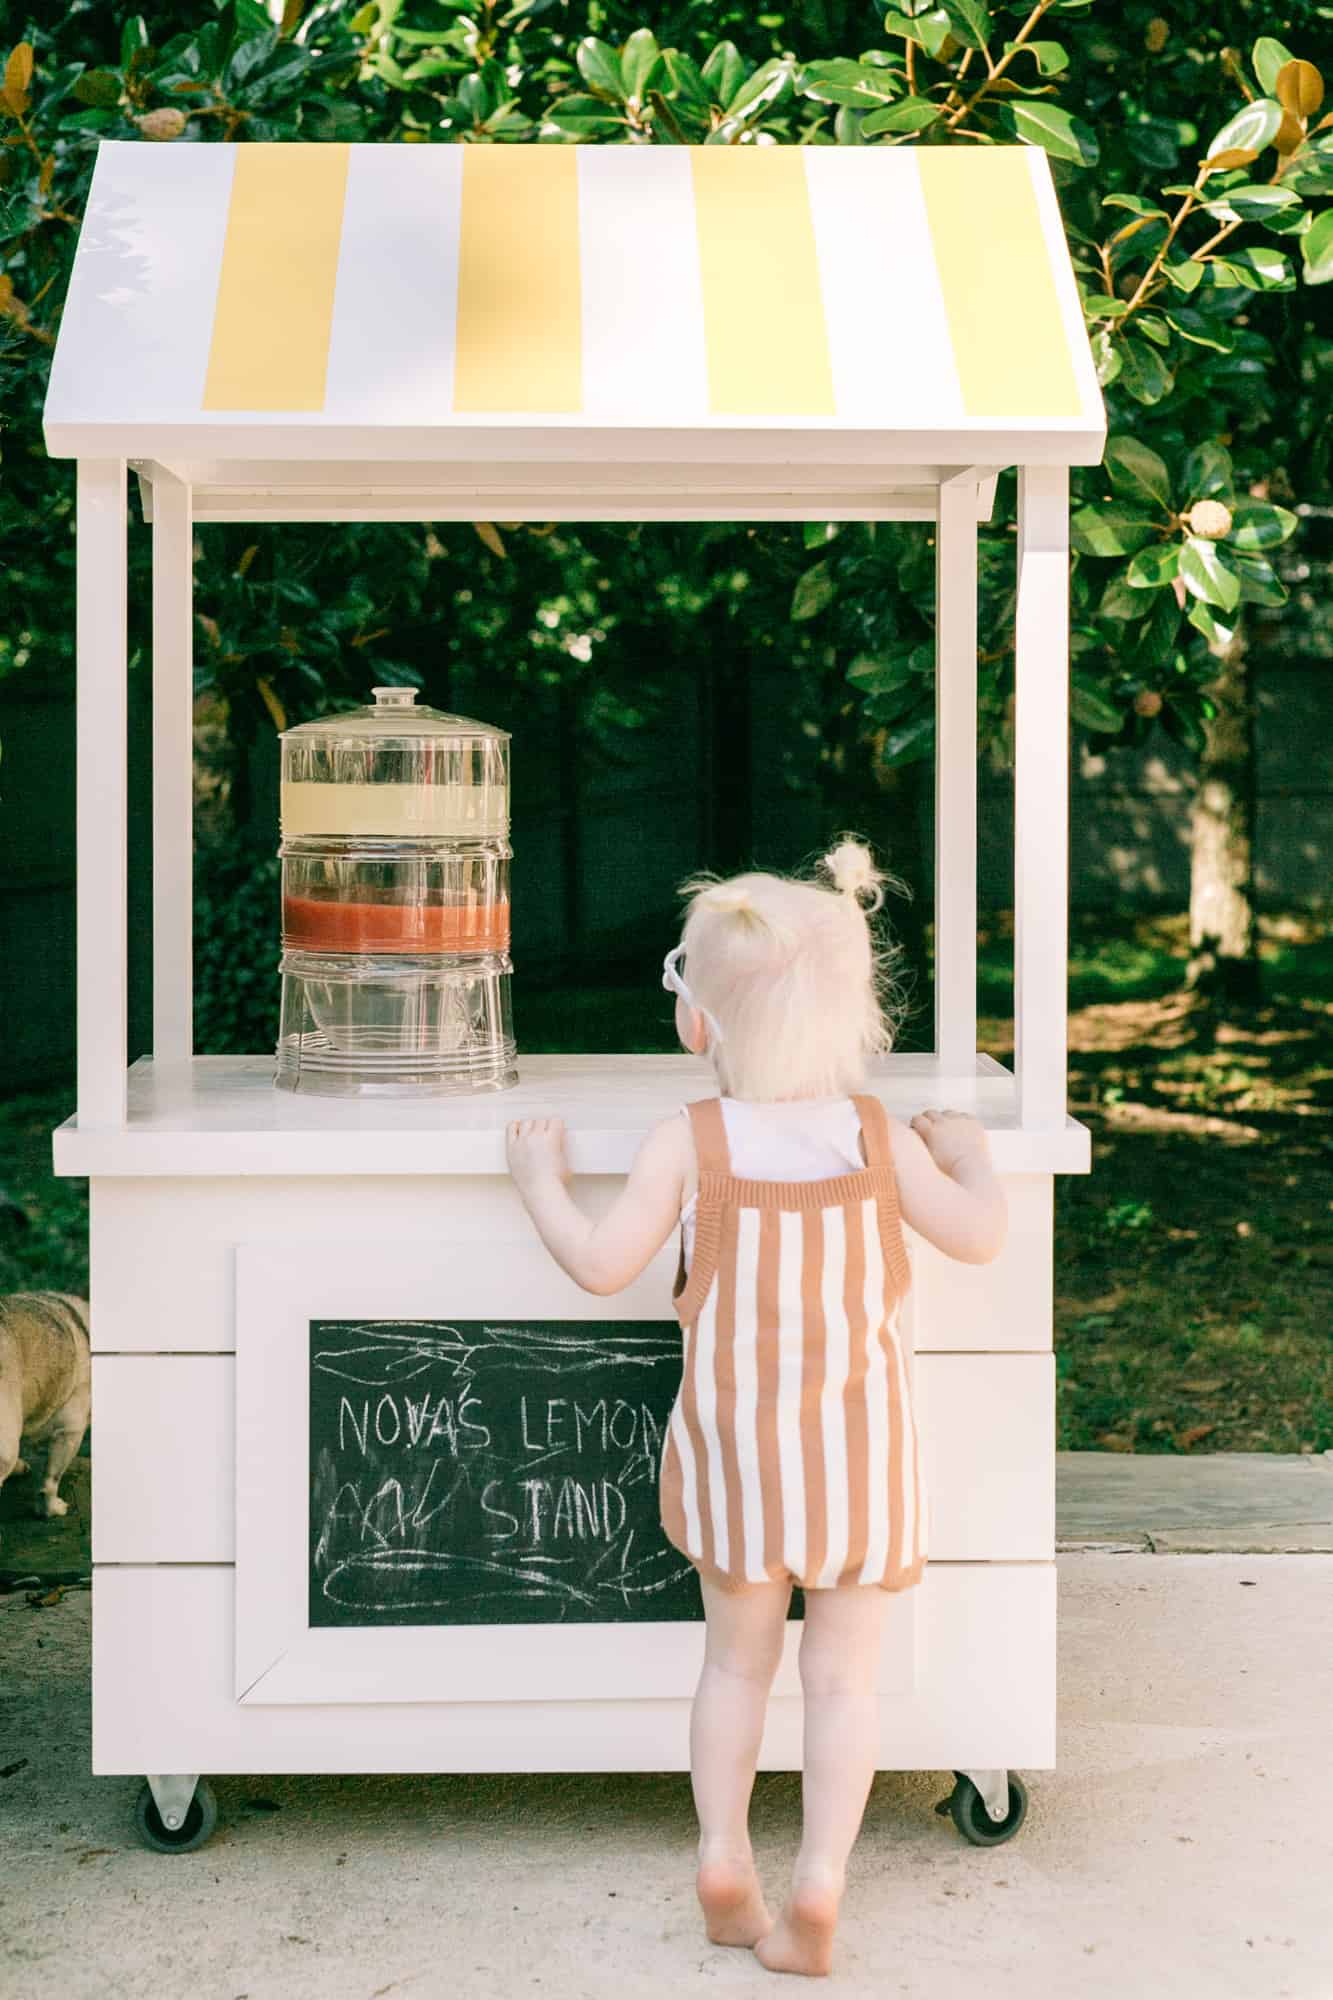
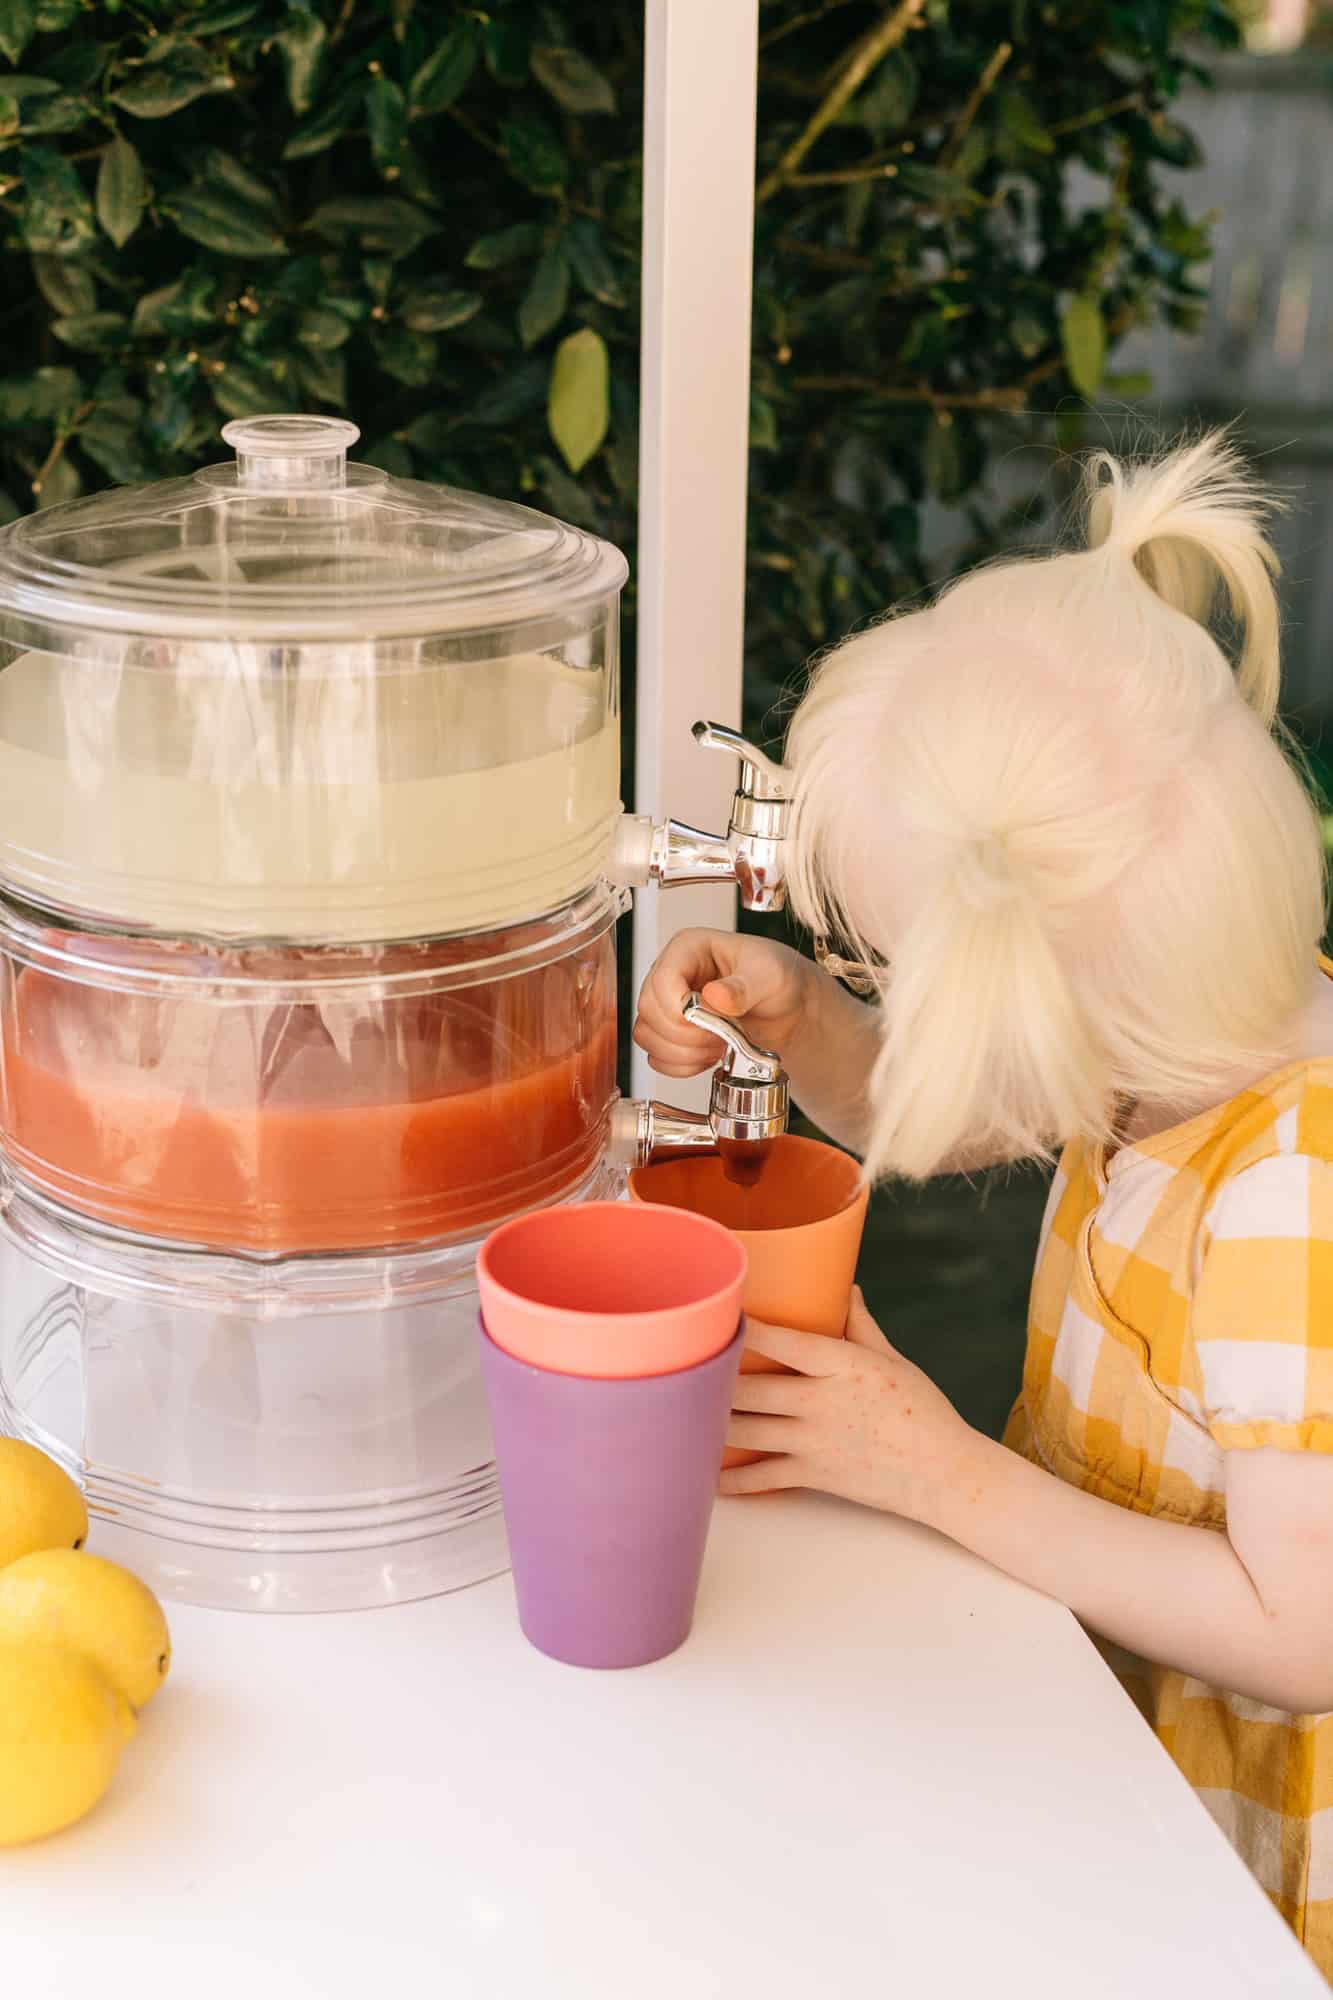
Since we moved, we’ve been rolling it out every weekend. Nova loves serving lemonade. And someday (after COVID) maybe we’ll even get to use it the traditional way as well. But for now it’s all good—we’re her eager customers!
First, I’d love to share some cute photos with you! Then I will pass it over to Collin for the full DIY steps! 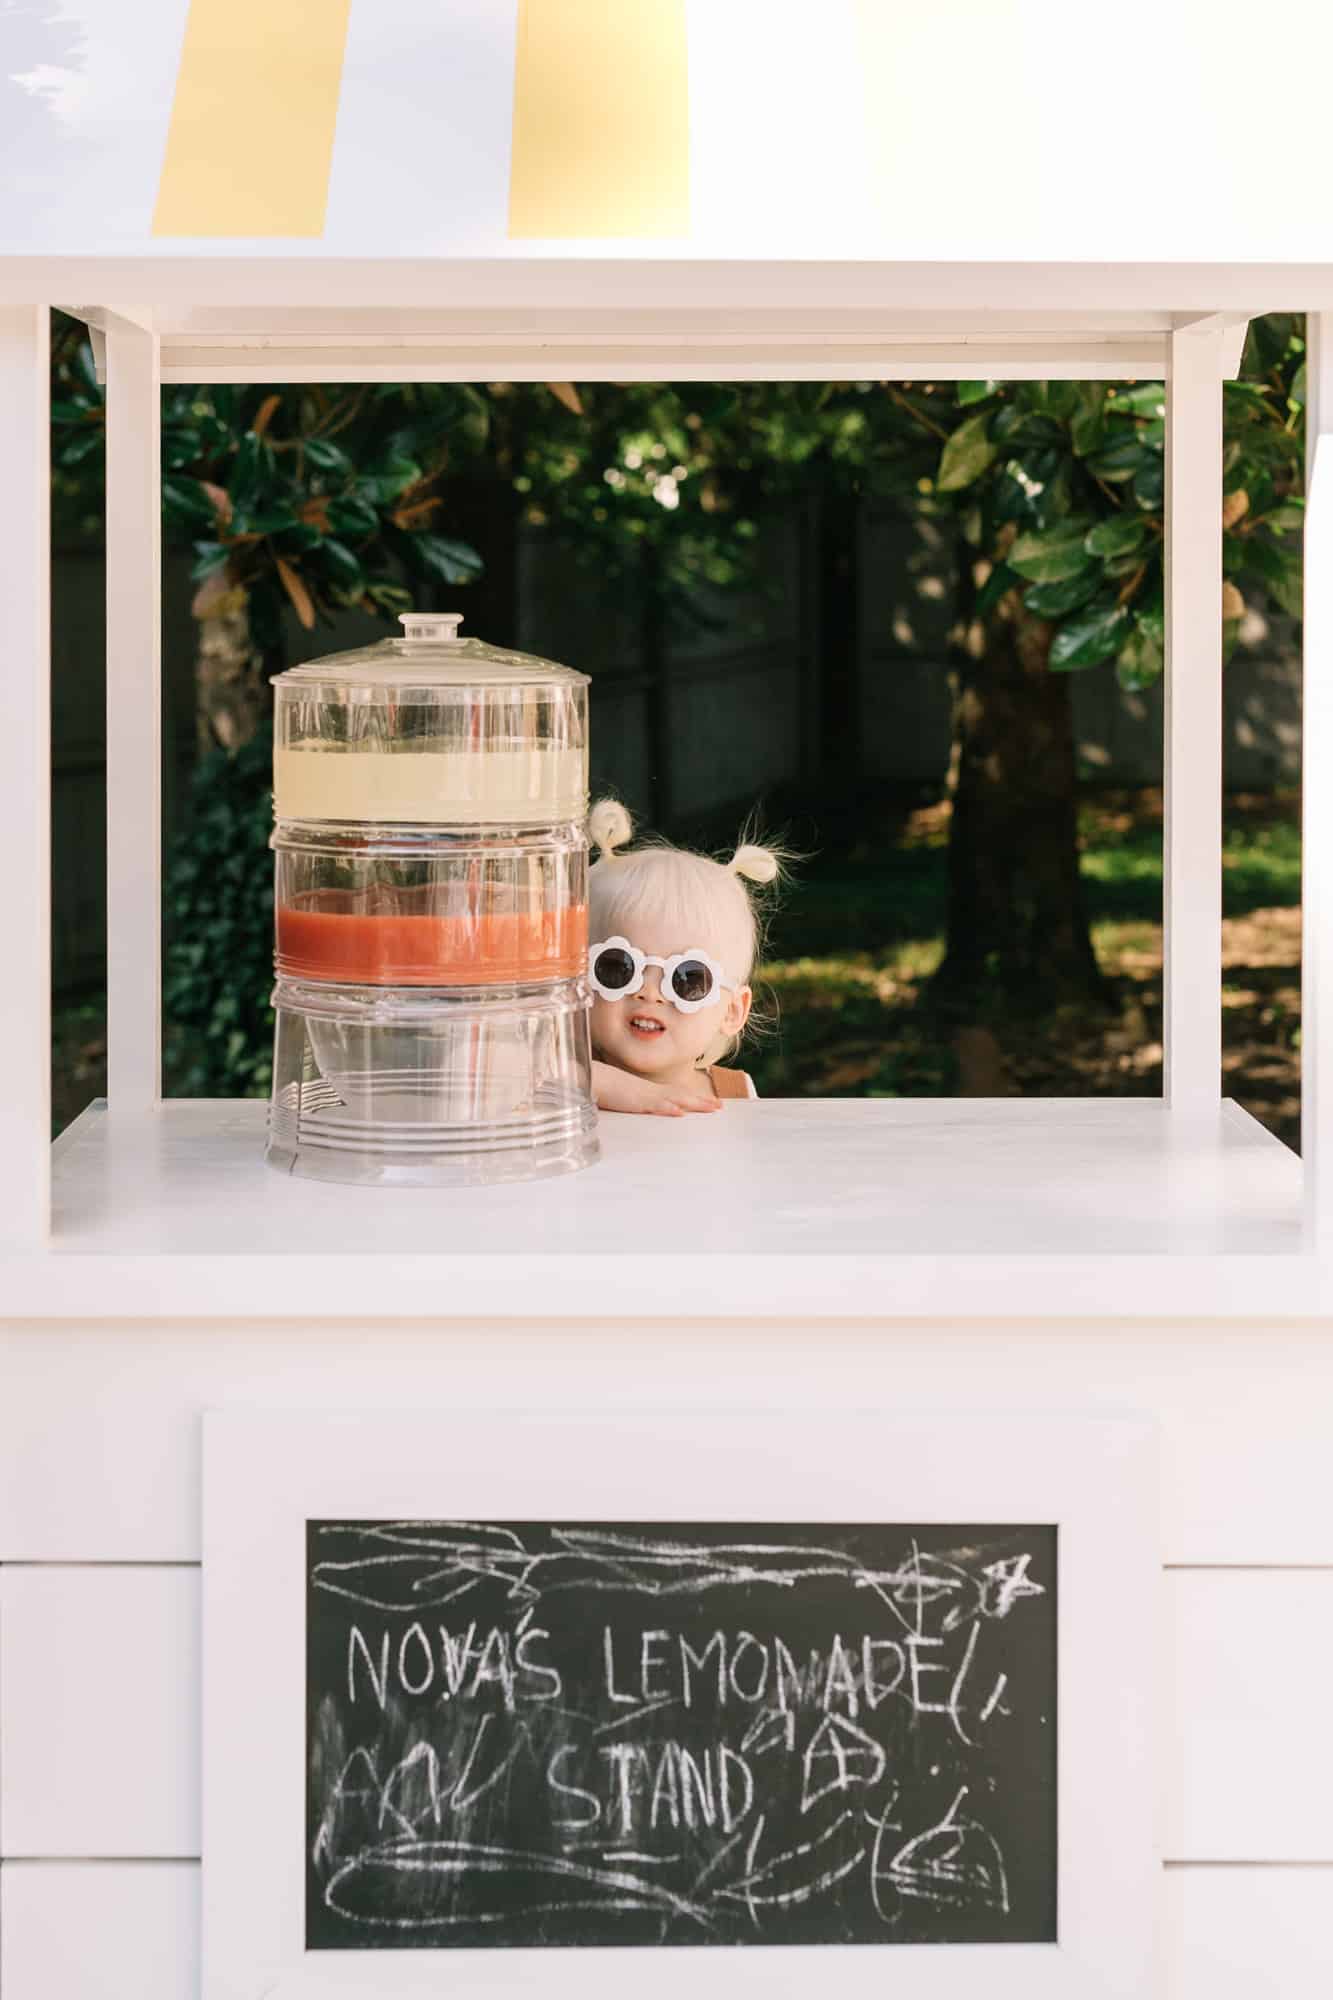


 Cheers, girl!
Supplies:
-four 2′ x 4′ x 8′ boards
-three 3/4″ x 8″ x 8′ primed boards
-six 3/4″ x 4″ x 8′ primed boards
-two 3/4″ x 2′ x 4′ plywood boards
-four 3/4″ x 1.5″ x 8′ primed boards
-nine 1.5″ x 1.5″ x 3′ boards
–two 4″ fixed casters
–two swivel casters
–2″ square head wood screws to use with pocket hole jig
-wood filler
-caulk
-painters tape
-paint brush or mini roller
-exterior white and yellow semigloss paint
Tools:
-miter saw
-circular saw
-jigsaw
-electric drill
-nail gun
-clamps
-speed square
–pocket hole jig
 Start by making the square frame for the base out of your 2″ x 4″ boards. The base frame measurements are 3′ wide by 23.25″ tall x 2′ deep. Cut your 2’x4′ boards to make two identical 23.25″ x 2′ side boxes and then connect the two sides together with 4 boards cut to 33″ as shown above. Now is also a good time to attach the casters to the bottom with some screws. Initially, I was going to only use 2 casters on one side, but ultimately went with 4 to make it easier to roll. The picture above was taken before I changed the plan 🙂
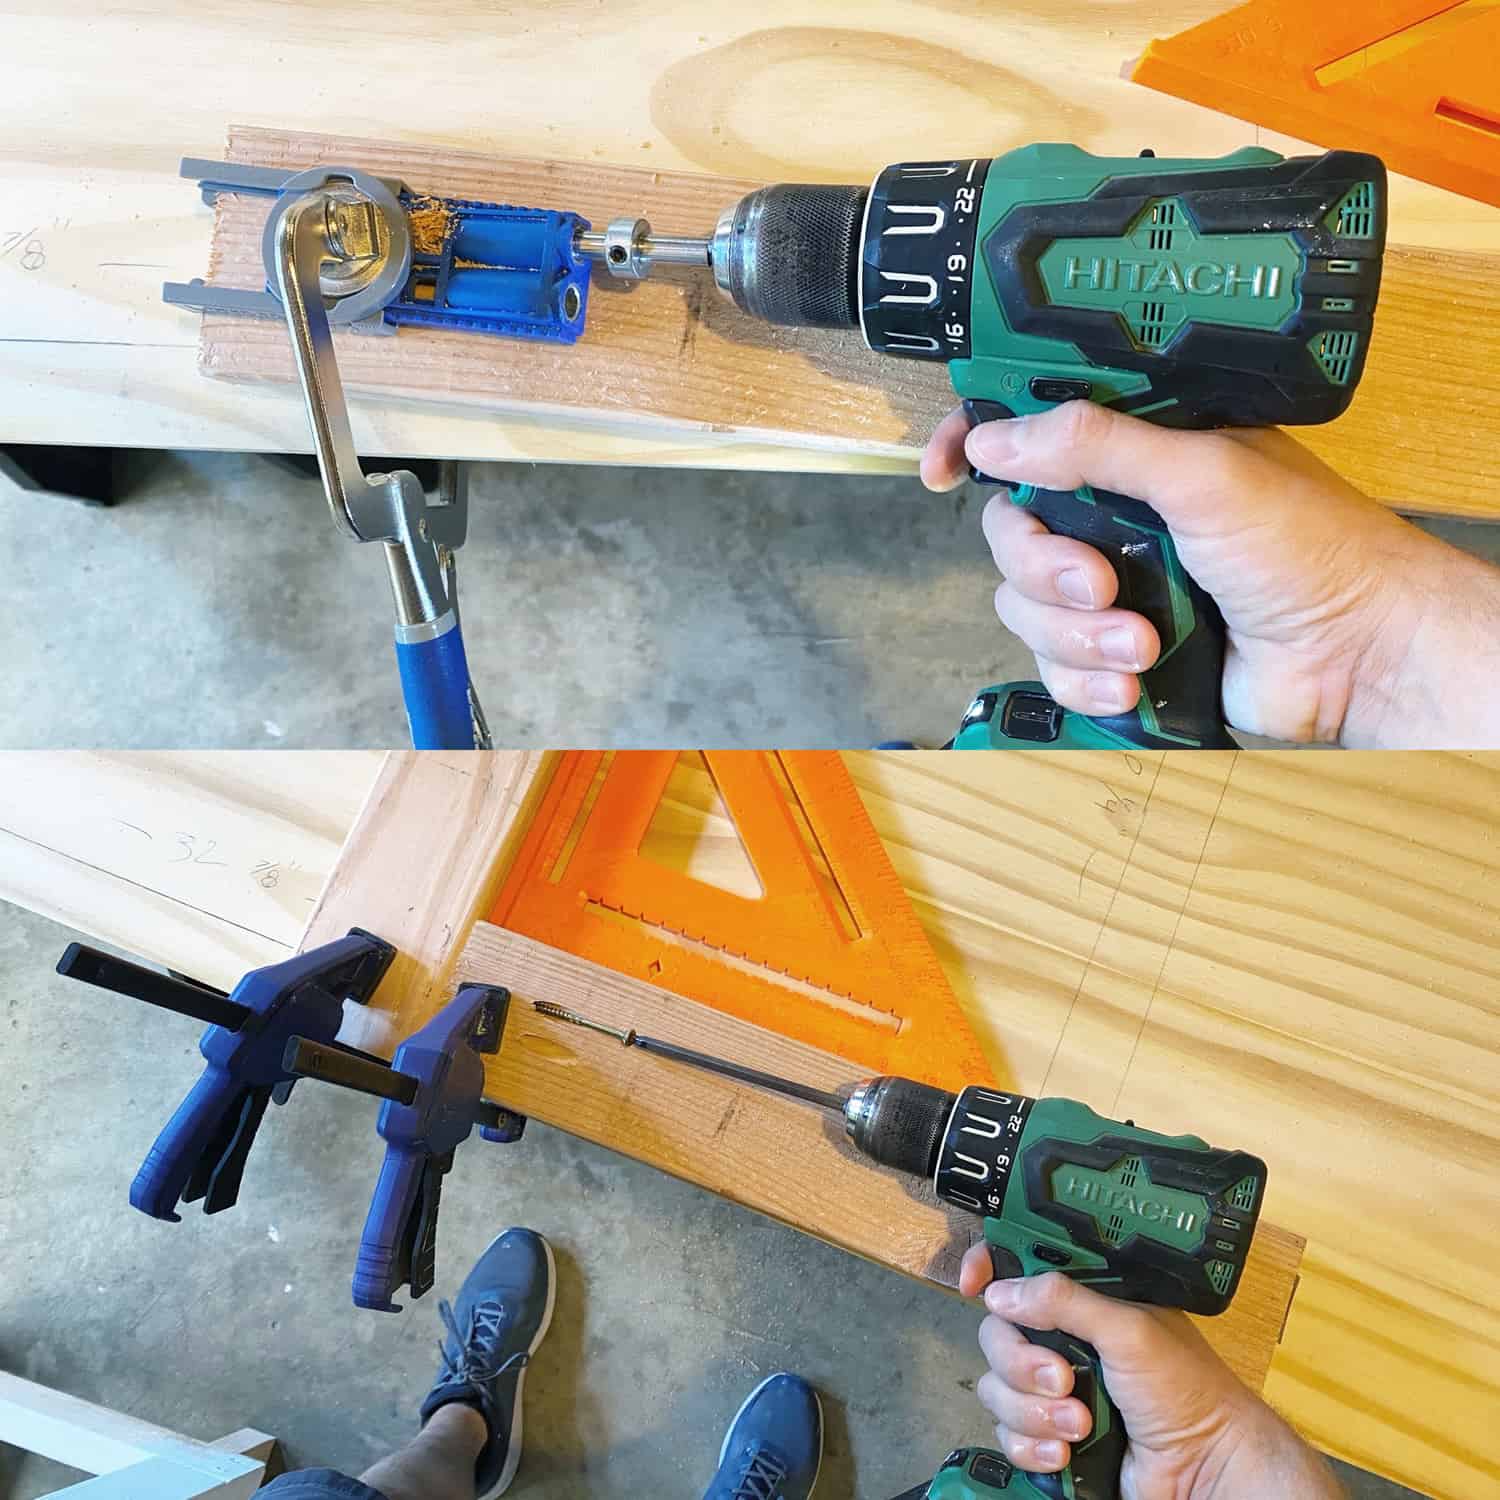 To attach all of the 2″x 4″ boards together, use wood glue as well as a pocket hole jig and wood screws (the pocket hole jig will come with an extra long square driver bit as shown above). It’s a good idea to use some clamps to hold the pieces of wood in place while you screw them together, as well as a square to make sure everything is as a perfect right angle.
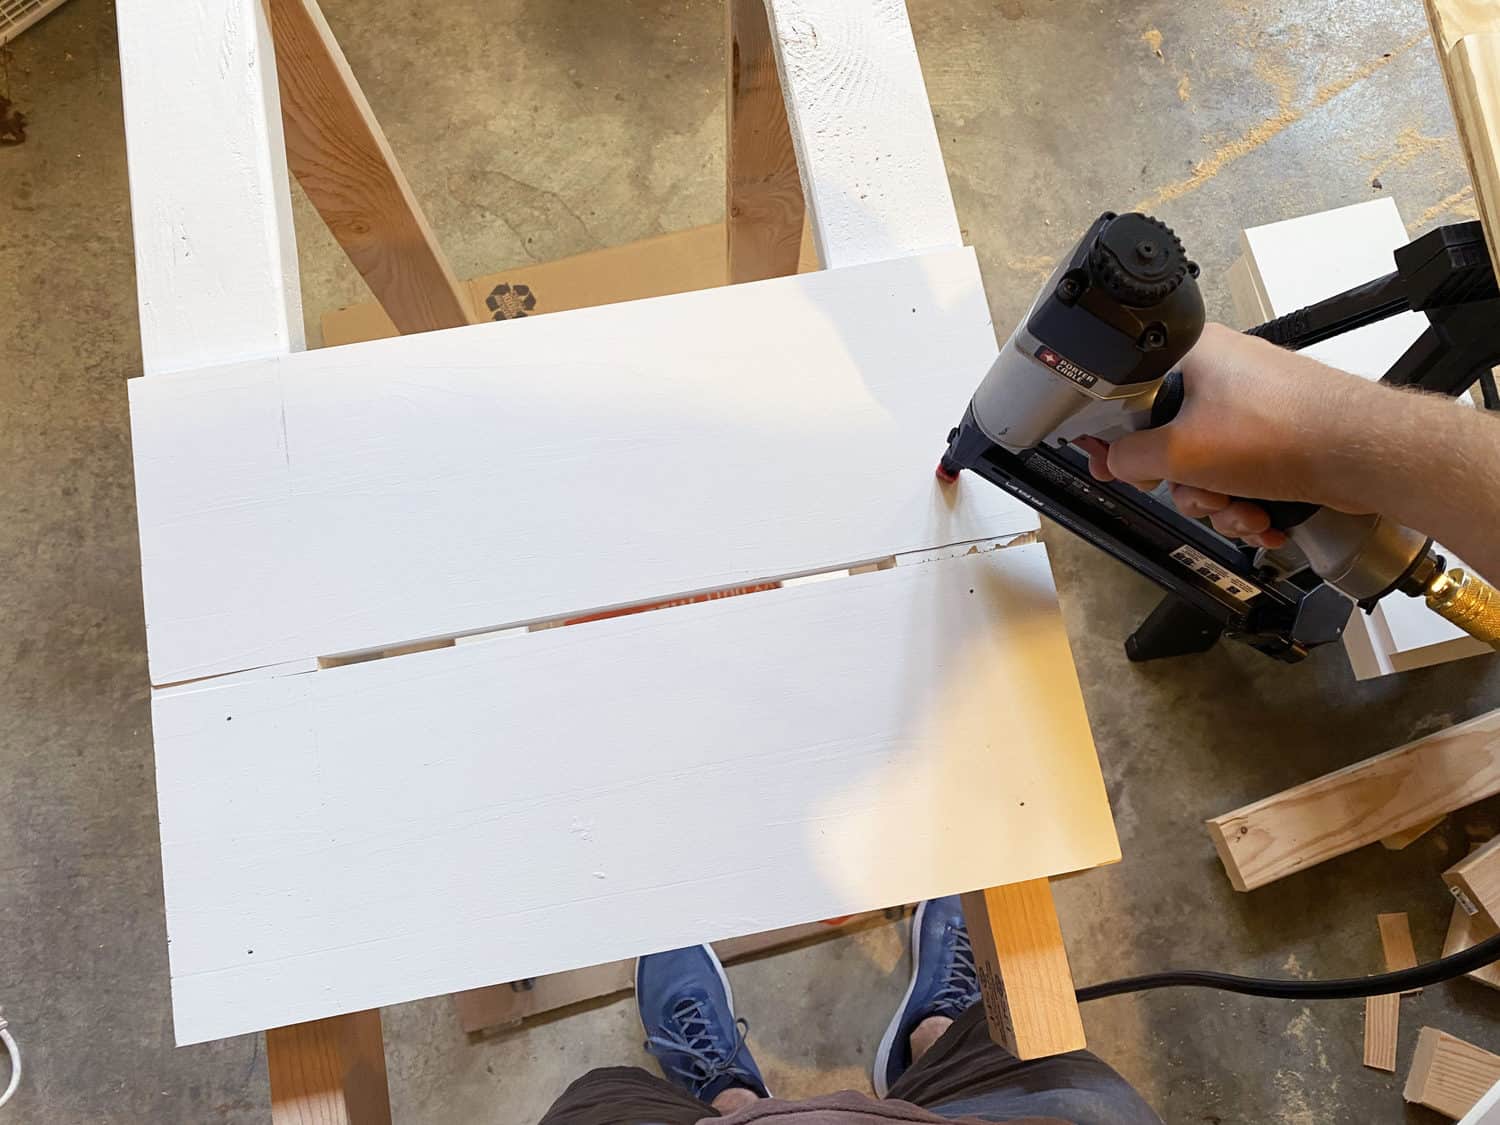 Next, cut your 3/4″ x 8″ x 8′ primed boards into six 2′ side boards and three 37.5″ front boards. Attach the side boards first with a 1/2″ gap between each board and then attach the front boards the same way so the front boards cover up the cut edge of the side boards. Attach pieces with wood glue and a nail gun. Pro tip: cut some small 1/2″ wide pieces of wood from some scrap wood to use as a guide for the 1/2″ spacing of these boards!
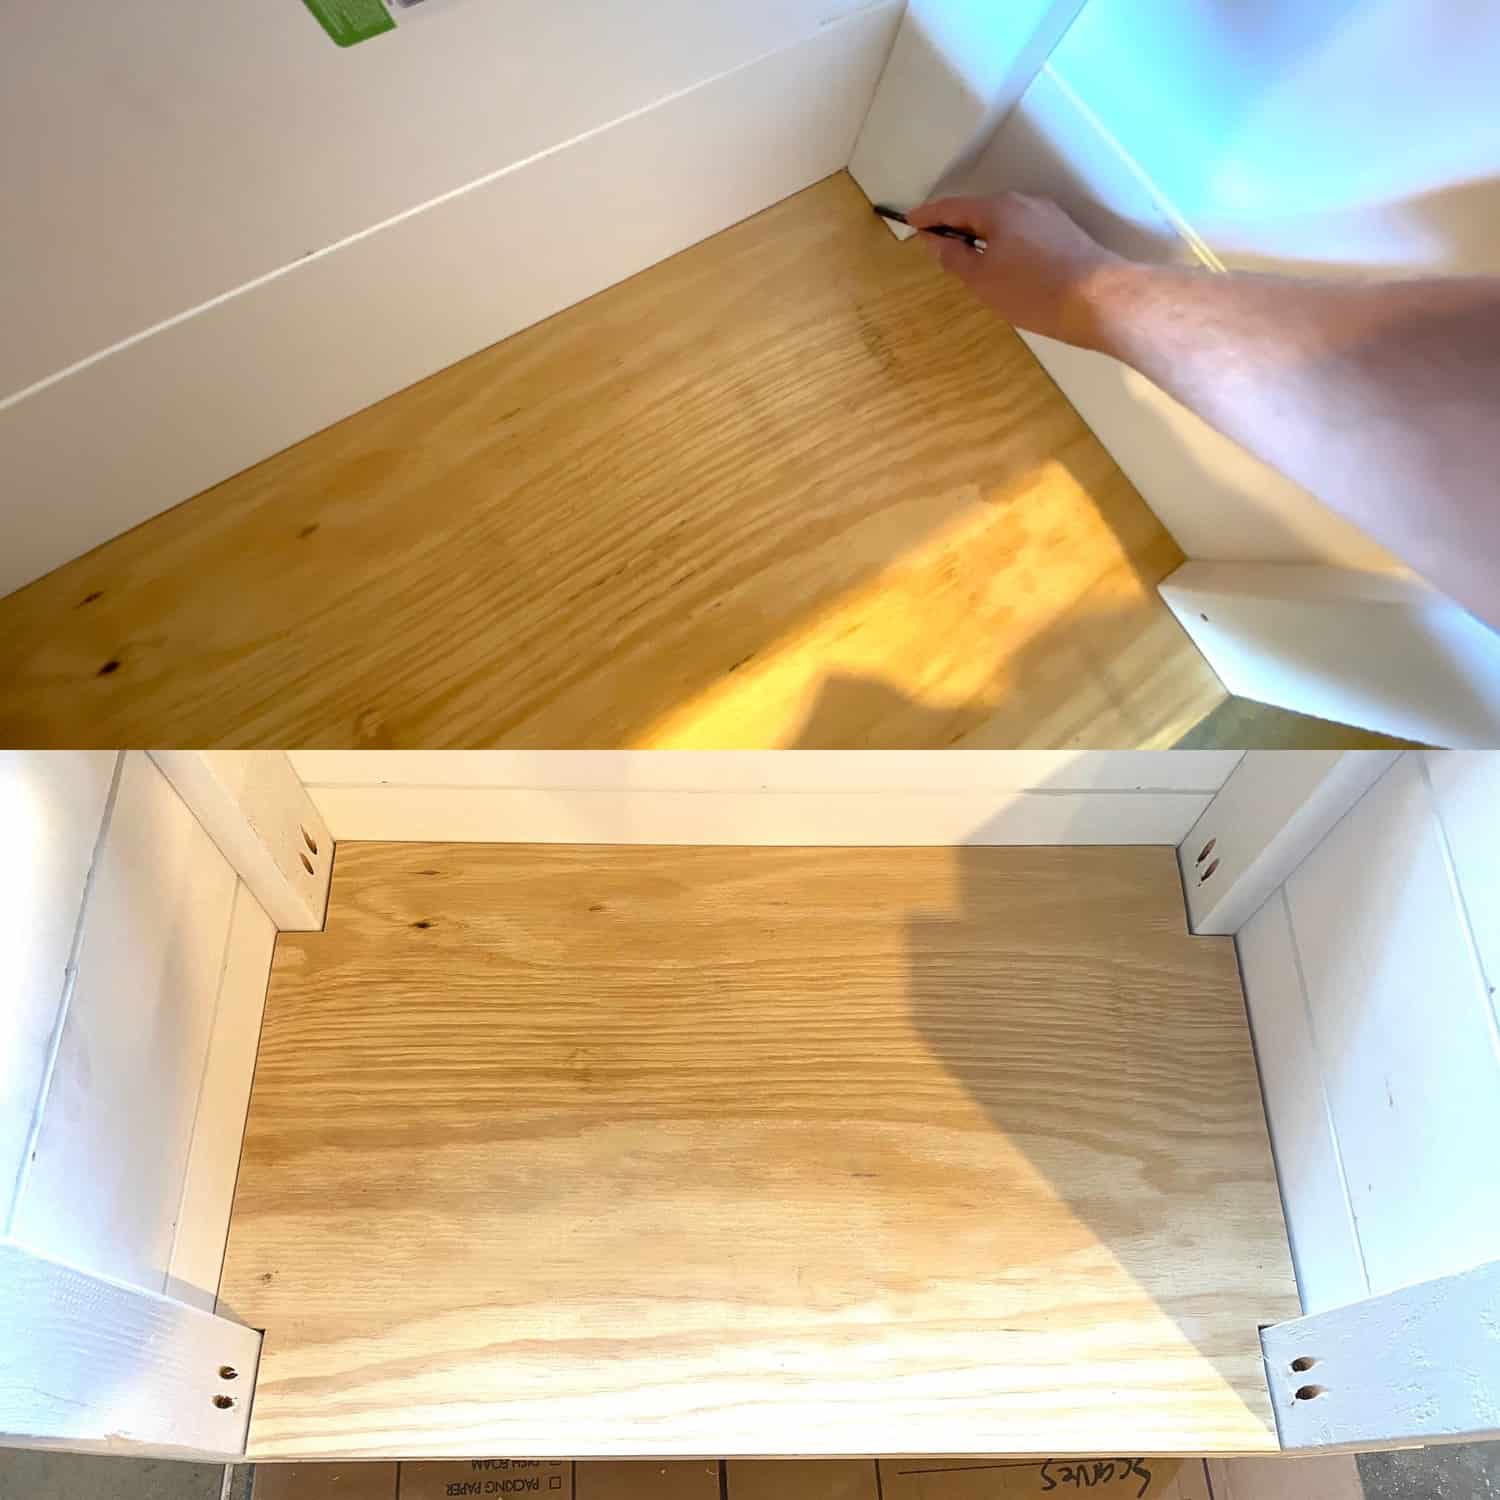
Now that the base of the stand is mostly done, flip it upside down and place it on one of your 3/4″ x 2′ x 4′ plywood boards and trace the inside of the base onto the plywood as shown above. Now cut out the shape with a jigsaw and lay it into the bottom of the base and attach with glue and nail gun.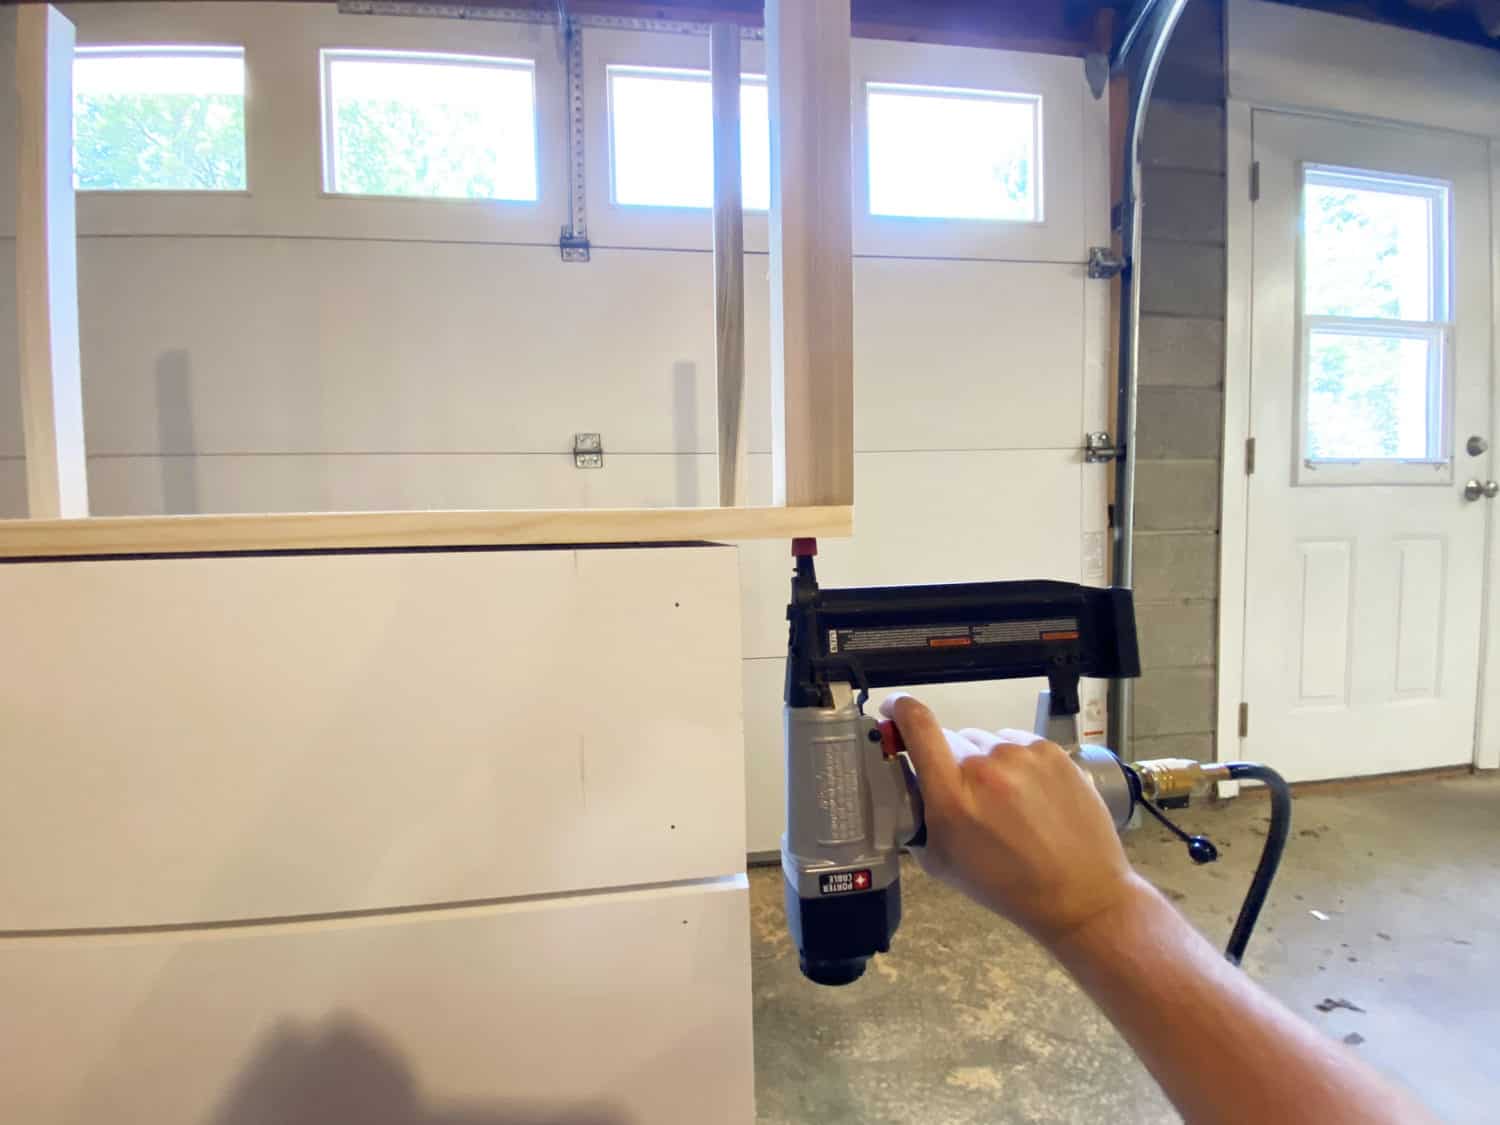 Cut the other piece of plywood to 37.5″ x 24.75″ for the table top of the stand. Next, cut four of your 1.5″ x 1.5″ x 3′ boards to 2′ to make the posts for the roof and attach them in all 4 corners. To do this, hang the piece of plywood off the edge of a table. Hold one of the posts boards in place on the corner and attach with wood glue and a few nails with the nail gun. Repeat with the other 3 posts and then flip the whole thing upside down and put 1 screw in to each post for stability.

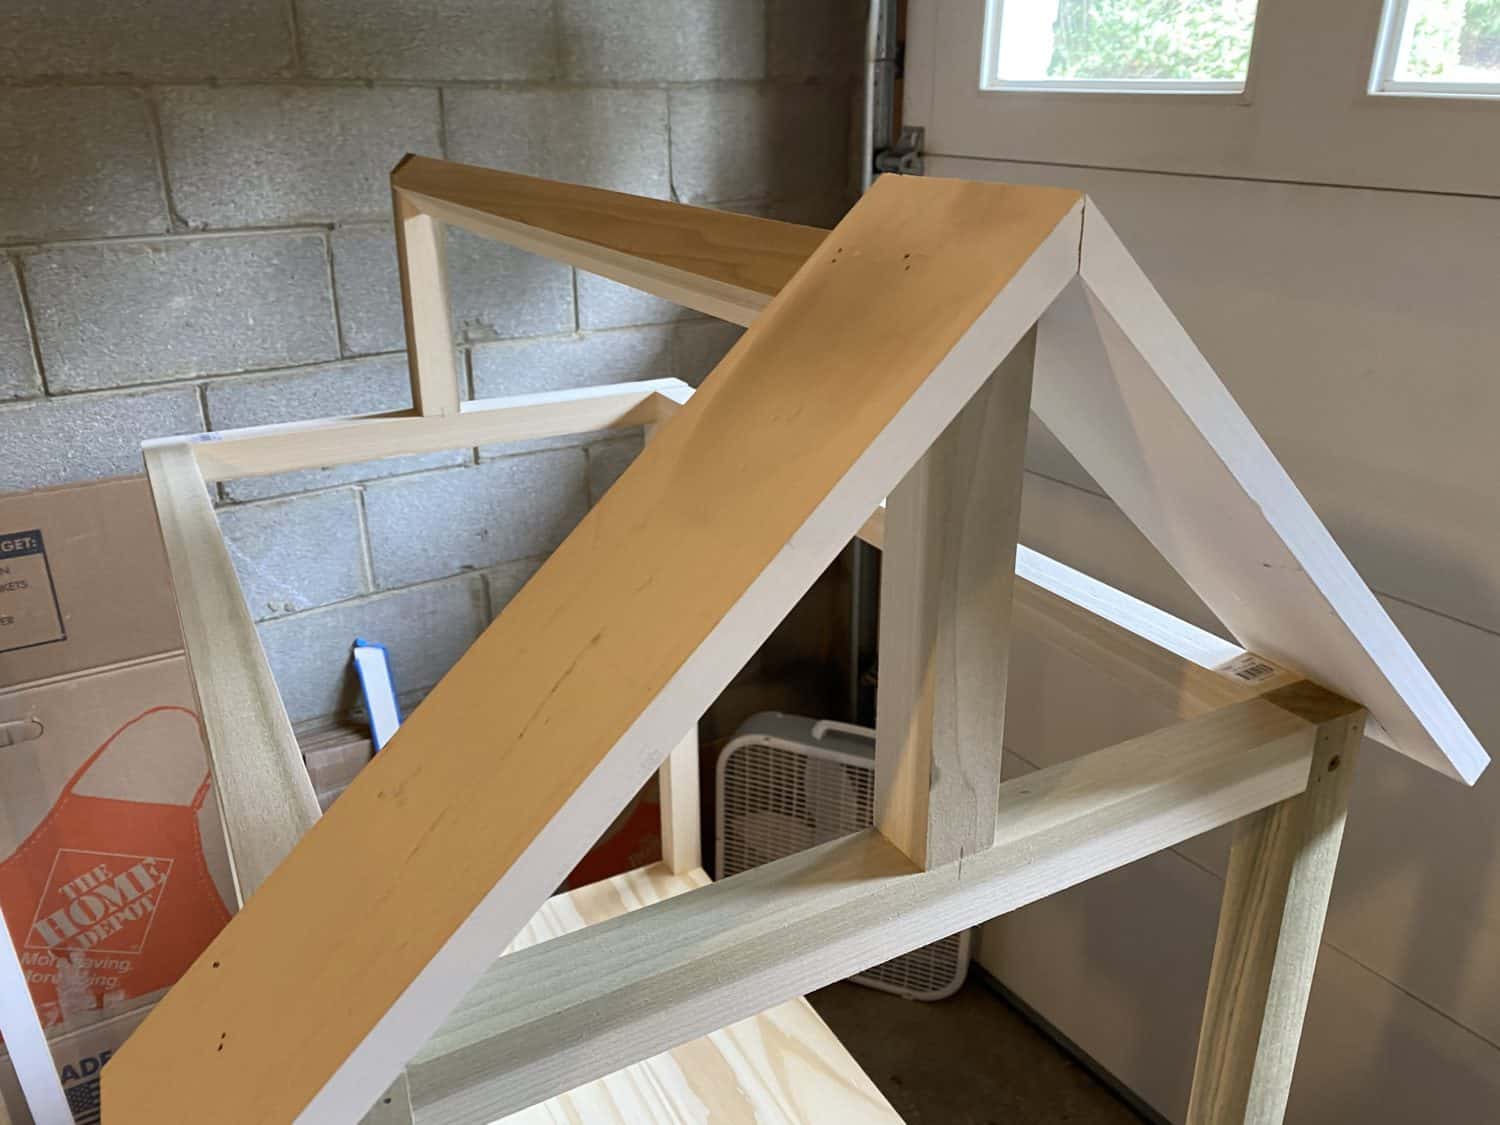
Place the table top with the 4 posts on top of the base. Making sure it’s evenly spaced, attach to base with wood glue and nail gun. Next, to make the roof frame, cut two 1.5″ boards to 34.5″ and two to 21.75″ to attach in between the 4 posts. Now cut two 8″ pieces with two 45º cuts at the top to make an arrow and attach them in the middle of the two sides of the roof frame. Cut one more 1.5″ board to 34.5″ and attach at an angle in between the two arrow point pieces as shown above. Pro tip: I like to use glue and a nail gun to attach all of these pieces together to get it into its shape and then go back through with some wood screws to give it the stability it needs.
Next, cut your 3/4″ x 4″ x 8′ primed boards into sixteen 18″ pieces with a 45º cut at the top end. Attach the boards to the roof frame one at a time, lining up the 45º cuts at the top. Attach with wood glue and nail gun.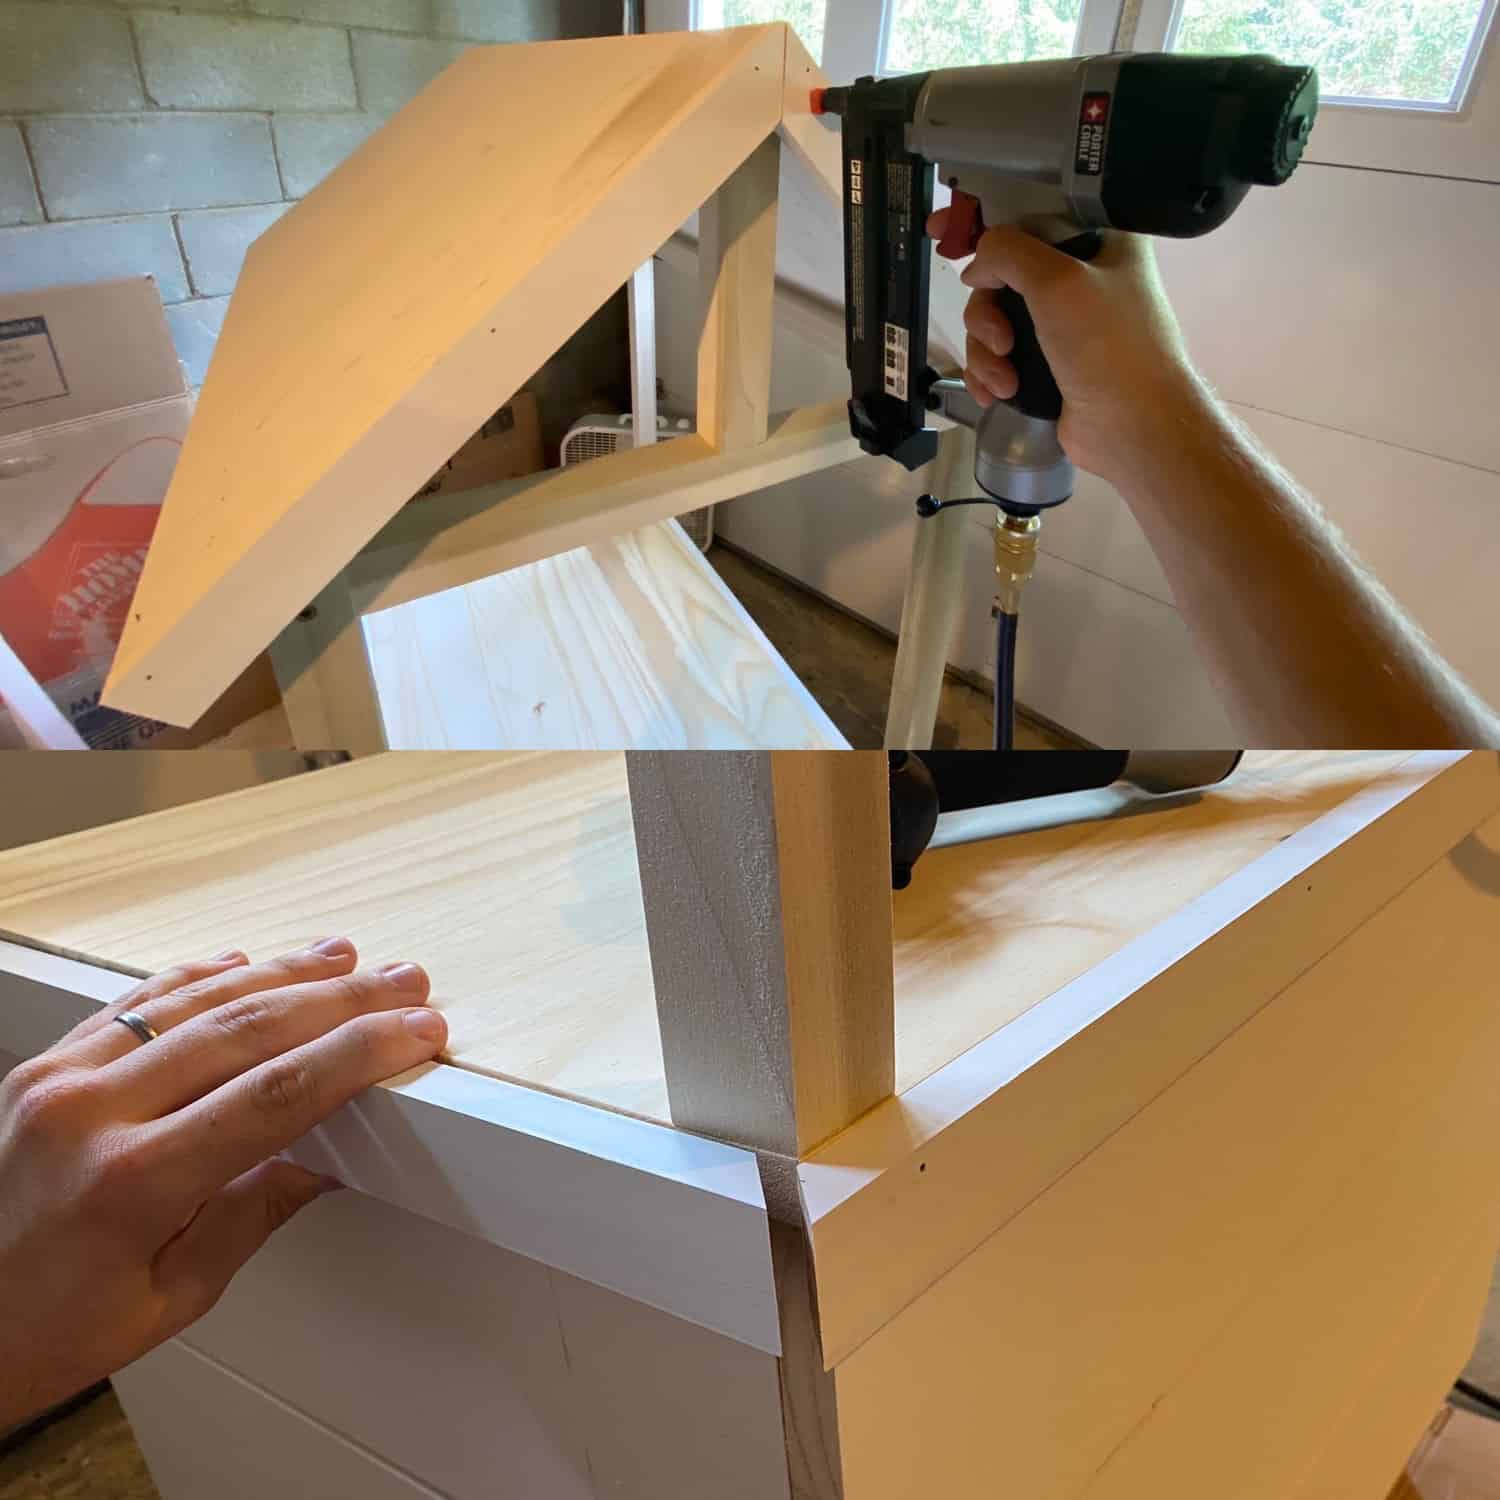 Lastly, cut your 3/4″ x 1.5″ x 8′ primed boards to trim out the roof and the table top of the base. Attach with wood glue and nail gun as shown above! Fill any gaps/cracks/nail holes with wood filler or caulk and it’s ready to paint! To paint the roof, give the whole roof a coat of white and then tape off every other board and paint yellow.
Thank you so much for reading! If you make one of these, we’d LOVE for you to tag us on IG. Also, I’m pretty sure I missed a good opportunity for making lemons into lemonade, a 2020 metaphor … next time! 🙂 xx- Elsie
Credits//Author: Elsie Larson. Project: Collin DuPree. Photography: Amber Kelly. Photos edited with A Color Story Desktop. Special thanks to our tiny cute lemonade models!!
from A Beautiful Mess https://ift.tt/31t5hHn
via IFTTT