 Confession: I own an embarrassing amount of sprinkles. It’s a collection that grows and grows (as I love to bake), but I somehow don’t manage to use the same colors very often. Ha. Today, I’m sharing a super simple idea for storing small pantry items, like an embarrassingly large sprinkle collection.
This project is sponsored by Oui by Yoplait. You’ve probably seen their French-style yogurt in stores before—it’s the one that comes in a cute glass pot. Right now, they have a limited edition Heritage Collection where their delicious French-style yogurt comes in a crafted line of three unique, designed glass pots. As part of their Oui Heritage Workshop series taking place this summer, I’m going to share how to make your own reusable beeswax food wraps to add to the tops of the glass pots so you can store small amounts of leftovers or other pantry items inside.
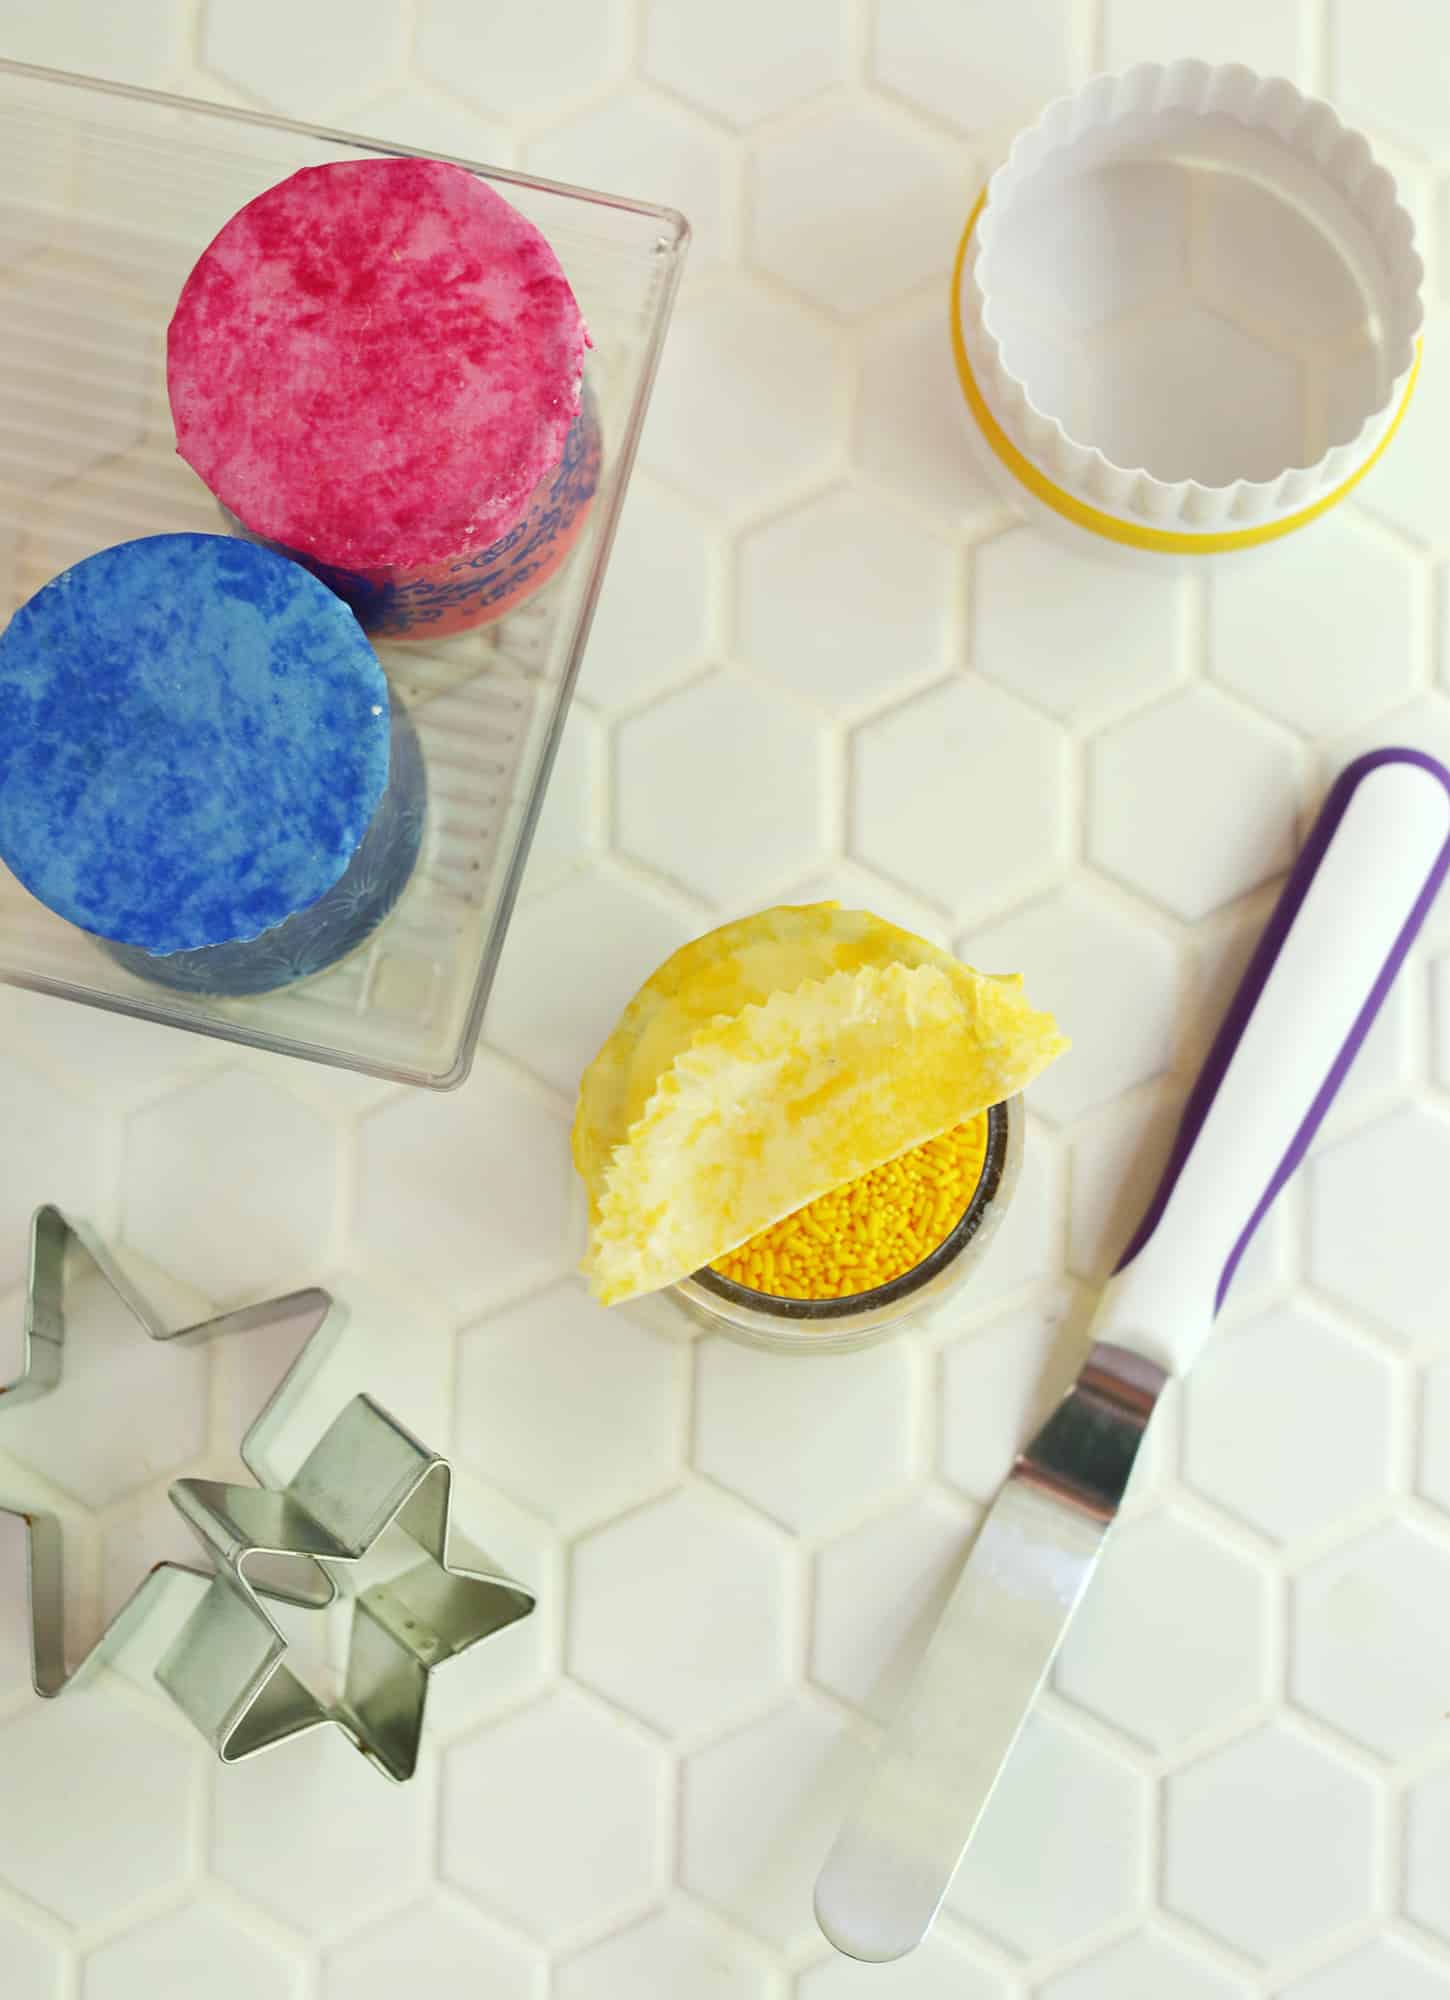
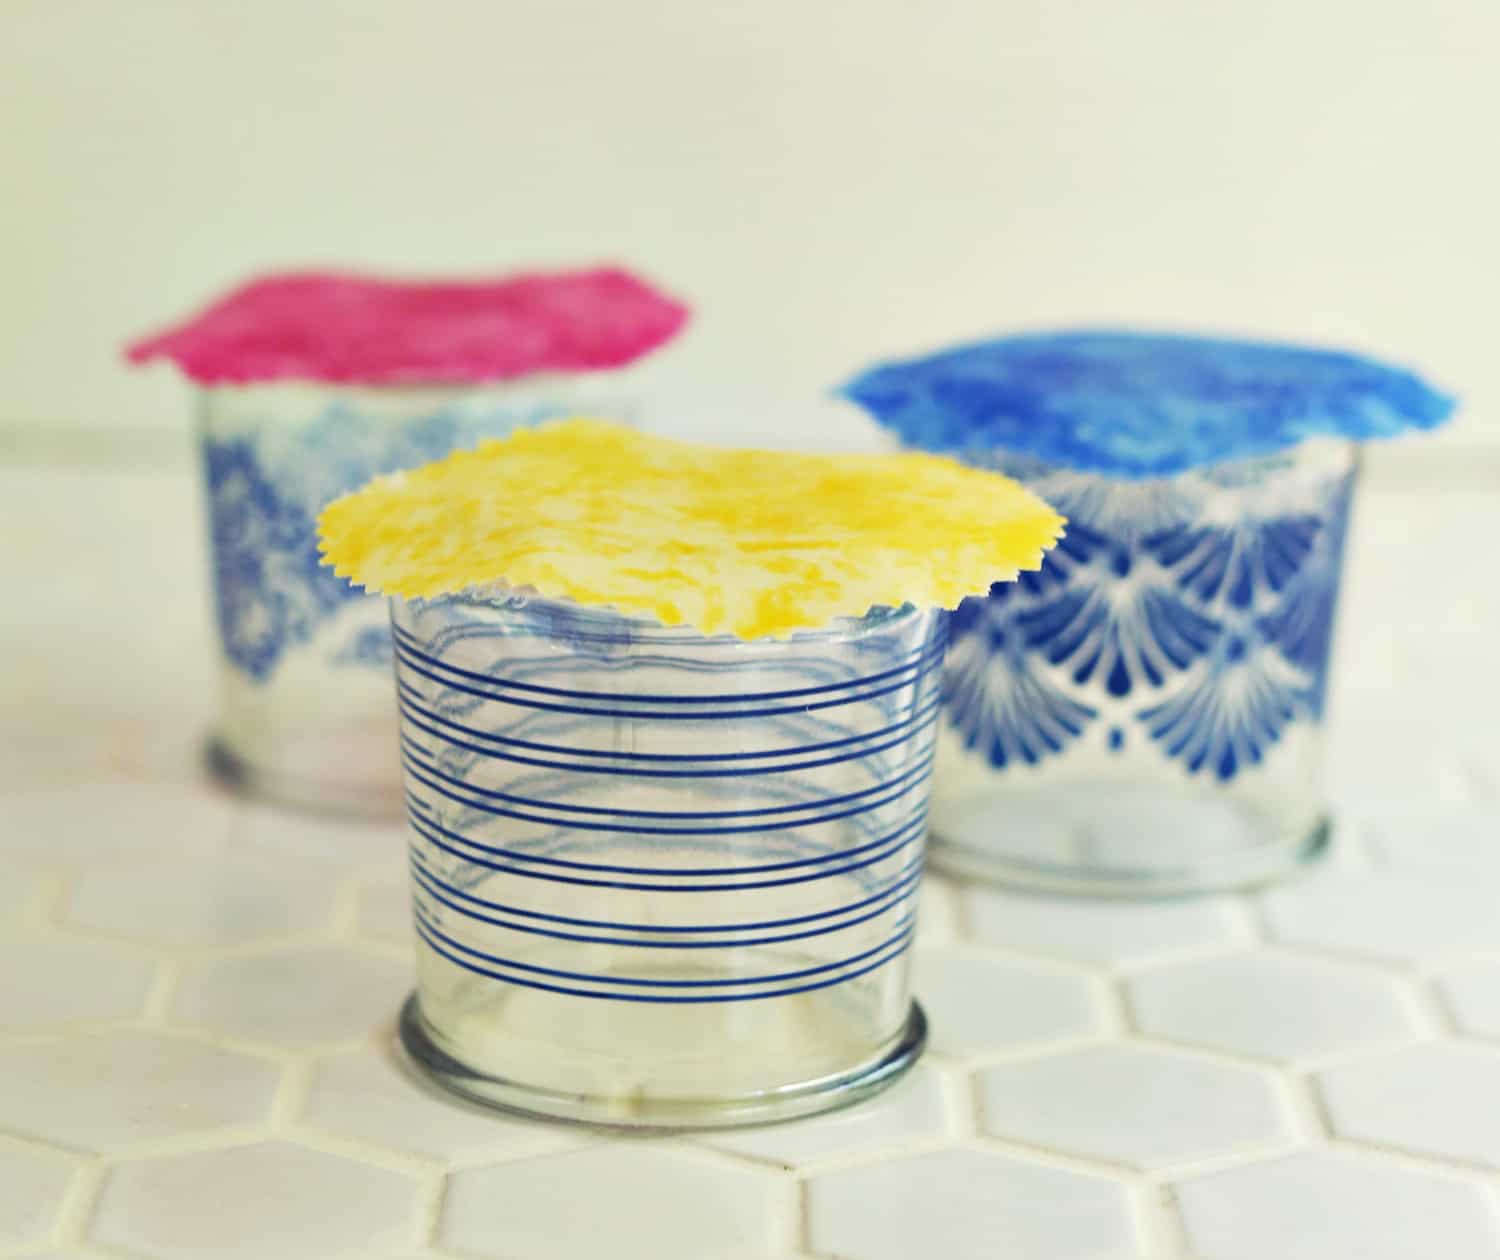
 Here’s what the beeswax wrap toppers look like once completed. They are easy to make and you could customize them to lots of different colors or patterns depending on your fabric choice. I’ll show how to make these in this quick little video:
Easy, right? But if you can’t watch the video right now, here is how to make these beeswax wrap toppers in photos and text too:
 Supplies:
Your favorite Oui by Yoplait Heritage Collection glass pot designs (plus one foil lid I used as the template)
cotton fabric (organic is preferred)
jojoba oil
powdered pine resin
organic beeswax pellets
parchment paper
pinking shears
paint brush
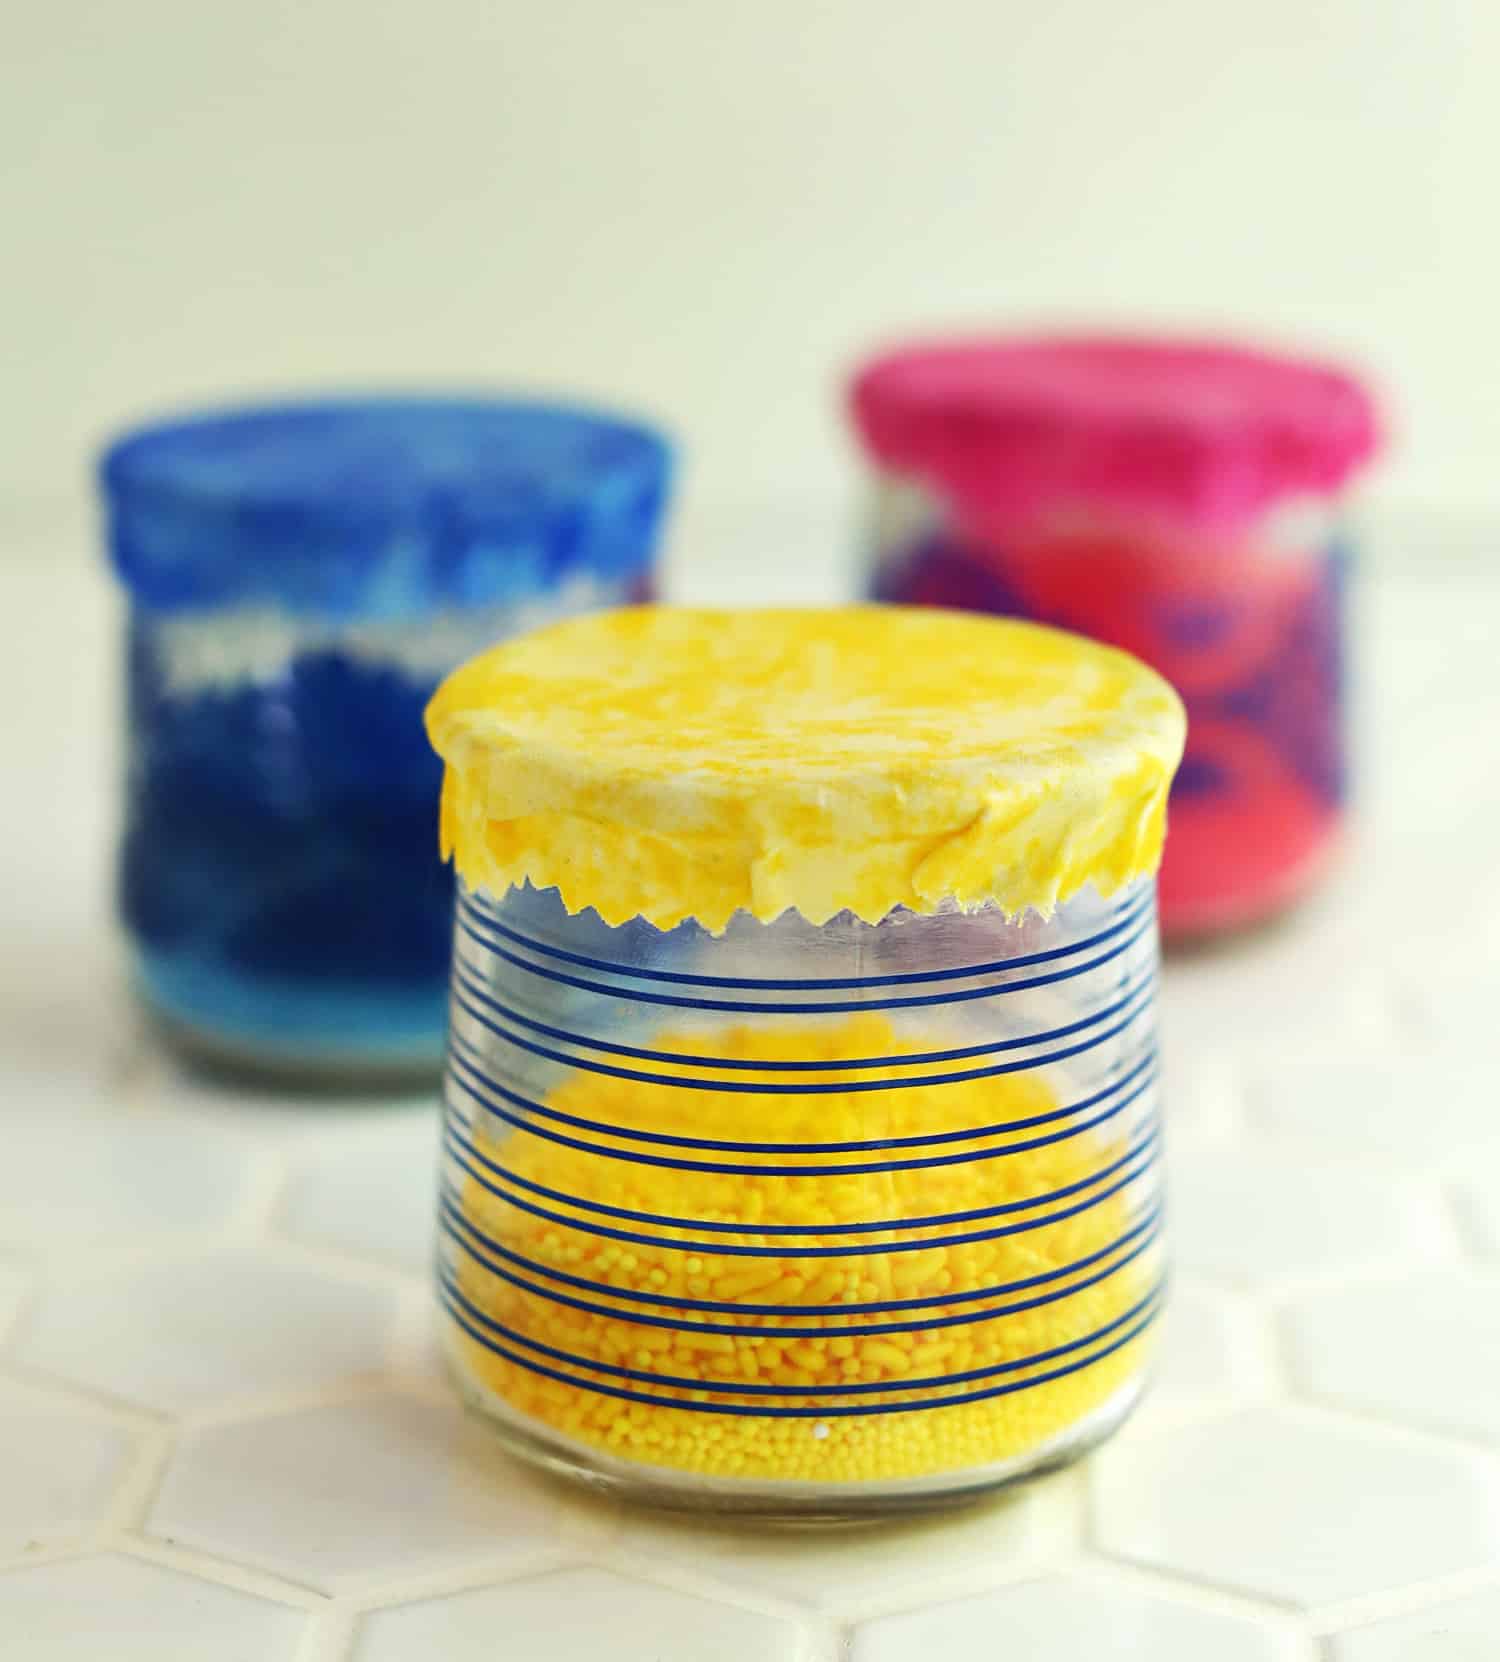
Step One: Eat the yogurt and then clean out the glass pot, saving one foil lid. The glass is easy to clean, sterilize and reuse.
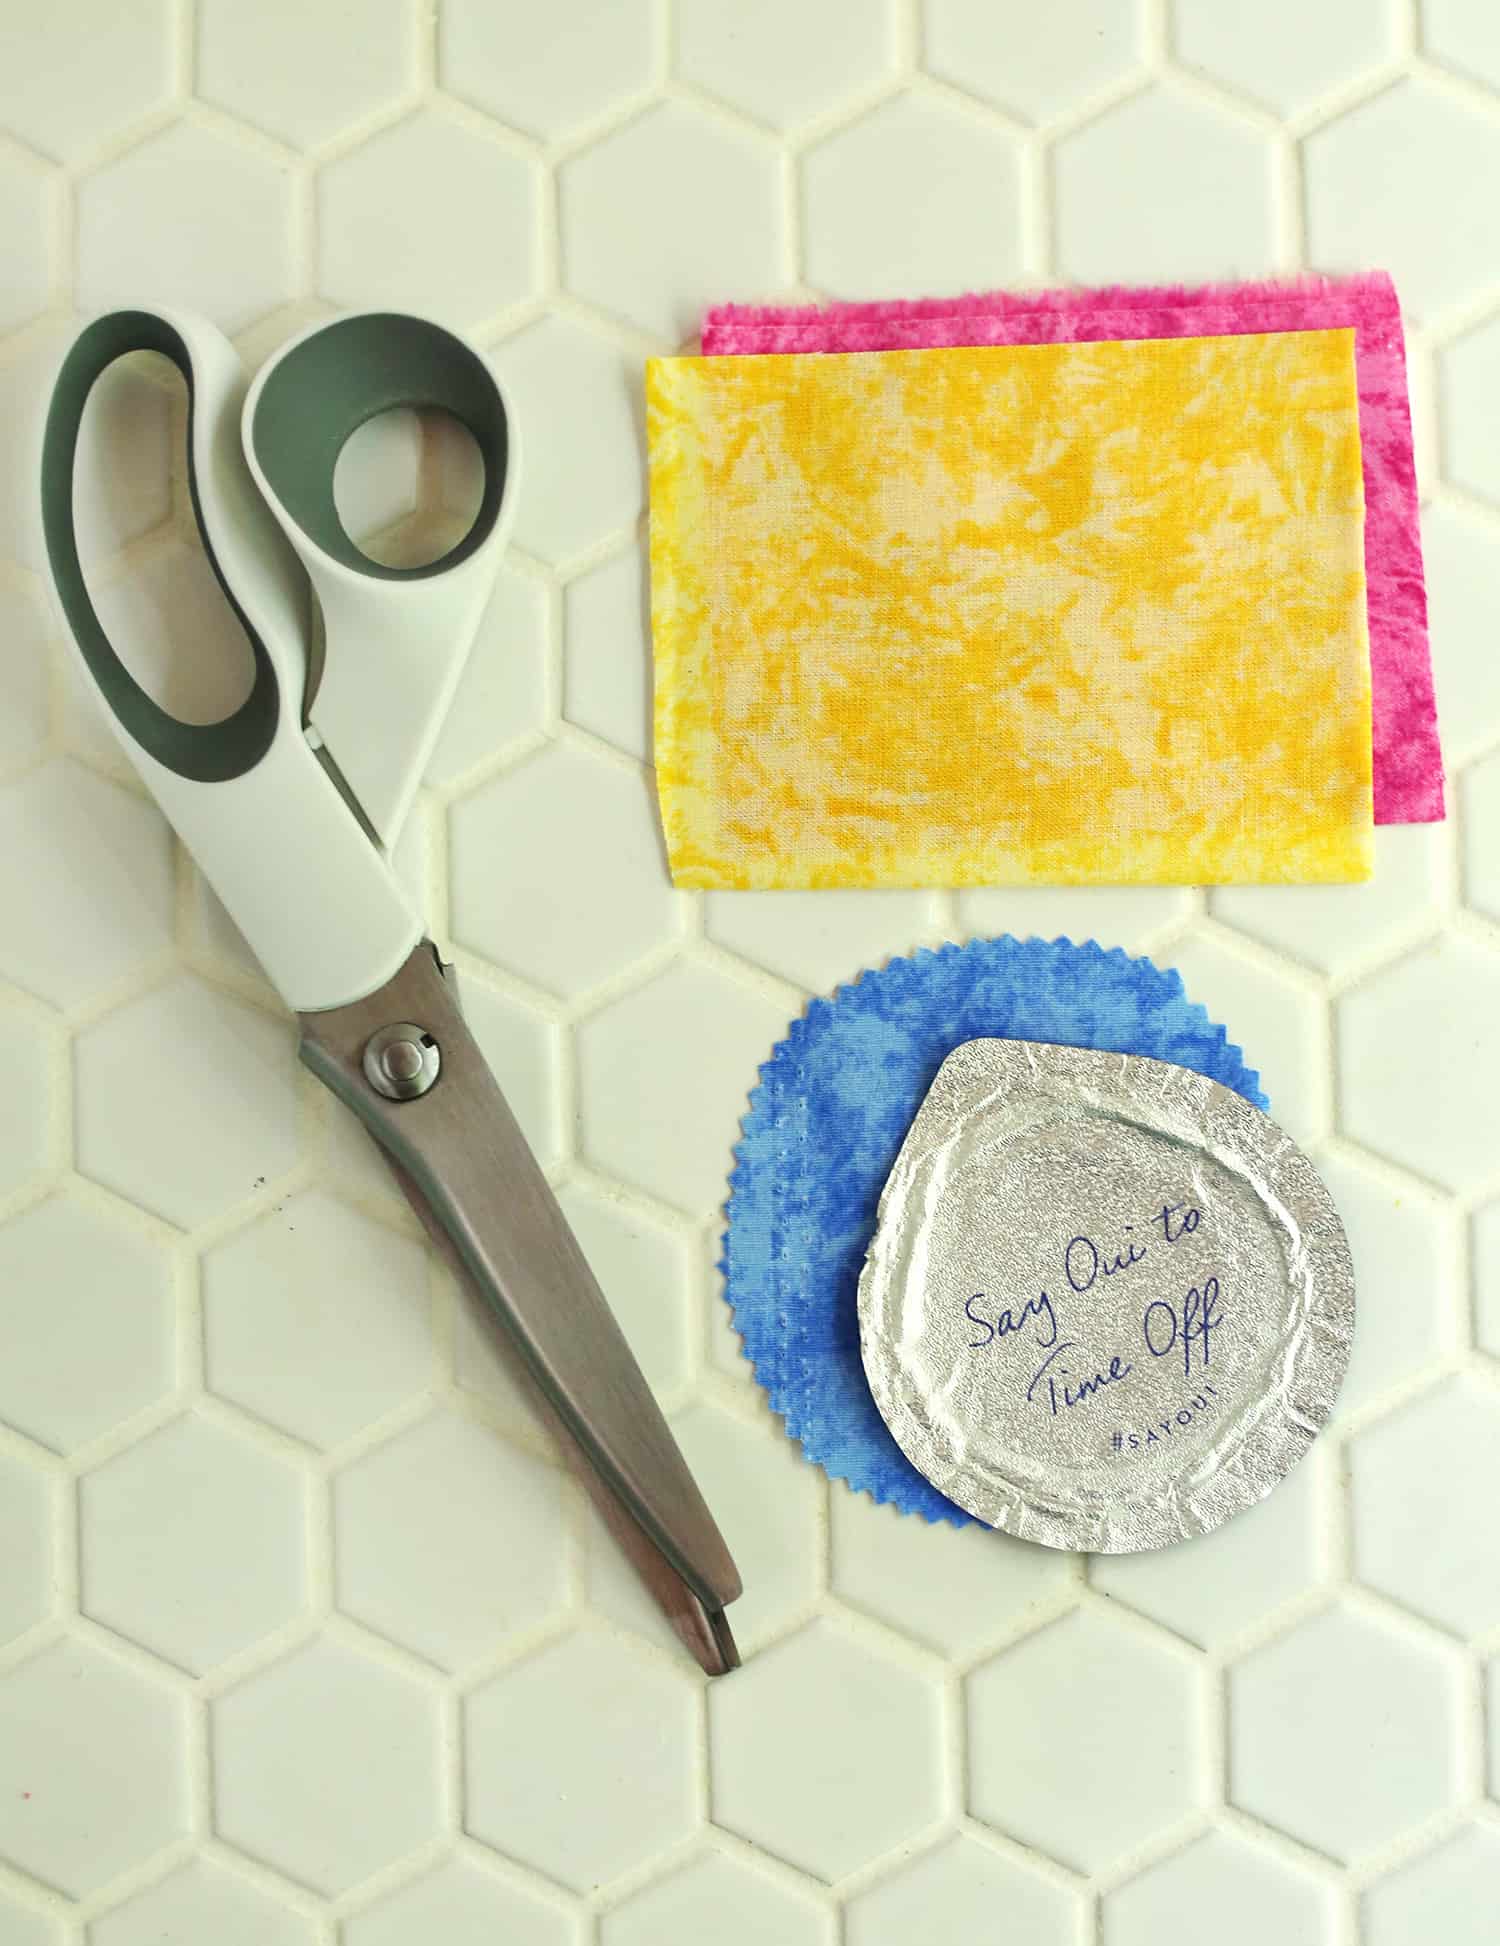 Step Two: Wash the fabric to remove any dyes or residue. Then use the foil lid to cut out a circle in the fabric.
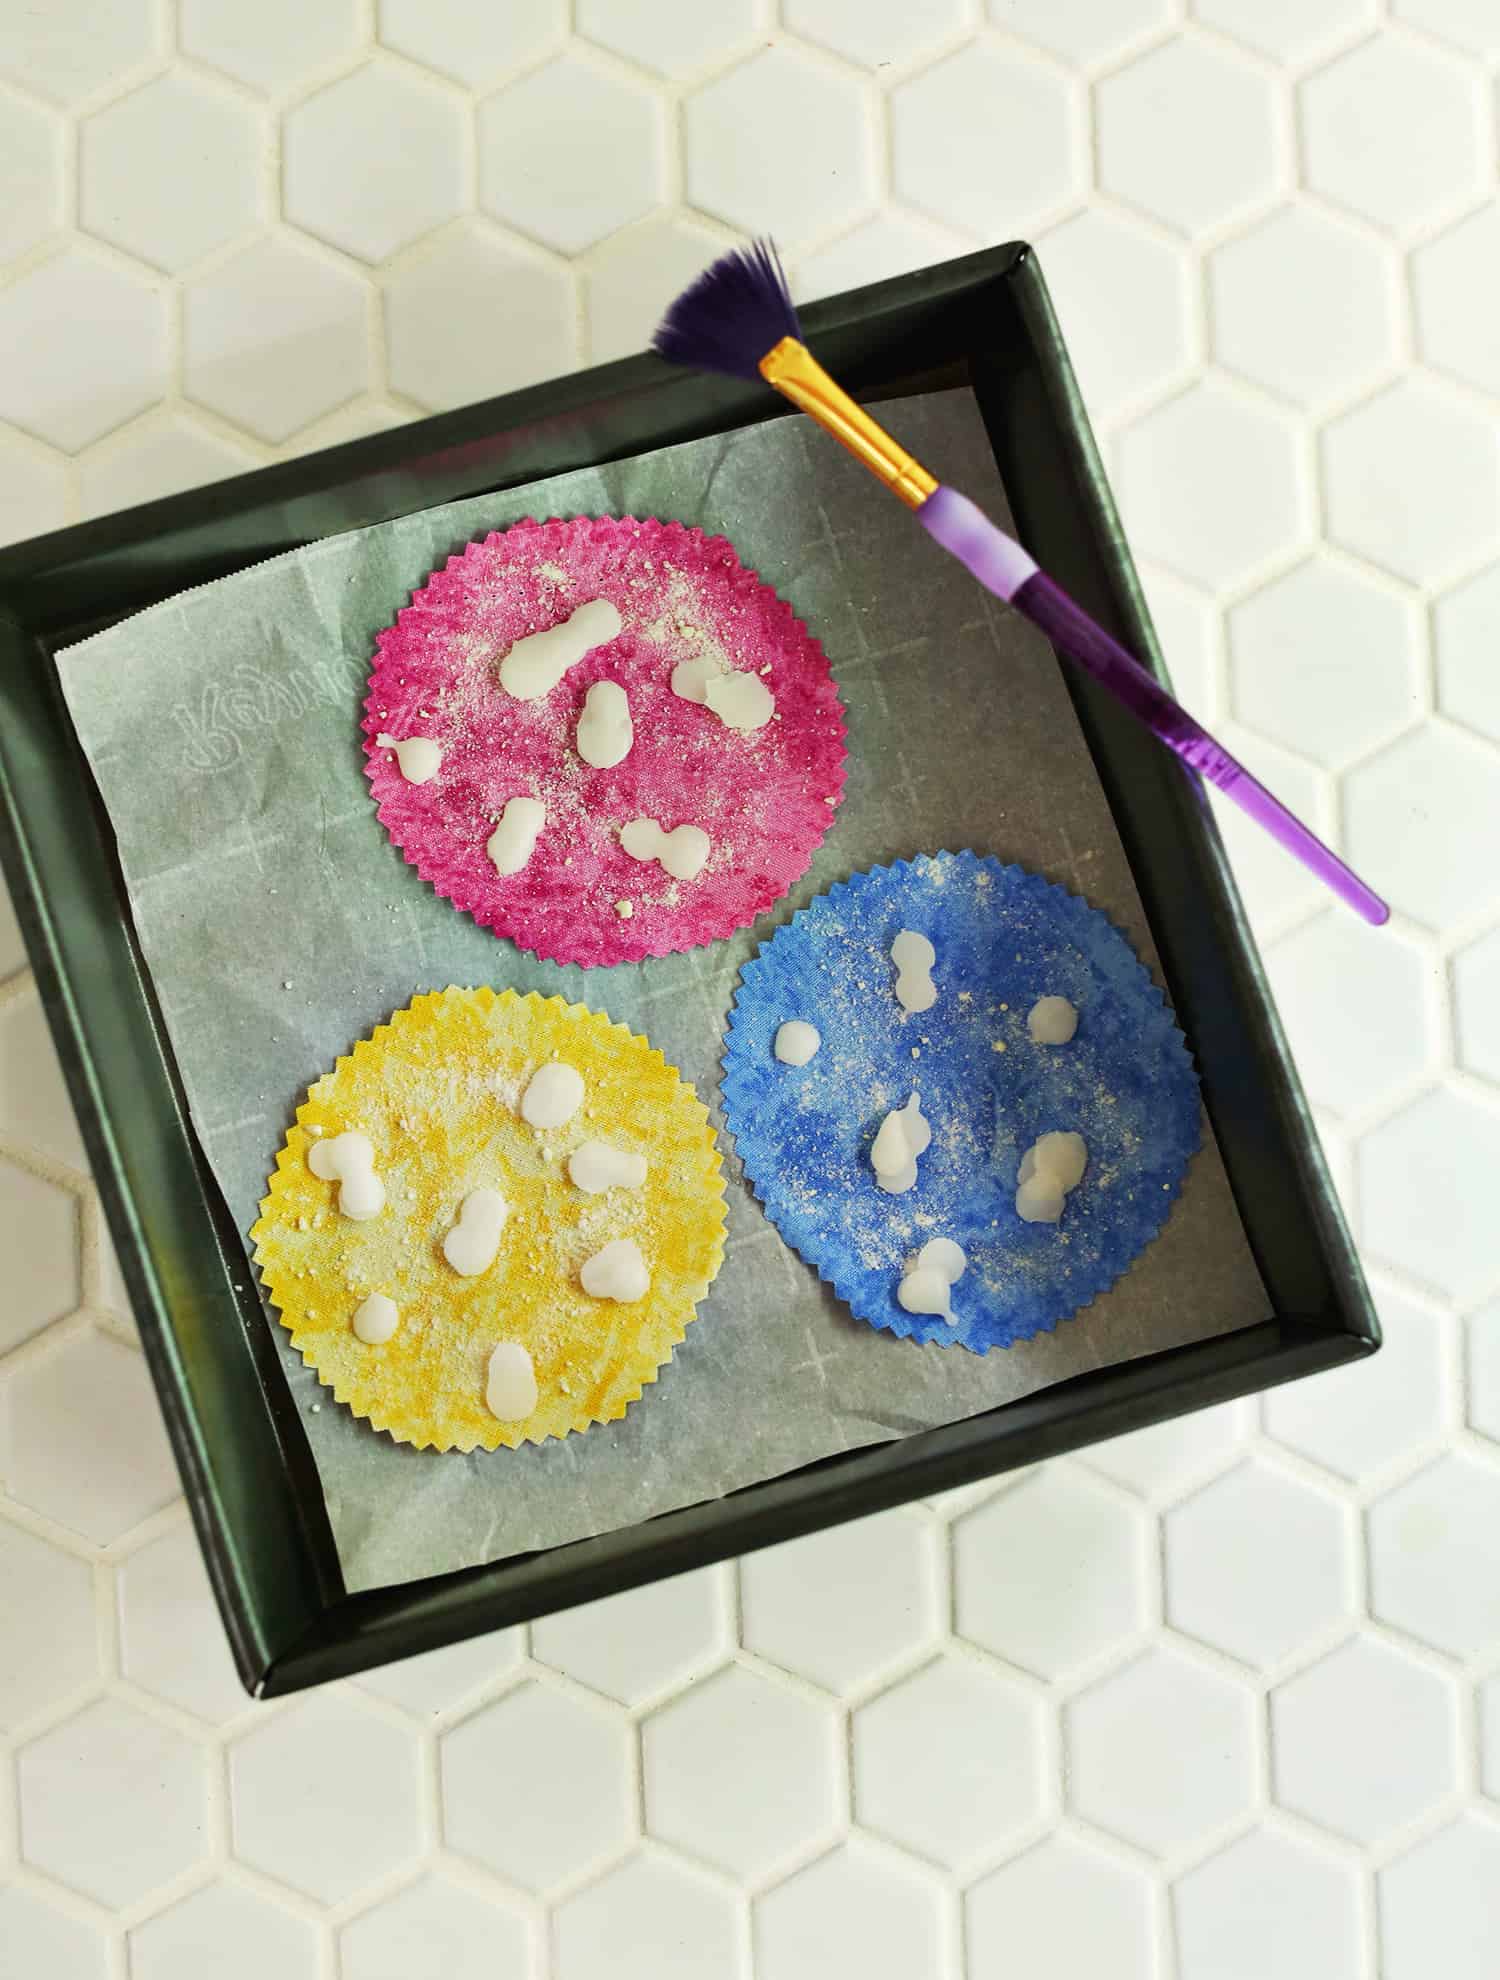 Step Three: On a baking sheet or pan lined with parchment paper add the fabric. Sprinkle on a small amount of oil, pine resin, and wax pellets. You can see about how much I added in the photo above (or in the video). You don’t need much! As these melt, they will spread out over the fabric.
 Step Four: Bake just the fabric at 225°F for 5-6 minutes, just until you see the wax as fully melted. Then use your paintbrush to brush the wax evenly over the fabric pieces, and remove any excess. Lay the fabric pieces over a glass pot or other container to allow them to fully dry.
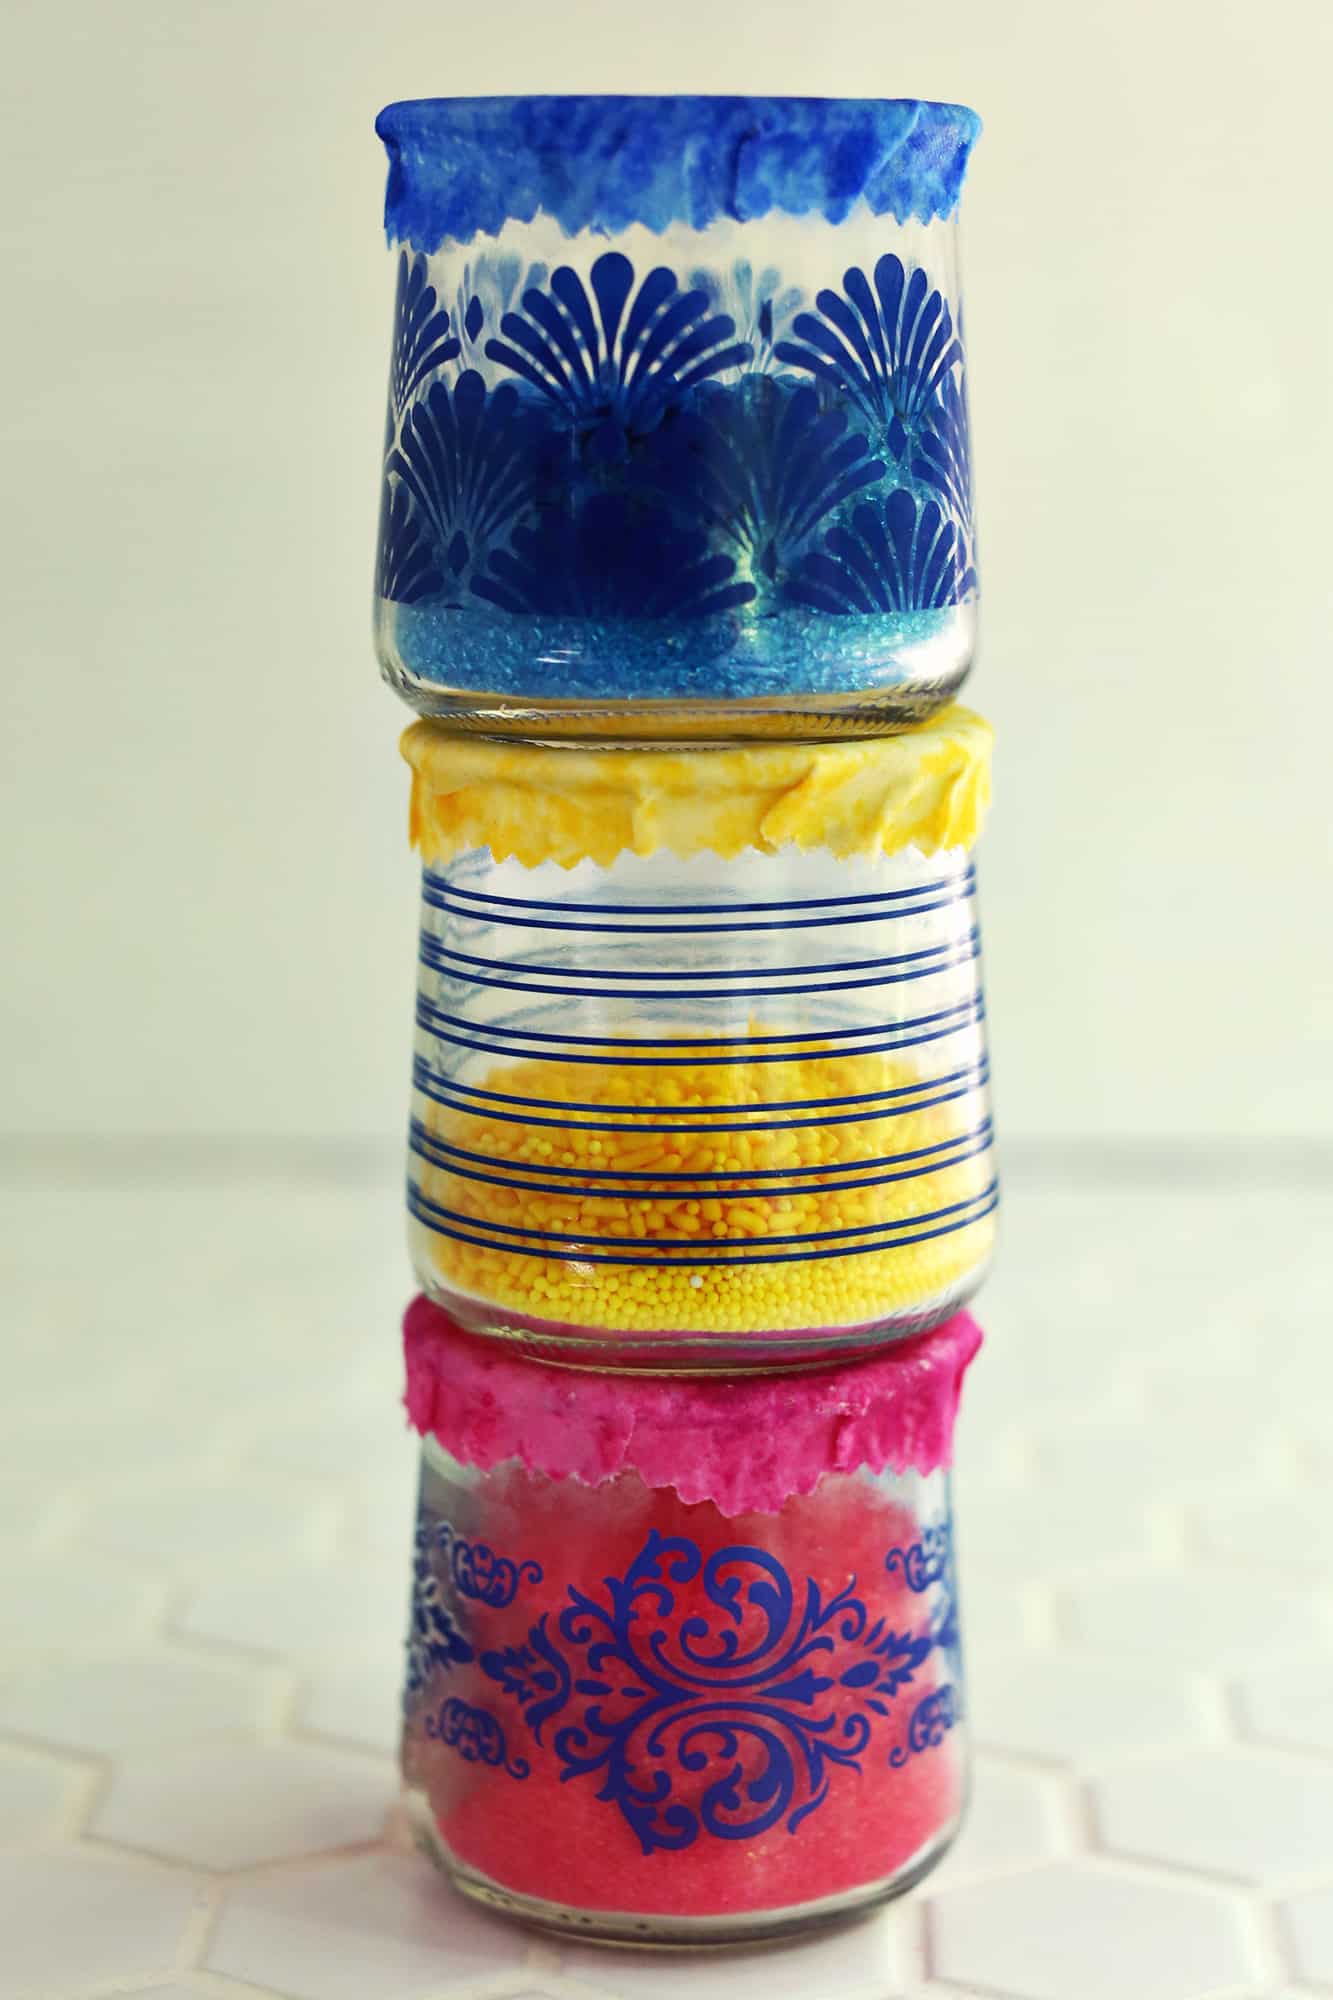
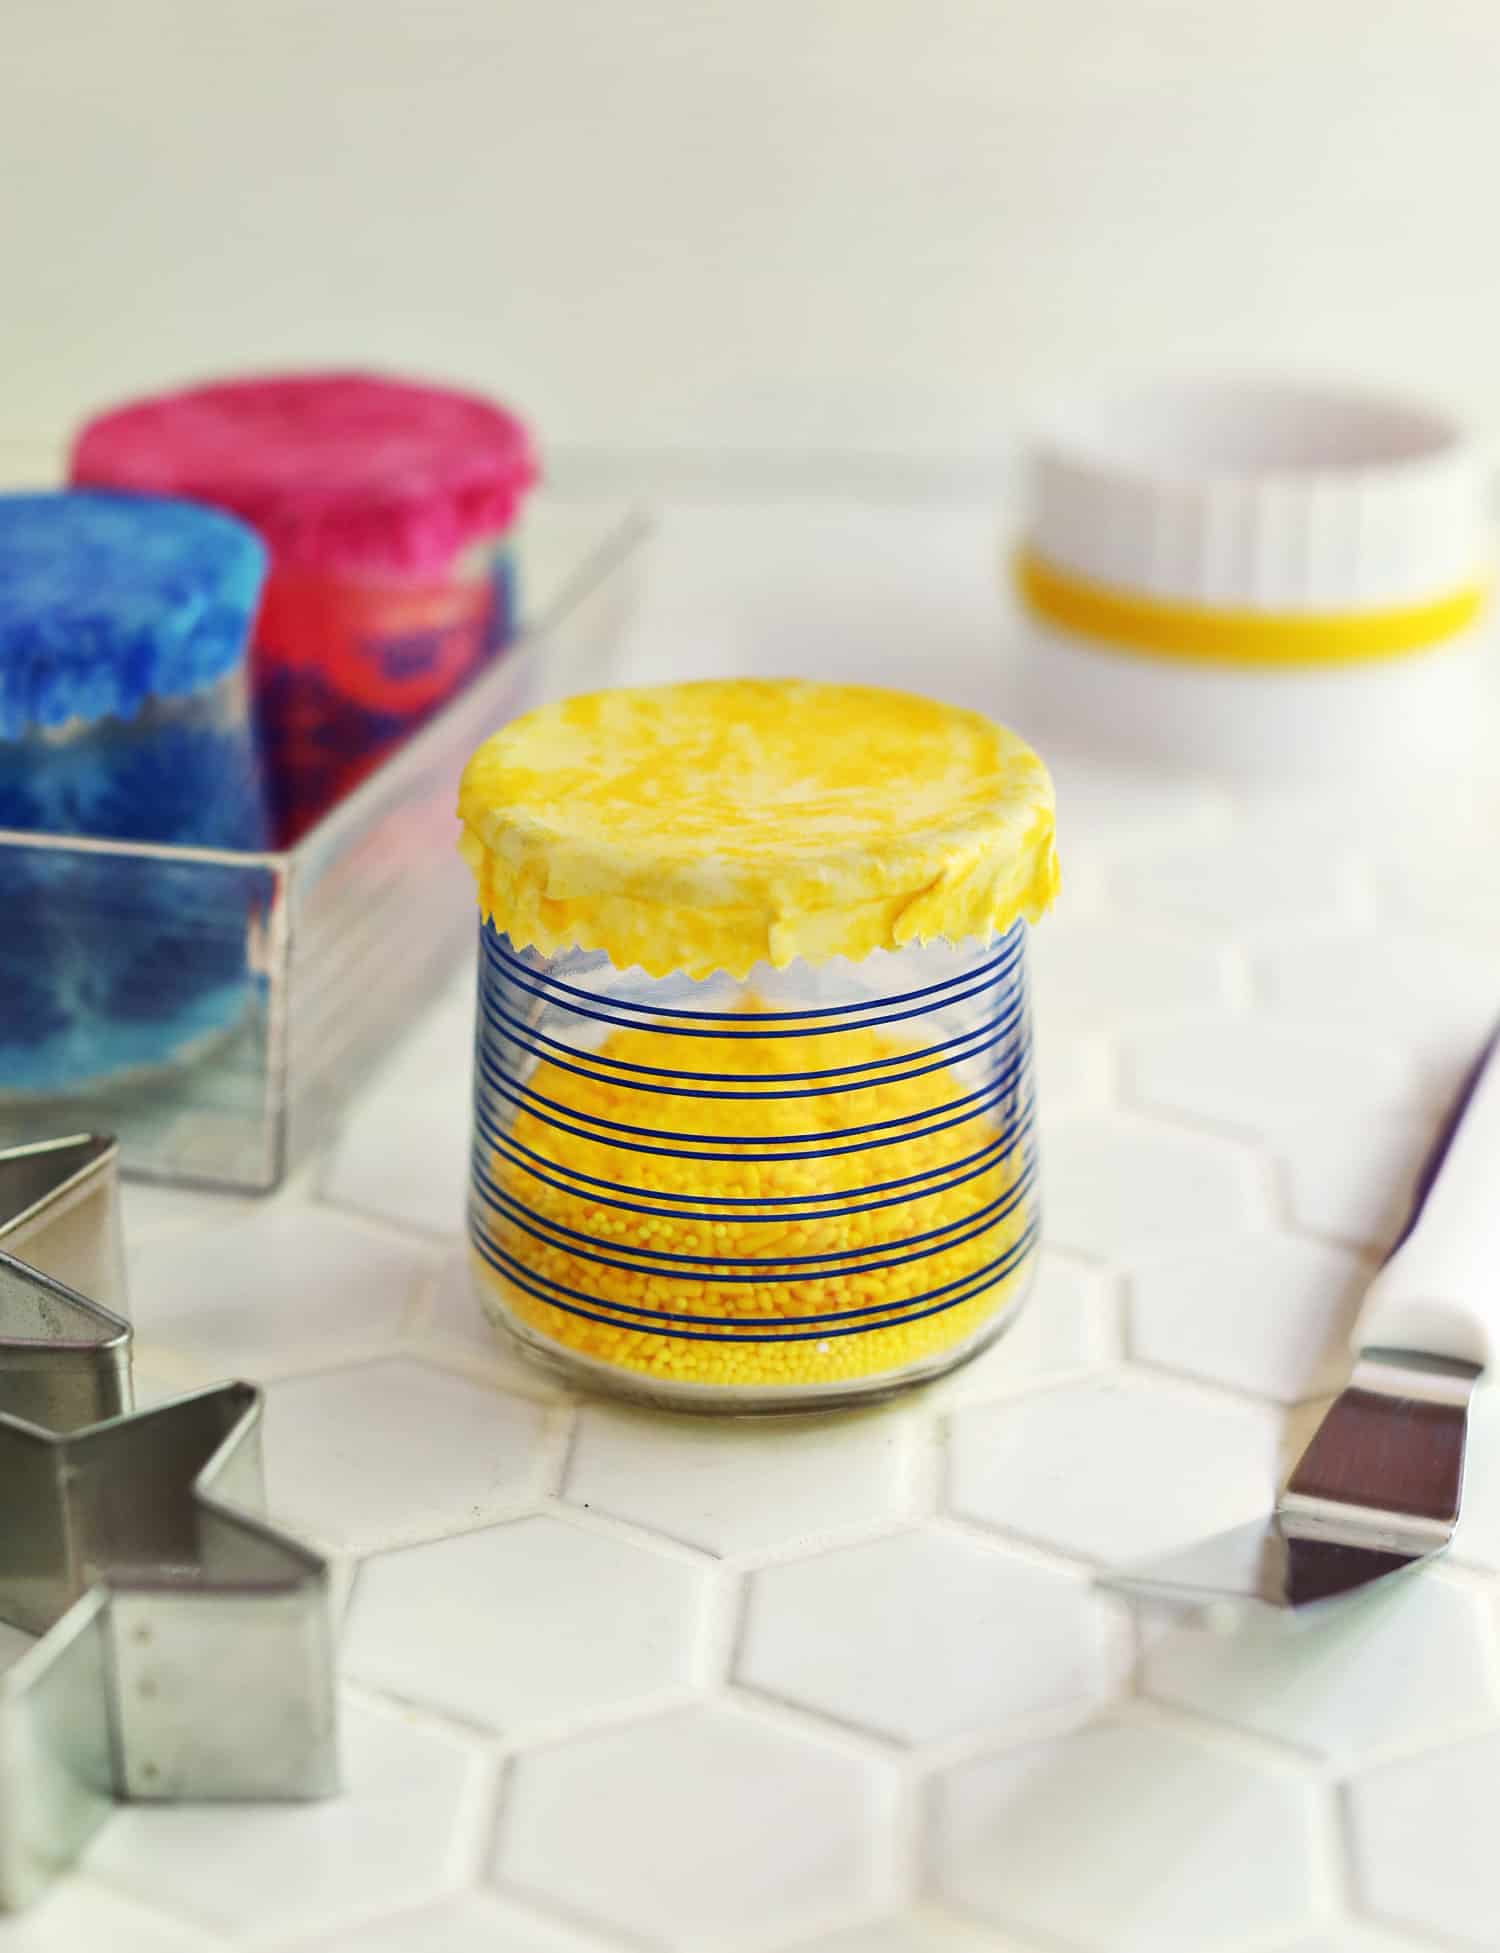 Once the beeswax wrap toppers are fully dry, you can press them onto the tops of your glass pots. That’s it! You can reuse these on your glass pots over and over again. If you need to wash them, remember to do so in cold water as hot water will melt the wax and cause it to run off your wrapper (and then it won’t work as well). Thanks for letting me share! xo. Emma
Credits // Author, Photography, and Video: Emma Chapman. Photos edited by A Color Story Desktop.
from A Beautiful Mess https://ift.tt/3kdR3kT
via IFTTT