 I always love to make at least a few little crafty Christmas-y things each year, as it’s just fun and something to do inside while listing to classic Christmas songs. This year, I decided I wanted to make a house-shaped tree topper for the pink tree in my living room. Kind of a home-for-the-holidays theme, as that’s pretty much the entire theme for this year. Ha. Anyway, I loved how this house Christmas tree topper DIY turned out, so I wanted to share.
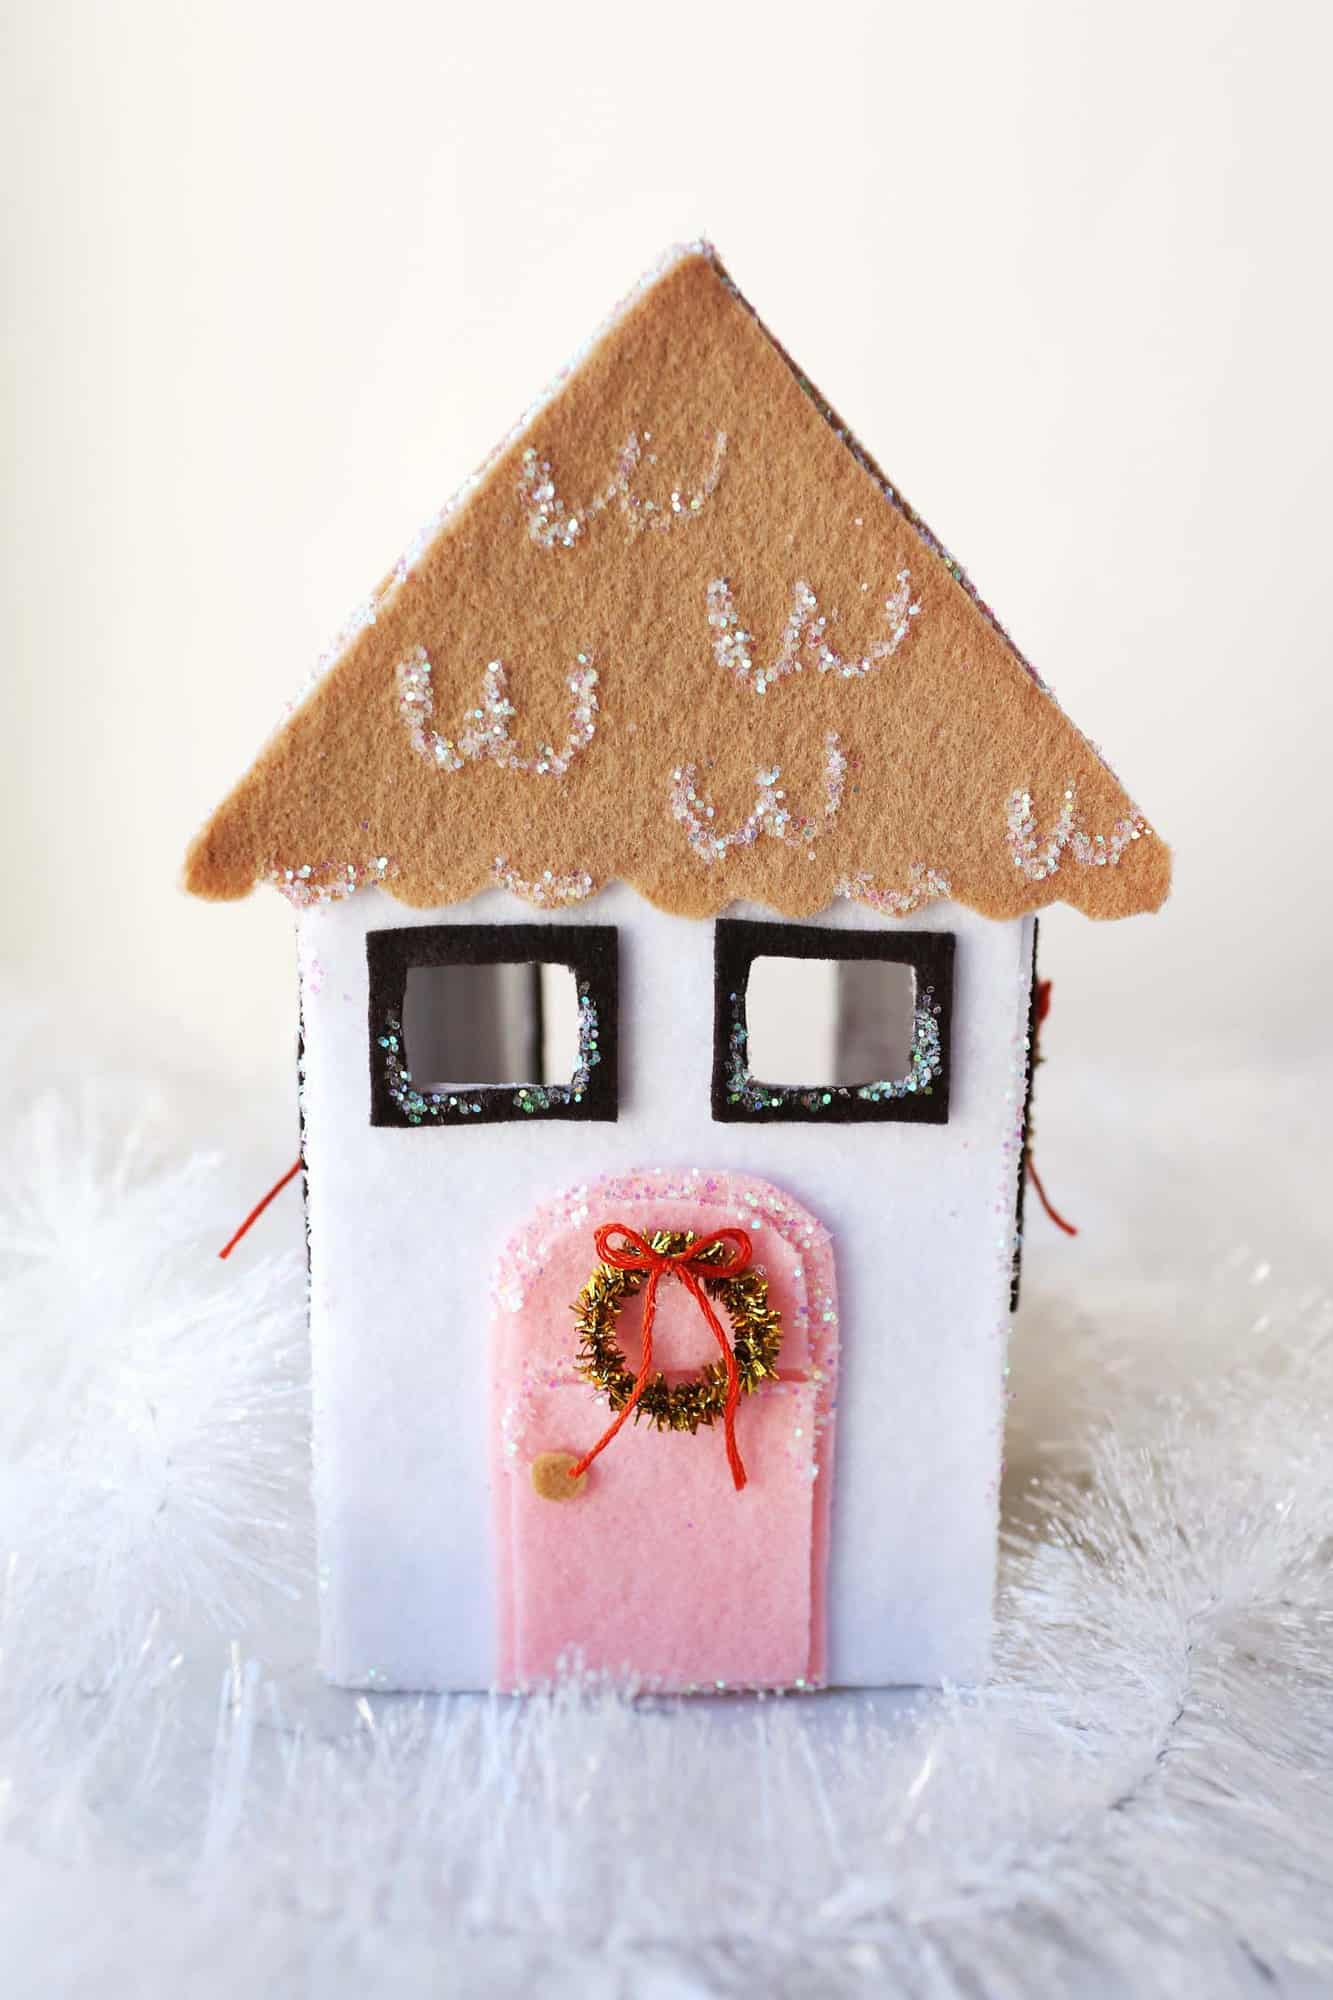
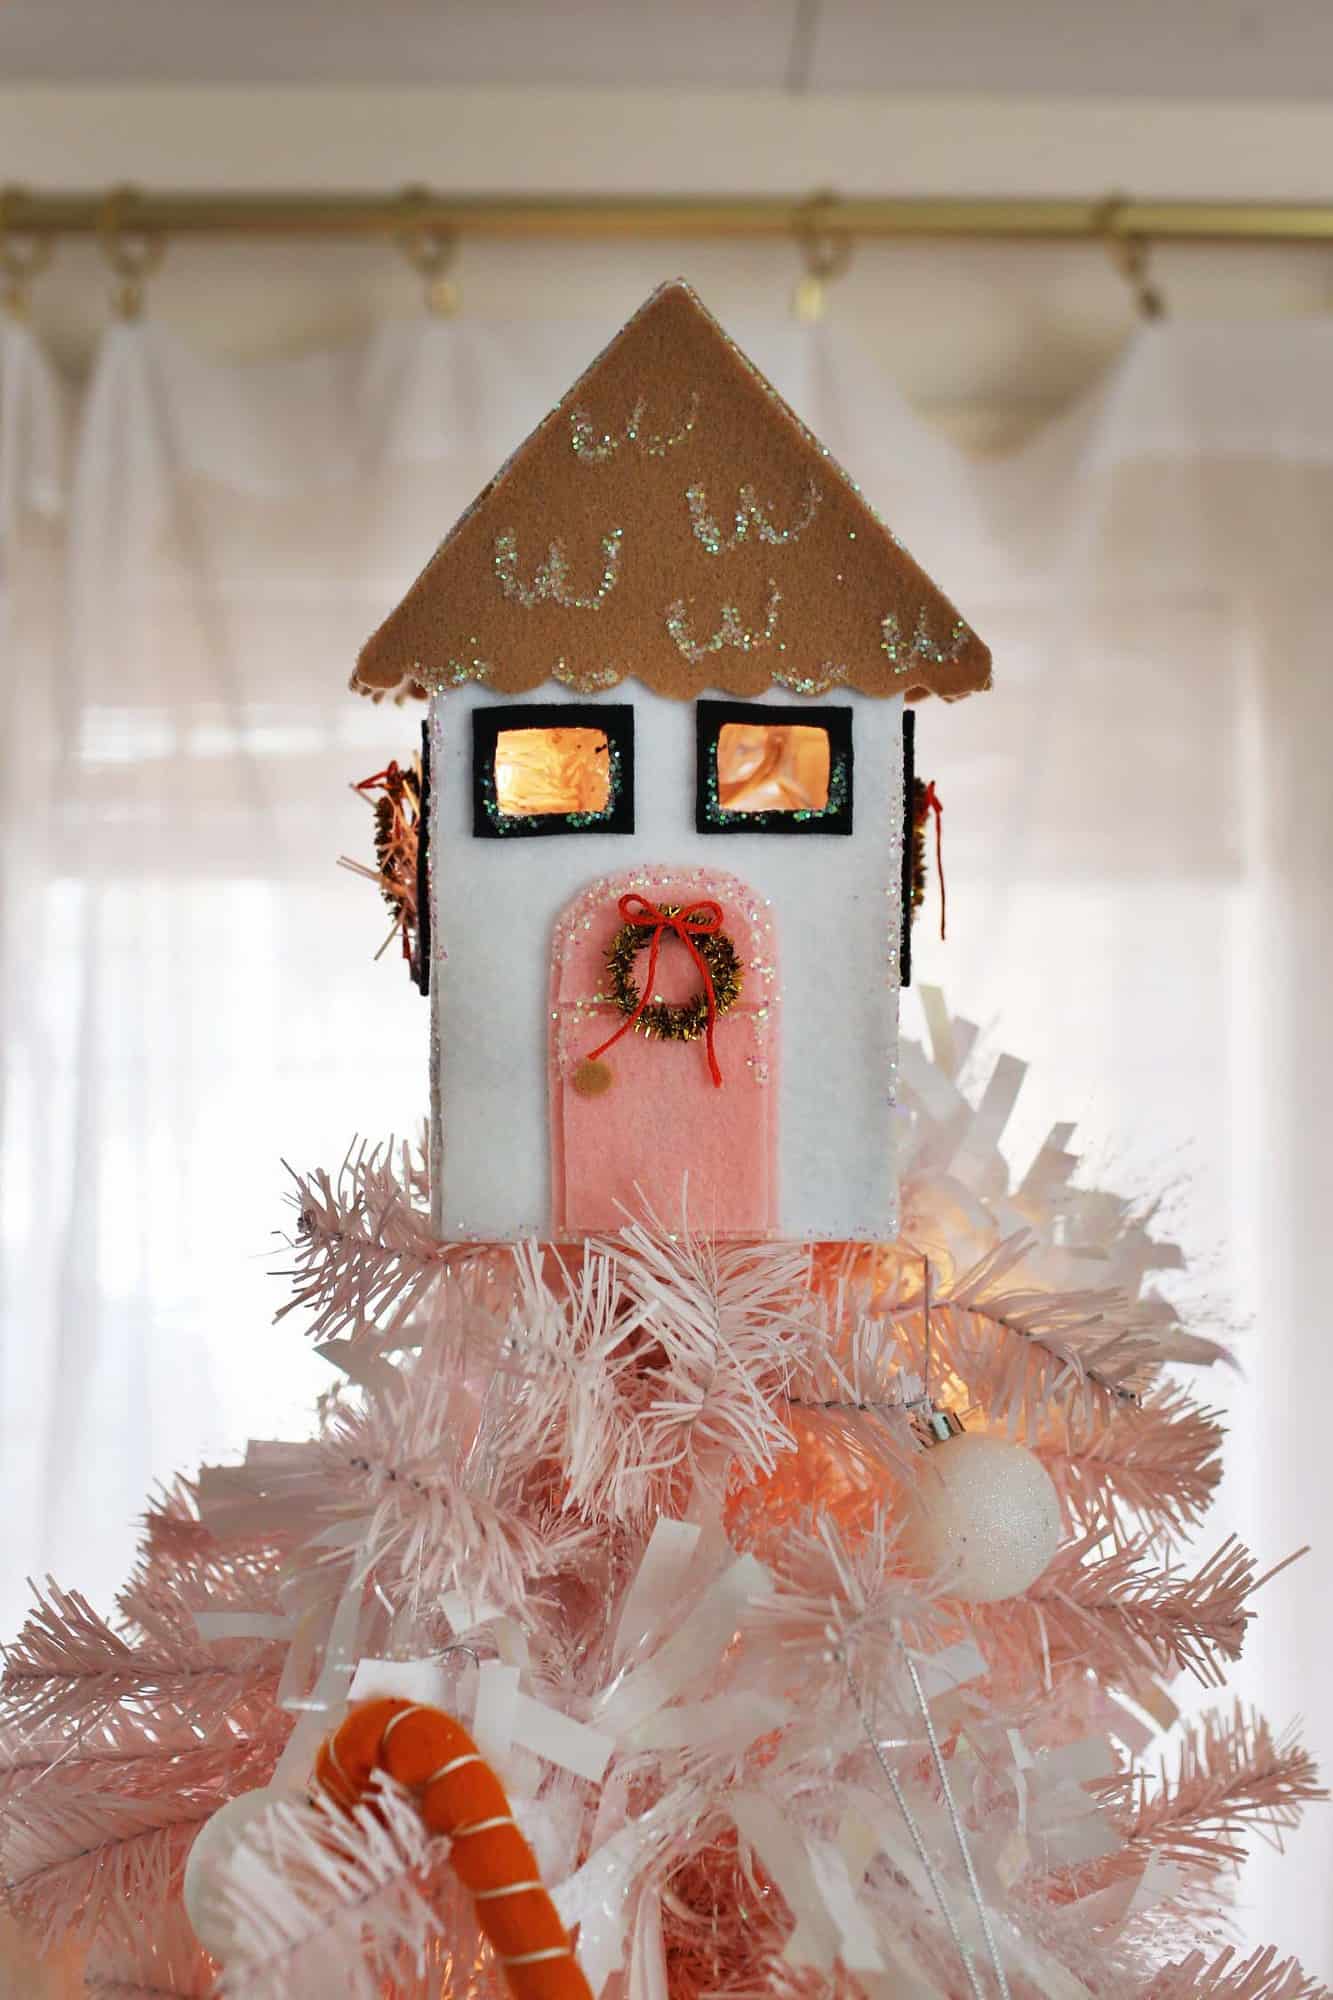 I was aiming for something simple but I knew I wanted a pink door and a few mini wreaths. 🙂 I always wanted the house to look like it was lit up on the inside when the tree lights were on—as if someone is home.
 Supplies:
-thin cardboard
–felt
–glitter
–pipe cleaners
-embroidery thread
-paint + brush
-tape
-glue
Since I enjoy crafting, I basically had all these supplies already. But you could choose to add other embellishments to your house Christmas tree topper like little flower boxes on the windows, or balsa wood shingles on the roof. It’s really up to you!
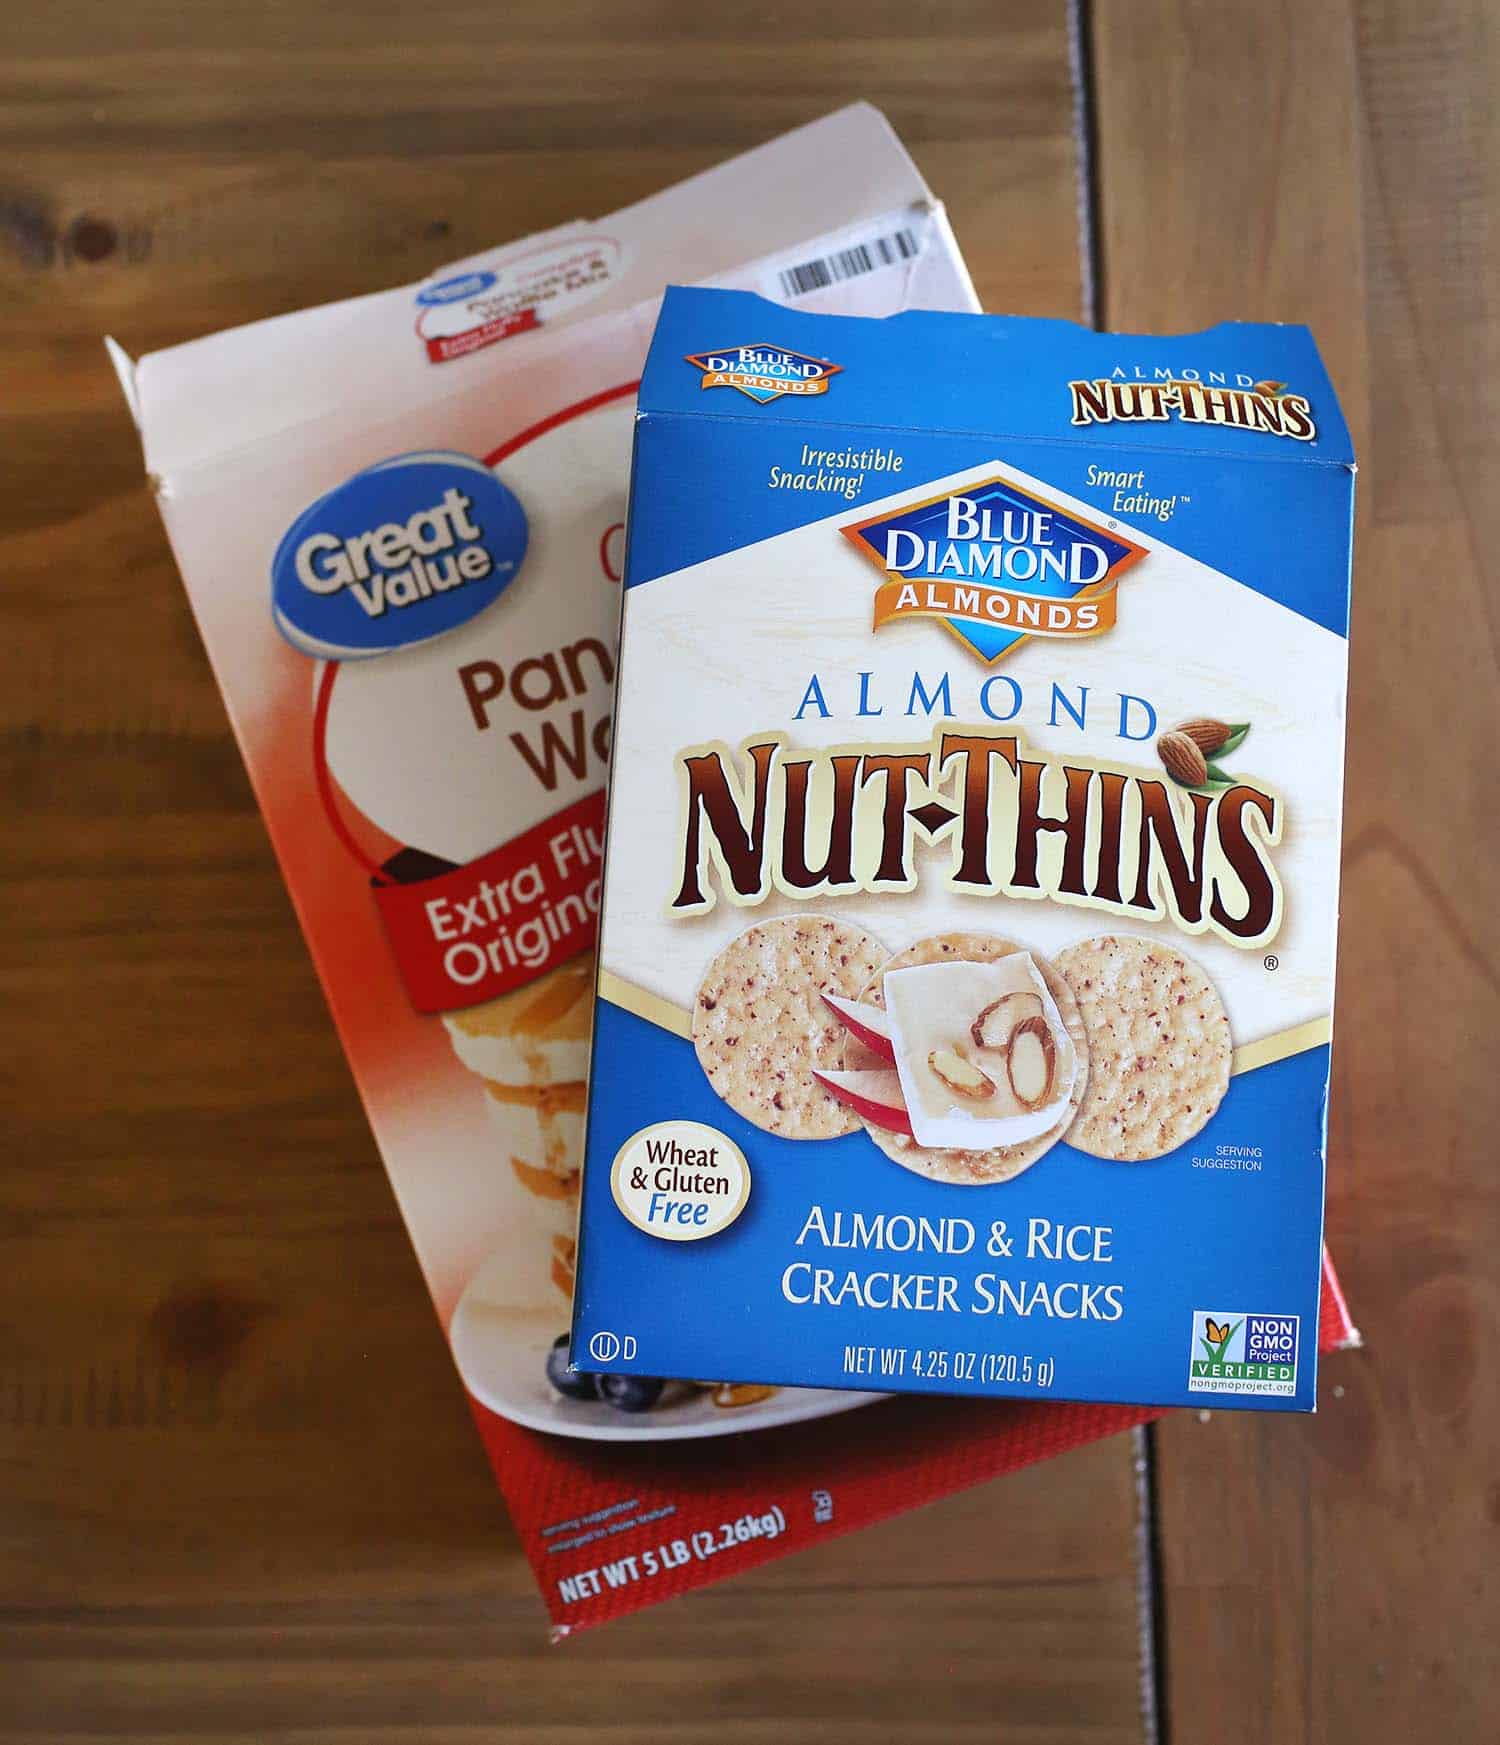 For the cardboard, I just used a few leftover food boxes I had. Feel free to judge this giant box of pancake mix as much as you like. Ha! But if you don’t want cardboard to reuse you could also use foam board.
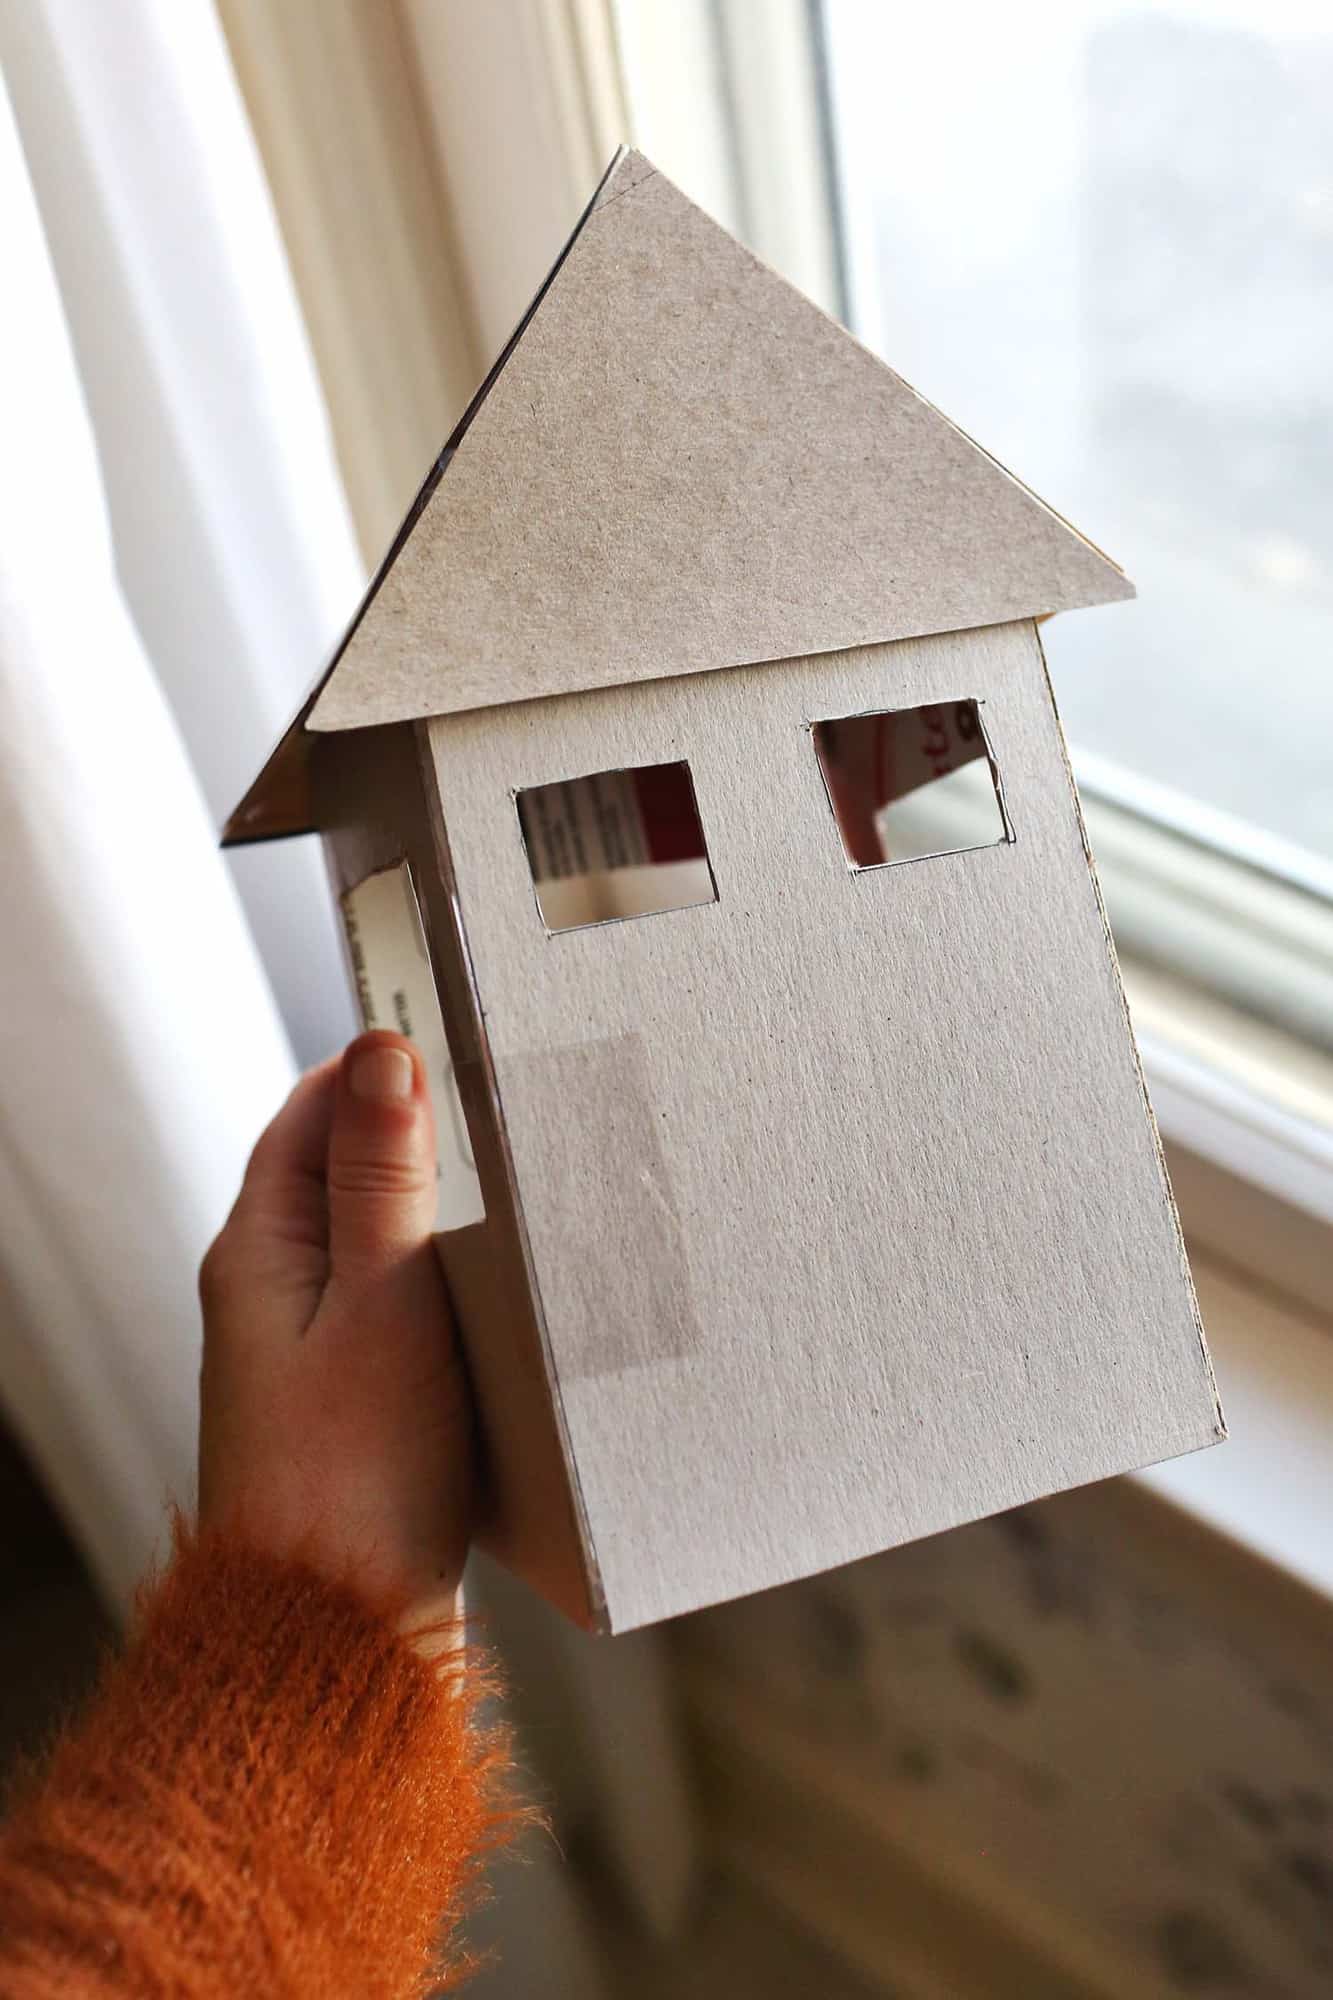 Step One: Make the house shape from the cardboard and tape. Keep in mind this will go on top of the tree, so you don’t necessarily want the bottom opening to be oversized. If you are more skilled than me, you could absolutely do a more intricate shaped house than this. I’d love to see someone do a two-story or something shaped like a castle! Also, you could choose to make your house tree topper-shaped/colored like your actual house if you preferred. 🙂
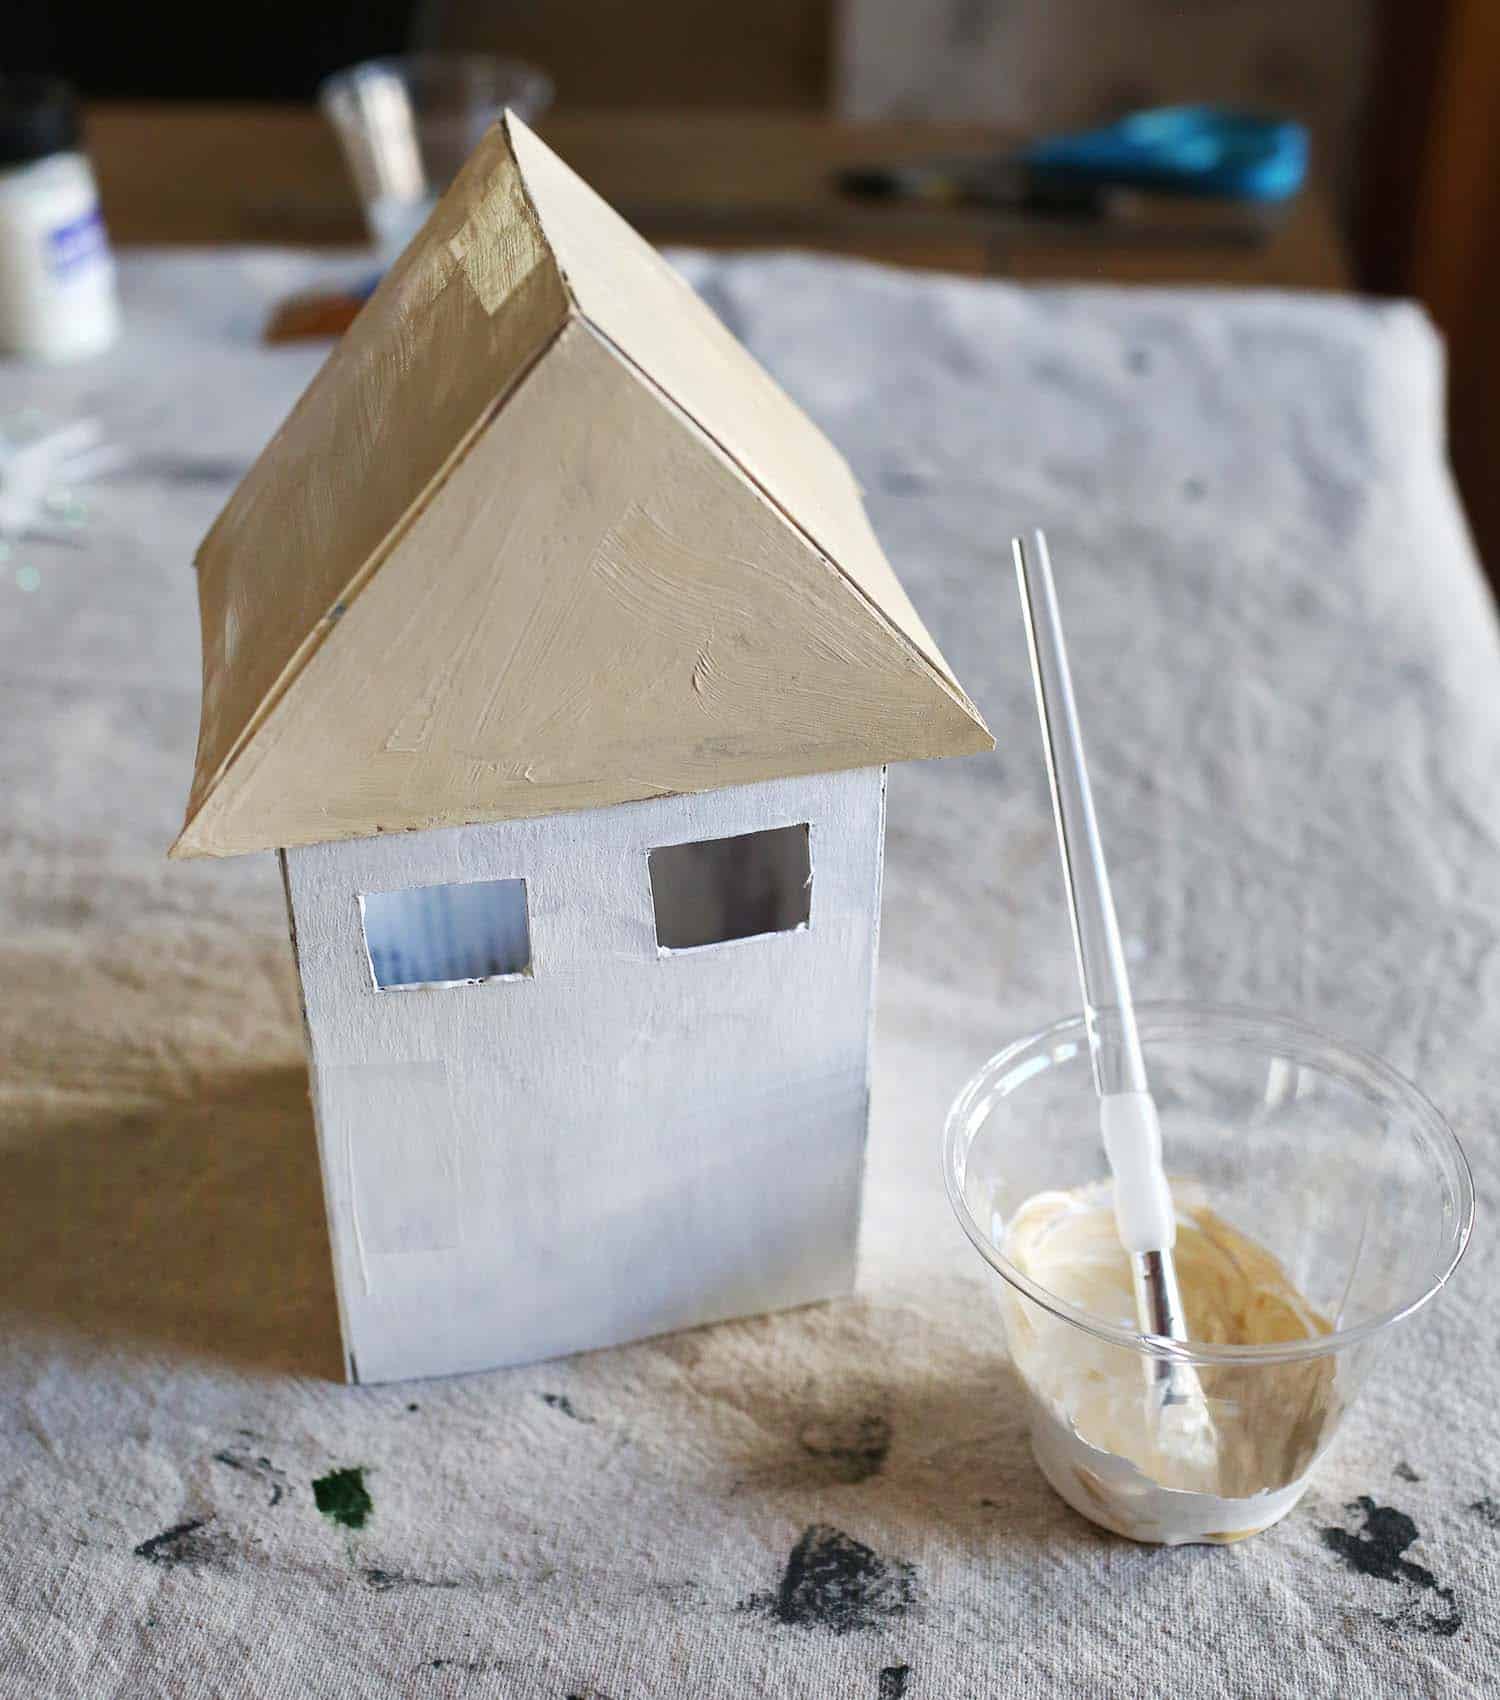 Step Two: Paint the house. This is so if there are small gaps in your felt you won’t see the cardboard color. I also painted most of the inside since I was reusing cardboard I had and didn’t want any text or logos to show through the windows.
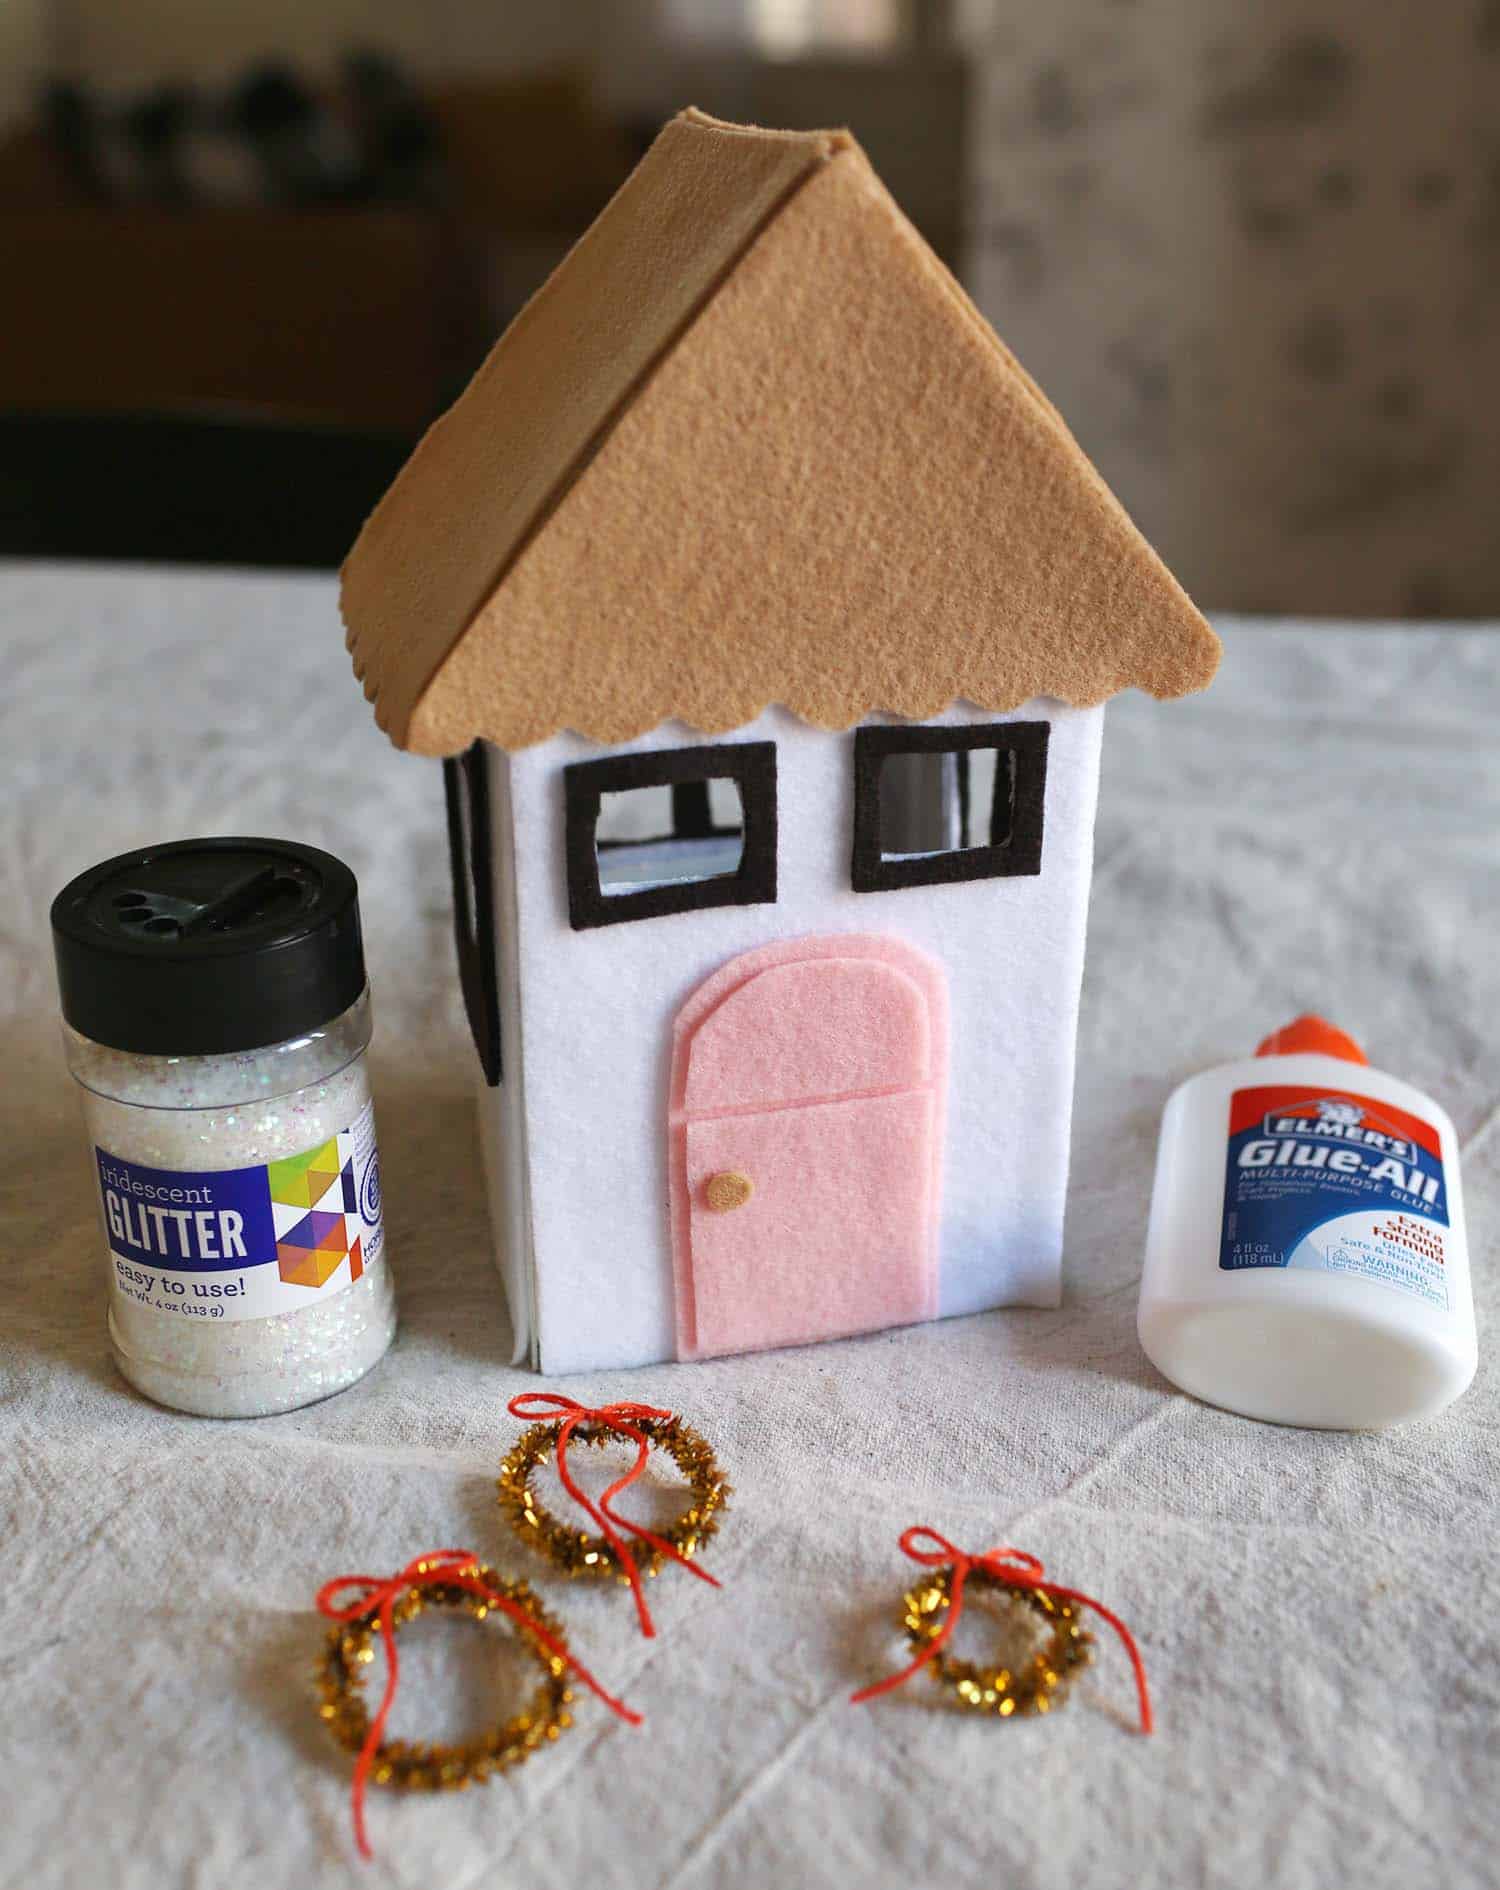 Step Three: Glue felt to the exterior. I chose to do a white house, with a tan roof, dark brown outlined windows, and a pink door.
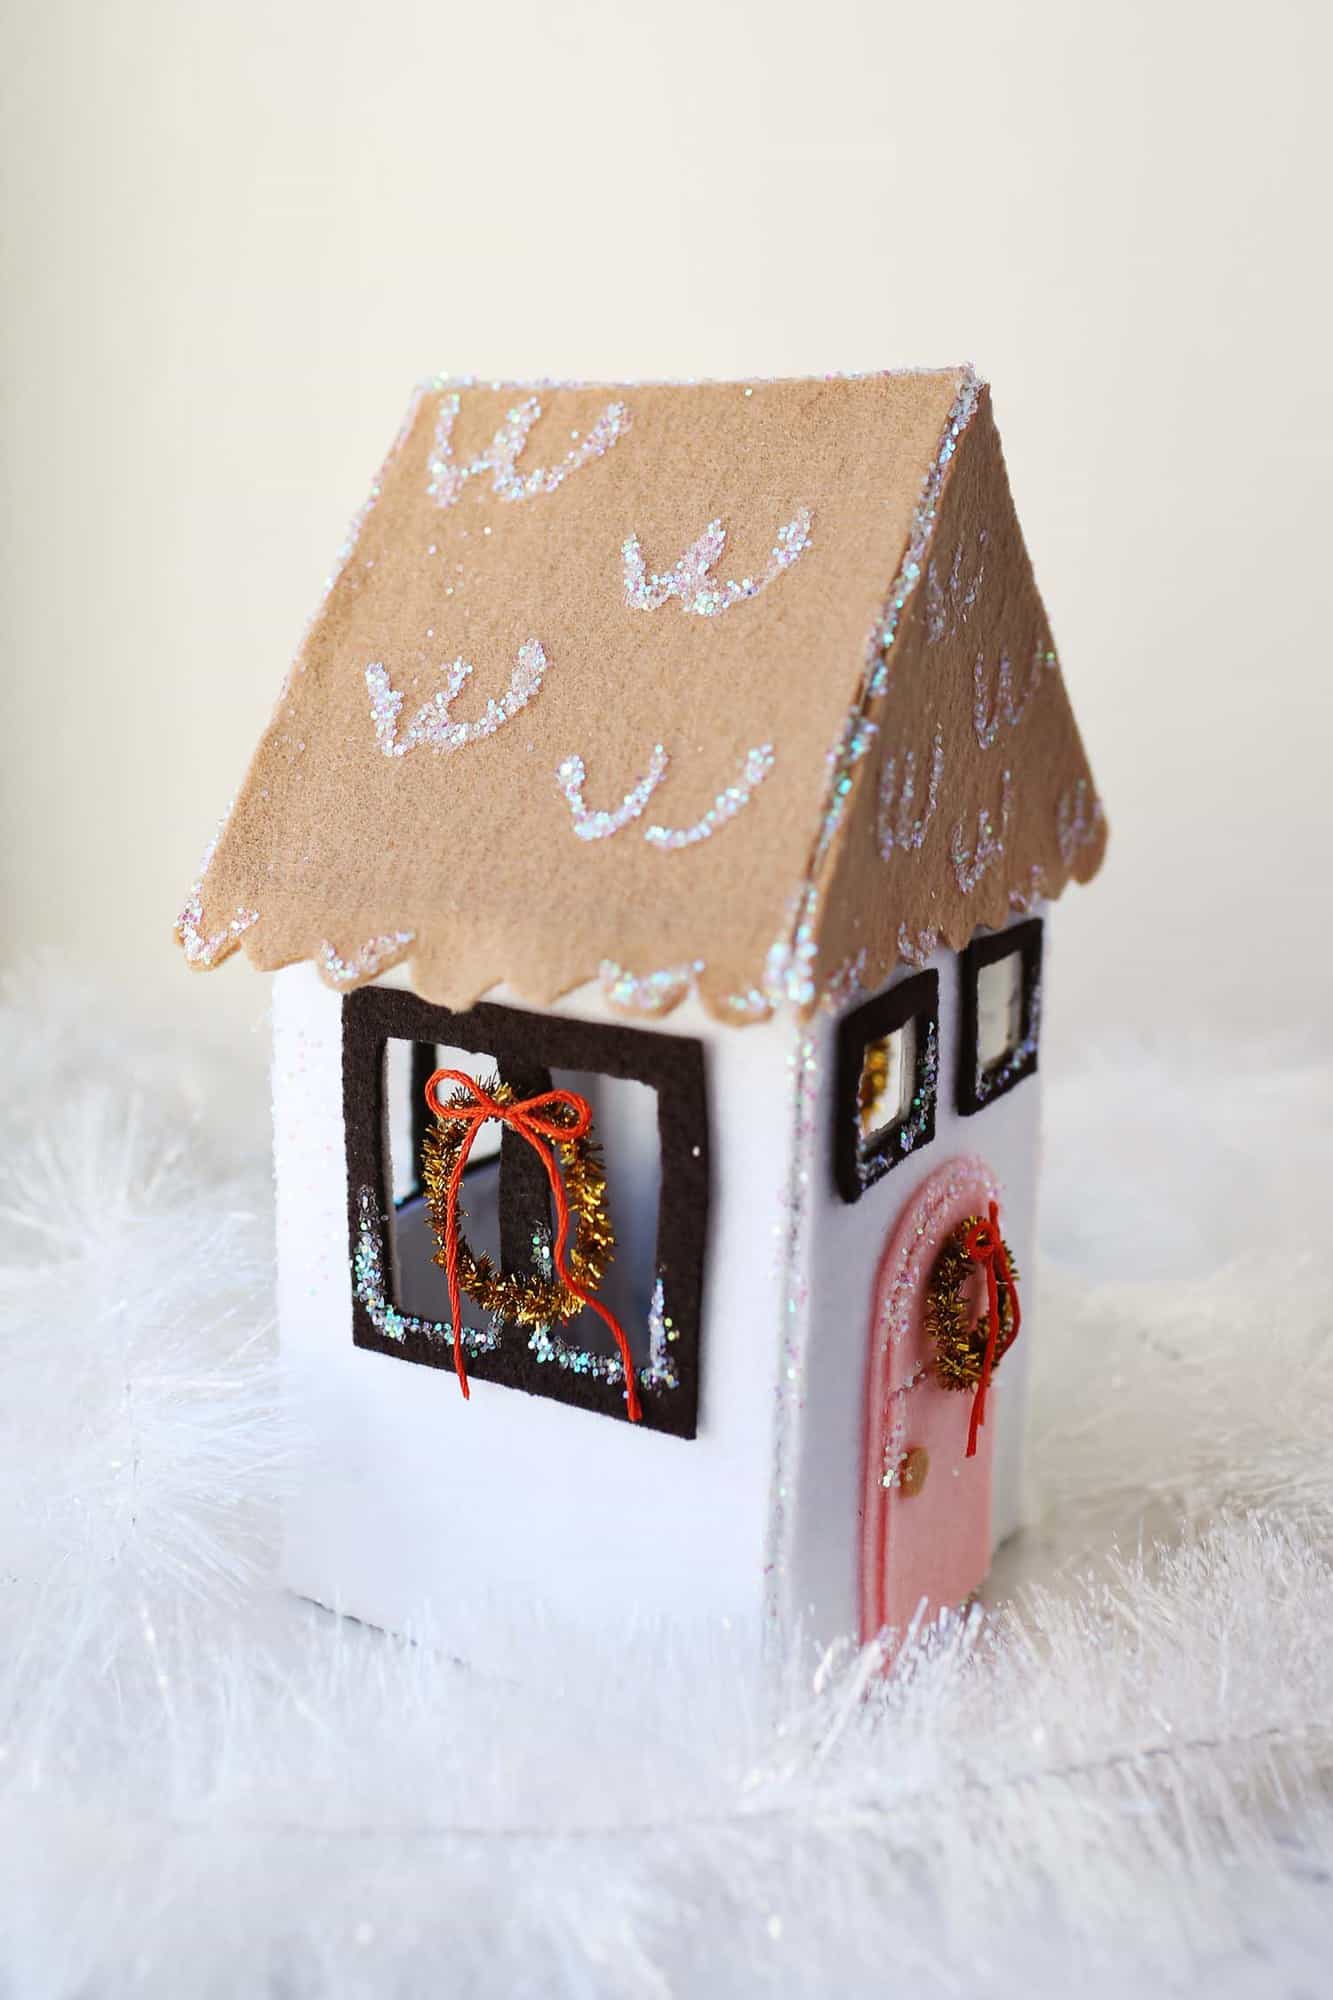
Step Four: Add any embellishments to the exterior. I added small pipe cleaner wreaths to the door and side windows. I also used glue and glitter to add a snowy look to the roof and edges of the windows. Although, afterward I realized my snowy shingles could also be boob or butt outlines. Yes, I am very mature in my sense of humor.
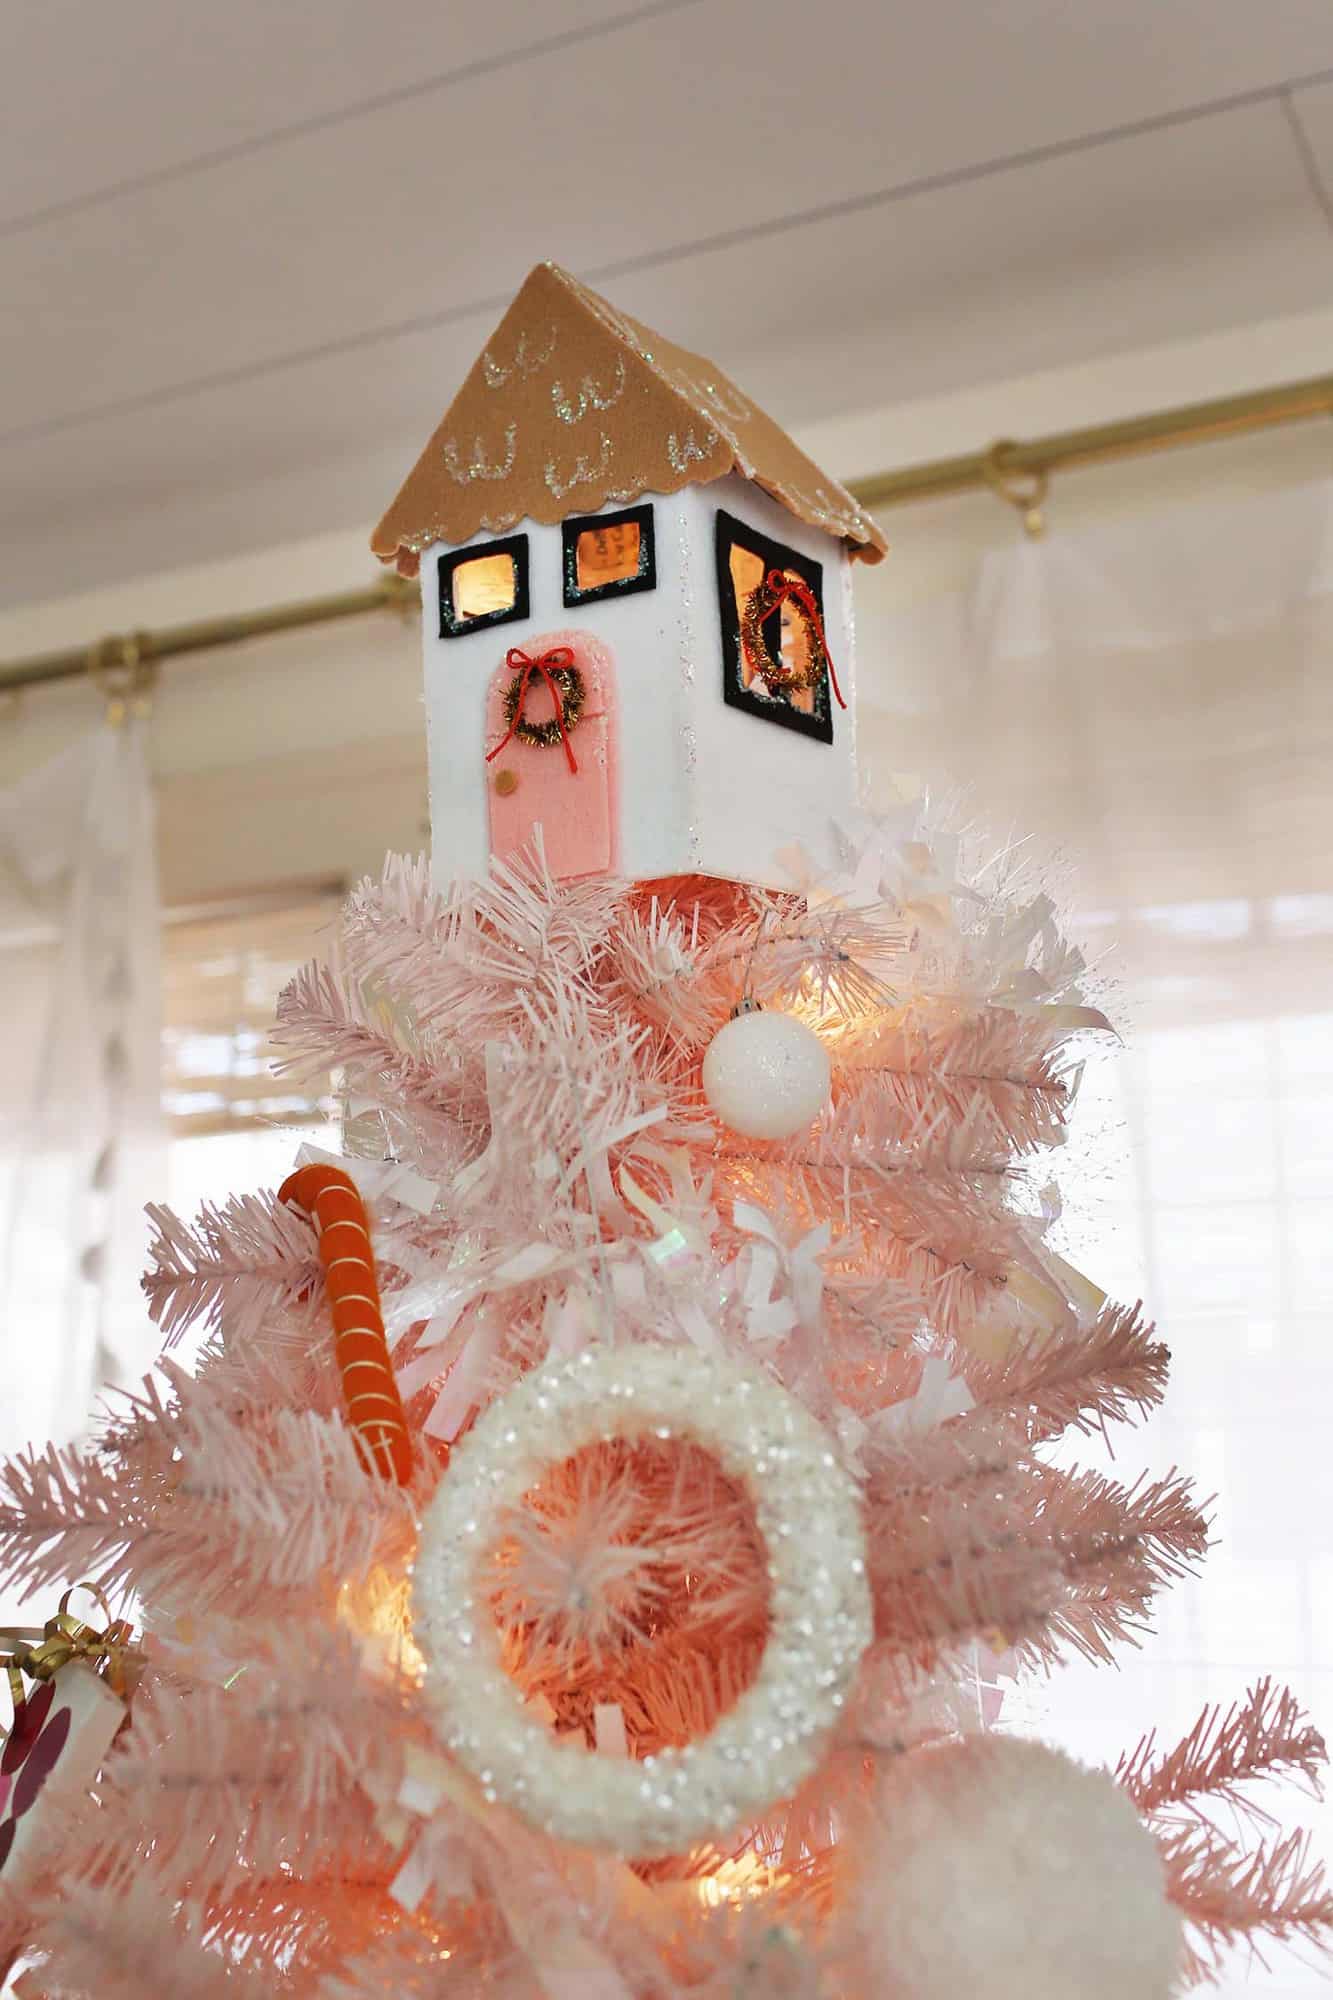
 Once everything is fully dry you’re ready to add this to the top of your tree!
 My only issue is I am not yet sure how I am going to store this so it doesn’t get smushed and I can reuse it in the coming years. I’m hoping I come across a box just a little bigger that I can reuse to store this in with tissue paper stuffed inside the house to help it keep its shape. We’ll see! Thanks for letting me share. xo. Emma

House Christmas Tree Topper DIY
Ingredients
- thin cardboard
- felt
- glitter
- pipe cleaners
- embroidery thread
- paint + brush
- tape
- glue
Instructions
-
Make the house shape from the cardboard and tape. Keep in mind this will go on top of the tree so you don’t necessarily want the bottom opening to be oversized.
-
Paint the house. This is so if there are small gaps in your felt, you won’t see the cardboard color. I also painted most of the inside since I was reusing cardboard I had and didn’t want any text or logos to show through the windows.
-
Glue felt to the exterior. I chose to do a white house, with a tan roof, dark brown outlined windows, and a pink door.
-
Add any embellishments to the exterior. I added small pipe cleaner wreaths to the door and side windows. I also used glue and glitter to add a snowy look to the roof and edges of the windows.
-
Once everything is fully dry, you’re ready to add this to the top of your tree!
Credits // Author and Photography: Emma Chapman. Photos edited with A Color Story Desktop.
from A Beautiful Mess https://ift.tt/37KDRje
via IFTTT